Do you have a question about the Black & Decker CLM3820L2 and is the answer not in the manual?
This document describes the Black & Decker CLM3820 cordless lawnmower, a device designed for mowing grass. It is intended for consumer use only.
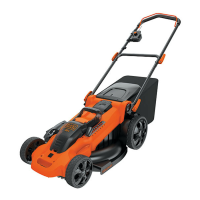
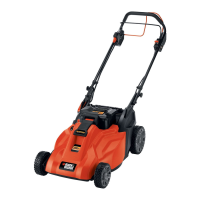
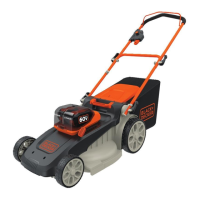
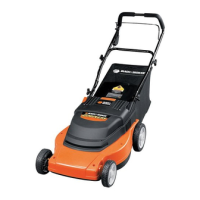
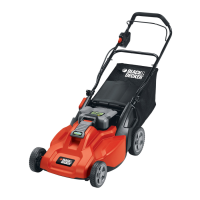
The CLM3820 is a cordless lawnmower, meaning it operates on battery power, offering freedom of movement without the restriction of a power cord. The primary function is to cut grass using a rotating blade. It features a grass collection box to gather clippings, which can be assembled and attached to the mower. The handle system is adjustable for user comfort and storage, allowing the upper handle to be folded down. The cutting height is also adjustable, providing flexibility for different grass lengths and desired finishes. The device incorporates safety features such as a bail bar and a safety key to prevent accidental operation and ensure safe handling during maintenance.
The CLM3820 operates on a 36V battery system. The input voltage for charging is 230V, and the output voltage from the charger is 36V. The charger current is 1300mA. The no-load speed of the mower is 3300 revolutions per minute (min⁻¹). The weight of the mower is 16.2 kg. The battery capacity is 2Ah, and it is a Li-Ion type. The charger model is LCS36 typ. 1. The approximate charge time is between 1.5 and 2.0 hours. The mower is designed for an area of up to 300m² on a single 2Ah battery pack. The sound power level (LWA) is 96 dB(A), with an uncertainty (K) of 3 dB(A). The sound pressure level (LpA) is 93 dB(A), with an uncertainty (K) of 3 dB(A). The hand/arm weighted vibration value is less than 2.5 m/s², with an uncertainty (K) of 1.5 m/s².
Assembly: The grass collection box (12) needs to be assembled by clipping its two sides together (Fig. A) and then securing the lid (17) by pushing down on it until all clips are securely located (Fig. B, C). The lower handle (10) is attached to the mower base using quick release clamps (11) (Fig. D, E). The upper handle (6) is then attached to the lower handle (10) using quick release clamps (7) (Fig. F, G). The handle height can be adjusted by moving the lower handle (10) to one of the three marked positions (Fig. H). The grass box (12) is hooked onto the mower (9) at the rear (Fig. I, J). The cutting height is adjusted using a lever (13) on the side of the mower, with settings from 21 (lowest) to 13 (highest) (Fig. K, L).
Battery and Charging: The battery (23) is charged using the charger (24) (Fig. M). The charger has indicator lights (25) to show the charging status (Fig. N). Once charged, the battery (23) is inserted into the battery compartment (14) on the mower (15) (Fig. O).
Operation: To start the mower, insert the safety key (1) into its housing (Fig. P), push down on the lock-off release button (3), and then pull the bail bar (2) towards the handle (Fig. Q). The grass box full indicator (26) provides a visual cue when the grass box is full (Fig. R).
Safety Instructions:
Blade Maintenance: The blade (29) should be removed for sharpening or replacement. To remove the blade, first remove the grass box and battery. Then, using a spanner (28), hold the blade and unscrew the blade bolt (Fig. S). The blade (29), blade bolt (30), blade guide (32), square blade guide (33), washer (34), and blade spacer (35) can then be removed (Fig. T). To sharpen the blade (31), it should be clamped in a vice and sharpened with a file (Fig. V). The blade should be balanced after sharpening (Fig. W). To re-install the blade, ensure the blade is positioned correctly with the cutting edges facing upwards (Fig. U).
Cleaning:
Storage:
Troubleshooting: The manual provides a troubleshooting guide for common issues such as the machine failing to operate, the mower being too hard to push, or abnormal vibrations. For example, if the machine fails to operate, possible solutions include checking if the safety key has been installed and fully seated, if the lock-off button is being completely depressed before moving the bail handle, or if the battery is fully charged and properly installed. If the mower is too hard to push, checking the cutting height and ensuring the grass deck is not dragging are suggested. For abnormal vibrations, checking for damaged or defective parts and ensuring proper assembly are recommended. If issues persist, contacting a Black & Decker service center is advised.
| Brand | Black & Decker |
|---|---|
| Model | CLM3820L2 |
| Category | Lawn Mower |
| Language | English |