1110
A . Record Your Meter’s Power F a c t o r
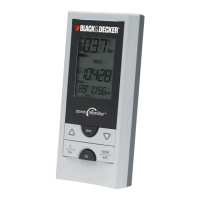
Find and re c o rd your mete r’s Power Fa c t o r . On the face of the mete r , look for a number
p r eceded by the lette rs Kh, Ks, or Kt. This number is usually 1.0 for an electronic mete r. I f
your meter lists more than one of these nu m b e rs, look for the smallest nu m b e r. Wri te this
number in the box below.You will need it later (in section 06) when you pro gram your Digita l
D i s p l a y.
Optical Port
Power Factor
Optical Port
Power Factor
Optical
Port
0 3 I N S TALLING YOUR METER SENSOR
TYPE 2—ELECTRONIC WITH OPTICAL PORT ON FAC E
0 3 I N S TALLING YOUR METER SENSOR
TYPE 2—ELECTRONIC WITH OPTICAL PORT ON FAC E
Ruler
Power
Factor
Optical Port (left port)
Power Factor
Power Factor = (usually 1.0 Kh)
B . Prepare Your Meter Sensor
Make sure the batteries are installed in the Meter
Sensor.
1. Pull the Sensor A rm Latch Cover upwa rd to open it.
2 . Ve rify that the Sensor A rm is pushed in as far as it
will go into the body of the Meter Sensor.
3 . Close the Sensor A r m Latch Cove r .
4 . Ve rify that the Sensor A rm is fully pushed in.
N o t e : If the optical port is closer than 1.5 inches to the
edge of the glass housing, you will need to add a ru bb e r
shim to the Sensor.
If the port is fa r ther than 1.5 inches from the edge, yo u
can skip steps 5-7.
5 . Peel off the adhesive backing from the shim.
6 . Position the shim on the underside of the Mete r
Sensor with the adhesive side dow n .
7. Press the shim in place onto the underside of the
M e t er Sensor body.