Do you have a question about the Black & Decker Fire Storm FS110L and is the answer not in the manual?
Defines DANGER, WARNING, and CAUTION symbols used in the manual for hazard identification.
Provides essential safety precautions for operating the equipment to prevent injury or damage.
Covers reading the manual, using safety equipment, dressing properly, and maintaining a safe work area.
Details safe practices for starting, using guards, handling workpieces, and controlling dust.
Emphasizes locking the switch, disconnecting power, and ensuring childproofing.
Covers ensuring complete assembly, securing the machine, and checking blades.
Details safe practices for blade types, starting, workpiece handling, and material restrictions.
Ensures adjustments are locked, waits for blade stop, and covers security measures.
Warns against staring into the laser beam or reflections to prevent serious eye injury.
Advises using only specified controls, procedures, batteries, and accessories.
Prohibits operation in environments with flammable liquids, gases, or dust.
Details requirements for the electrical circuit, wire gauge, and fuse for safe operation.
Critical warning against exposing the machine to moisture or operating in damp areas.
States the machine is wired for 120V, 60Hz AC power.
Explains why grounding is essential for operator protection from electric shock.
Details the grounding process, plug requirements, and checks for proper installation.
Specifies the use of 3-wire extension cords with grounding plugs for safety.
Advises on selecting proper, undamaged 3-wire extension cords of adequate gauge.
Provides a chart for selecting the correct extension cord gauge based on rating and length.
Describes the miter saw's capabilities for cutting wood, plastic, and aluminum.
Guides users on how to carefully unpack the saw and remove protective coatings.
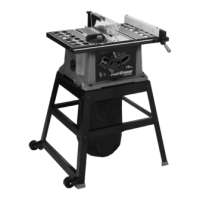
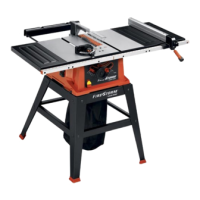
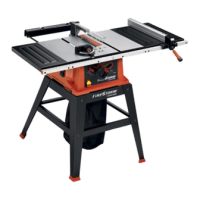
Clarifies that illustrations may differ from the actual product model.
Lists all items included in the saw's packaging, including tools and accessories.
Warns against lifting the saw by the switch handle to prevent misalignment.
Lists tools required for assembly, distinguishing between supplied and non-supplied items.
Critical safety instruction to ensure assembly is complete before connecting power.
Provides step-by-step instructions for rotating the table to the desired angle.
Explains how to secure the cuttinghead in the upright position for safe transportation.
Describes the process for correctly attaching the dust bag to the dust spout.
Guides users on how to securely mount the miter saw to a workbench or supporting surface.
Identifies the 'Hazard Zone' on the table and warns against placing hands within it.
Explains how to position and use the work clamp for securing workpieces.
Details how to start and stop the saw using the switch trigger and mentions the automatic brake.
Advises waiting for the blade to stop completely after releasing the trigger.
Recommends periodically checking and tightening the arbor screw due to braking torque.
Instructs to lock the switch in the 'OFF' position with a padlock to prevent unauthorized startup.
Details the range of miter angles the saw can cut, up to 47° left and right.
Explains the function of positive stops for quick miter angle selection.
Highlights the 33.9° indicator on the miter scale for precise crown molding cuts.
Critical safety step to disconnect power before adjusting the table fit.
Guides users on adjusting the table's sliding fit for smooth, accurate movement.
Explains how the pointer and scale indicate the actual angle of cut.
Details how to lock the cuttinghead in the down position for safe transportation.
Reiterates the importance of lifting by the base or handle, not the switch.
Advises moving the sliding fence to ensure clearance when tilting the cuttinghead.
Describes the saw's capability to tilt for bevel cuts from 0° to 45° left.
Explains the use of positive stops for quick 90° and 45° bevel positioning.
Mentions the 33.9° indicator on the bevel scale for crown molding.
Explains the purpose of the sliding fence for supporting large workpieces.
Guides on positioning the fence for miter cuts, close to the blade.
Instructs to move the fence away from the blade for clearance during bevel cutting.
Explains the rear support bar's role in preventing tipping when the cuttinghead is raised.
Guides on extending the stabilizer bar for support and using it as a carrying handle.
Critical safety warning to fully extend the stabilizer bar before operating the saw.
Explains the function of side supports for stabilizing the machine and workpieces.
Provides instructions on how to extend the side supports for use.
Safety instruction to disconnect power before adjusting blade parallelism.
Explains how to check if the saw blade is parallel to the table slot.
Provides steps to adjust the cutting arm to achieve blade parallelism with the table slot.
Safety instruction to disconnect power before adjusting blade travel limits.
Explains the purpose of limiting blade travel to prevent contact with machine parts.
Guides on checking that the blade teeth do not contact any metal surfaces.
Safety instruction to disconnect power before adjusting bevel stops.
Details how to check and adjust the 90° bevel stop using a square.
Provides steps to adjust the 90° bevel stop screw for accurate alignment.
Guides on checking and adjusting the 45° bevel stop for accurate cuts.
Details how to set the 45° bevel stop using a square and adjustment screw.
Explains how to adjust the bevel pointer for accurate angle indication.
Safety instruction to disconnect power before adjusting the cuttinghead return spring.
Explains the factory setting of the spring for proper cuttinghead return.
Provides steps to adjust the spring tension by turning the screw and locknut.
Addresses adjustments needed for the sliding fit between the cuttinghead arm and trunnion.
Guides on adjusting the fit to ensure smooth movement without compromising accuracy.
Safety instruction to disconnect power before adjusting the lower blade guard.
Explains the purpose of the integrated blade guard covering the rear of the blade.
Provides instructions on adjusting the guard's nut to ensure free movement.
Crucial safety instruction to never remove any blade guards.
Emphasizes verifying all guards are in place and working before operation.
Explains the laser's function as a line-of-cut indicator projected onto the workpiece.
Provides instructions for checking the laser's alignment against the blade's cut.
Emphasizes locking the trigger switch with a padlock during alignment.
Defines correct laser positioning: the beam must align with the actual cut line.
Describes how to check vertical alignment by observing laser line movement.
Guides on adjusting the vertical alignment using the specified set screw.
Explains how to adjust the kerf adjustment screw to position the laser line.
Specifies the direction to turn the screw for moving the laser line towards or away from the blade.
Instructs to remove the padlock and confirms the saw is ready after adjustment.
Emphasizes regular maintenance for optimal laser performance.
Guides on cleaning laser lenses with a cotton swab, avoiding solvents.
Advises cleaning pitch build-up from the blade, as it can affect laser accuracy.
Reinforces safety by clamping workpiece if hand is near the blade hazard zone.
Stresses the importance of the cuttinghead returning quickly to prevent guard issues.
Instructs to verify correct settings and locked components before starting a cut.
Advises placing and firmly securing the workpiece against the fence.
Prohibits freehand cutting, emphasizing the need to hold the workpiece securely.
Warns of hazards associated with small cut-off pieces, like kickback or damage.
Recommends mounting an auxiliary fence to mitigate injury or guard damage risks.
Clarifies that auxiliary fences are for 0° bevel cuts only and must be removed when tilting.
Details cutting standard 2x4 lumber at various miter angles.
Explains how to cut standard 2x6 lumber at straight and miter angles.
Describes cutting standard 4x4 lumber in a single pass.
Highlights the machine's capability for accurate crown molding and bevel cuts.
Advises on cutting plastic pipe, emphasizing the need to clamp it to prevent rolling.
Explains that aluminum can be cut with the correct blade, though the supplied one is not recommended.
Details the correct technique and the use of stick wax for cutting aluminum.
Reiterates the safety warning against applying lubricant to a running blade.
Advises checking material for bowing before cutting and positioning it correctly.
Explains the consequences of incorrect positioning for bowed material, leading to pinching.
Introduces an example for cutting crown molding with specific wall angles.
Details setting the miter angle to 31.62° for crown molding cuts.
Explains setting the bevel angle to 33.86° for crown molding cuts.
Guides on placing the crown molding with the ceiling edge against the fence for cutting.
Clarifies workpiece placement for inside versus outside crown molding corners.
Details adjusting the miter angle to 31.62° left for matching corner cuts.
Guides on placing molding with the wall edge against the fence for the second cut.
Illustrates the resulting pieces for outside crown molding corners.
Illustrates the resulting pieces for inside crown molding corners.
Specifies the different bevel (30°) and miter (35.25°) settings for 45-45 crown molding.
Provides detailed instructions and safety precautions for changing the saw blade.
Explains that brush life depends on motor load and provides a check schedule.
Outlines the step-by-step process for inspecting the motor brushes for wear or damage.
Defines criteria for brush replacement, such as worn carbon or damaged springs.
Recommends professional service for repairs, maintenance, and brush replacement using genuine parts.
Addresses issues when the saw fails to start, listing possible causes and solutions.
Lists reasons for unsatisfactory cuts and their corresponding solutions.
Diagnoses issues where the blade fails to reach operating speed.
Covers causes of excessive vibration and how to resolve them.
Addresses problems with miter cut accuracy and their solutions.
Explains that cutting bowed material can cause the blade to pinch.
Provides information on finding local Black & Decker service centers for technical advice or repair.
Details the two-year warranty against defects in material or workmanship.
States that the warranty does not cover accessories.
Clarifies that the product is intended for home use only, not commercial applications.
Offers free replacement of illegible or missing warning labels.
Informs contractors that Firestorm products are for home use and not covered for jobsite use.
| Brand | Black & Decker |
|---|---|
| Model | Fire Storm FS110L |
| Category | Saw |
| Language | English |