ENGLISH
4
Fig. C
14
5
13
6
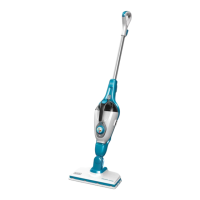
Attaching a cleaning pad (Fig. A, D)
Replacement cleaning pads are available from your
BLACK+DECKER dealer (cat. no. SMP20).
• Place a micro-fiber cleaning pad
7
on the floor with the
'loop' side facing up.
• Press steam mop down onto the cleaning pad. You are
now ready to steam clean your floor.
NOTICE: Do not store with a wet pad as this can damage your
floor. Always place the steam mop with the handle tube
9
in the upright position when stationary and make sure the
steam mop is turned off and unplugged when not in use.
Fig. D
7
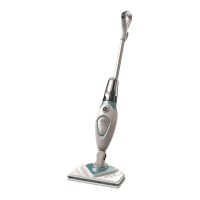
Removing a Cleaning Pad
CAUTION: Always wear suitable shoes when
changing the cleaning pad on your steam mop. Do
not wear slippers or open toed footwear.
1. Return the handle tube
9
to the upright position and
turn the steam mop ‘OFF’.
2. Wait until the steam mop cools down (approximately
5 minutes).
3. With suitable shoes on, step on the edge of the cleaning
pad and lift the steam mop away from the cleaning pad
freeing it from the ‘hook & loop’ fastening.
CAUTION: Always place your steam mop with the
handle tube
9
supported in the upright position
when stationary and make sure the steam mop is
turned off when not in use.
Filling the water tank (Fig. E)
WARNING: Do not over fill the tank.
NOTE: Do not use chemical cleaners with your steam mop
water tank.
NOTE: Fill the water tank with clean tap water.
NOTE: In areas of hard water, the use of distilled water is
recommended.
1. Make sure the steam mop is turned Off and unplugged.
2. Open the water tank access tab
3
.
3. Fill the water tank
4
with water.
4. Replace the water tank access tab.
NOTE: Ensure the water tank access tab is firmly secured.
NOTICE: Always empty the water tank after use.
NOTICE: Fill the water tank with clean tap water (Do not
use any additives or chemicals).
WARNING: Your water tank has a 380ml capacity. Do
not over fill the tank.
Fig. E
4
3
OPERATION
CAUTION: Never use the steam mop without first
attaching a cleaning pad.
NOTICE: Never leave the steam mop in one spot on any
surface for any period of time. Do not store with a wet
pad as this can damage your floor. Always place the steam
mop with the handle tube
9
in the upright position when
stationary and make sure the steam mop is turned off and
unplugged when not in use.
NOTICE: Always empty the water tank after use.
Switching On and Off
NOTICE: It takes approximately 30 seconds for the steam
mop to heat up.
1. To switch the appliance On, press the On/Off button
1
.
2. Press the steam operation button
2
. This will operate
the pump and the unit will begin to produce steam.
3. To stop steam generation, turn the steam operation
button
2
to Off. This will maintain power to the boiler
for quicker start up.
4. To switch the appliance Off, press the On/Off button
1
.
CAUTION: Never leave the steam mop in one spot on
any surface for any period of time. Always place the
steam mop with the handle tube
9
supported in the
upright position when stationary and make sure the
steam mop is turned off when not in use.
CAUTION: Always empty the steam mop after use.
NOTE: When first filled or after running dry, it can take up to
45 seconds for steam to be produced.
 Loading...