9
follows the shape.
Never use your sander
without sandpaper.
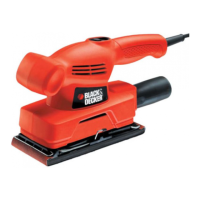
REMOVING THE SIDE HANDLE
Proceed as follows:
Turn the handle anti-
clockwise and unscrew
completely. Remove the
connecting shoulder.
Unclip the metal clip.
ADJUSTING THE SIDE HANDLE
Proceed as follows:
Loosen the handle
slightly. Move the metal
clip around the body of
the sander until the
side handle is in the
desired position.
Tighten the handle.
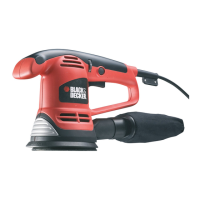
DUST EXTRACTION SYSTEM
Most of the dust from the work surface is collected in
the dustbag. The extraction fan of your multi sander
draws the dust from the surface through the holes in
the base. The dust then passes through the fan shroud
to the dustbag. You can also use your multi sander with
a vacuum cleaner. A special adaptor is available from
Black & Decker as an accessory.
EMPTYING THE DUSTBAG
Disconnect the plug from the electricity supply.
Hold your multi sander
vertically with the
dustbag facing
downwards. Squeeze
the sides of the dustbag
together, adjacent to
the finger grips and pull
the bag gently. Empty
the dustbag and
replace on the sander.
ENGLISH
A click is heard when the dustbag is correctly fitted.
The plastic baffle is removable. However, it is not
necessary to remove the baffle when emptying the
dustbag. Do not wash the dustbag. Empty the dustbag
every 10 minutes.
AUTOMATIC BRAKE SYSTEM (ABS)
(KA200/KA220/KA220E/KA230E)
Your multi sander has an automatic brake system
(ABS). This feature gives you optimal control as it
keeps the speed of the disc below that of the motor
when your sander is not on the work surface. When
your sander is switched off, the disc stops very quickly.
HANDY HINTS
You can hold your
multi sander in various
positions for maximum
comfort but make sure
you do not block the air
intake slots.
• Do not apply excessive pressure when you use your
multi sander, especially in the random orbit mode.
• Replace the sandpaper when it is worn.
• Use high grit sandpaper for a fine finish. As a
general rule, start with coarse grits and gradually
change to the finer grits for the final finish.
• When using your multi sander to sand profiles be
sure to keep the profile square to the workpiece.
• Smaller radii sanding profiles work better with finer
grit sandpaper.
• Ensure that the platen is flat on the work surface
whilst sanding.
EC DECLARATION OF CONFORMITY
We declare that units:
KA200, KA210, KA210E, KA220, KA220E, KA230E
conform to 89/392/EEC, 89/336/EEC, EN55014,
73/23/EEC, EN55104, EN50144
A weighted sound pressure 77.1dB (A)
 Loading...