! WARNING
The manufacturer has made
every eort to eliminate any
sharp edges. However, you
should handle all compo-
nents with care to avoid
accidental injury.
Some parts may contain
sharp edges, especially
as noted in these instruc-
tions. Wear protective
gloves if necessary.
! WARNING
The use of alcohol, prescrip-
tion or non-prescription
drugs may impair the
consumer’s ability to prop-
erly assemble or safely
operate the appliance.
! CAUTION
Two people are recom-
mended for the assembly
of this product.
ASSEMBLY INSTRUCTIONS
Please read all instructions thoroughly before proceeding. Make sure all
the plastic packing material is removed before assembling
Find a large, clean area to assemble your griddle. Please refer to the parts list
and assembly diagrams as necessary.
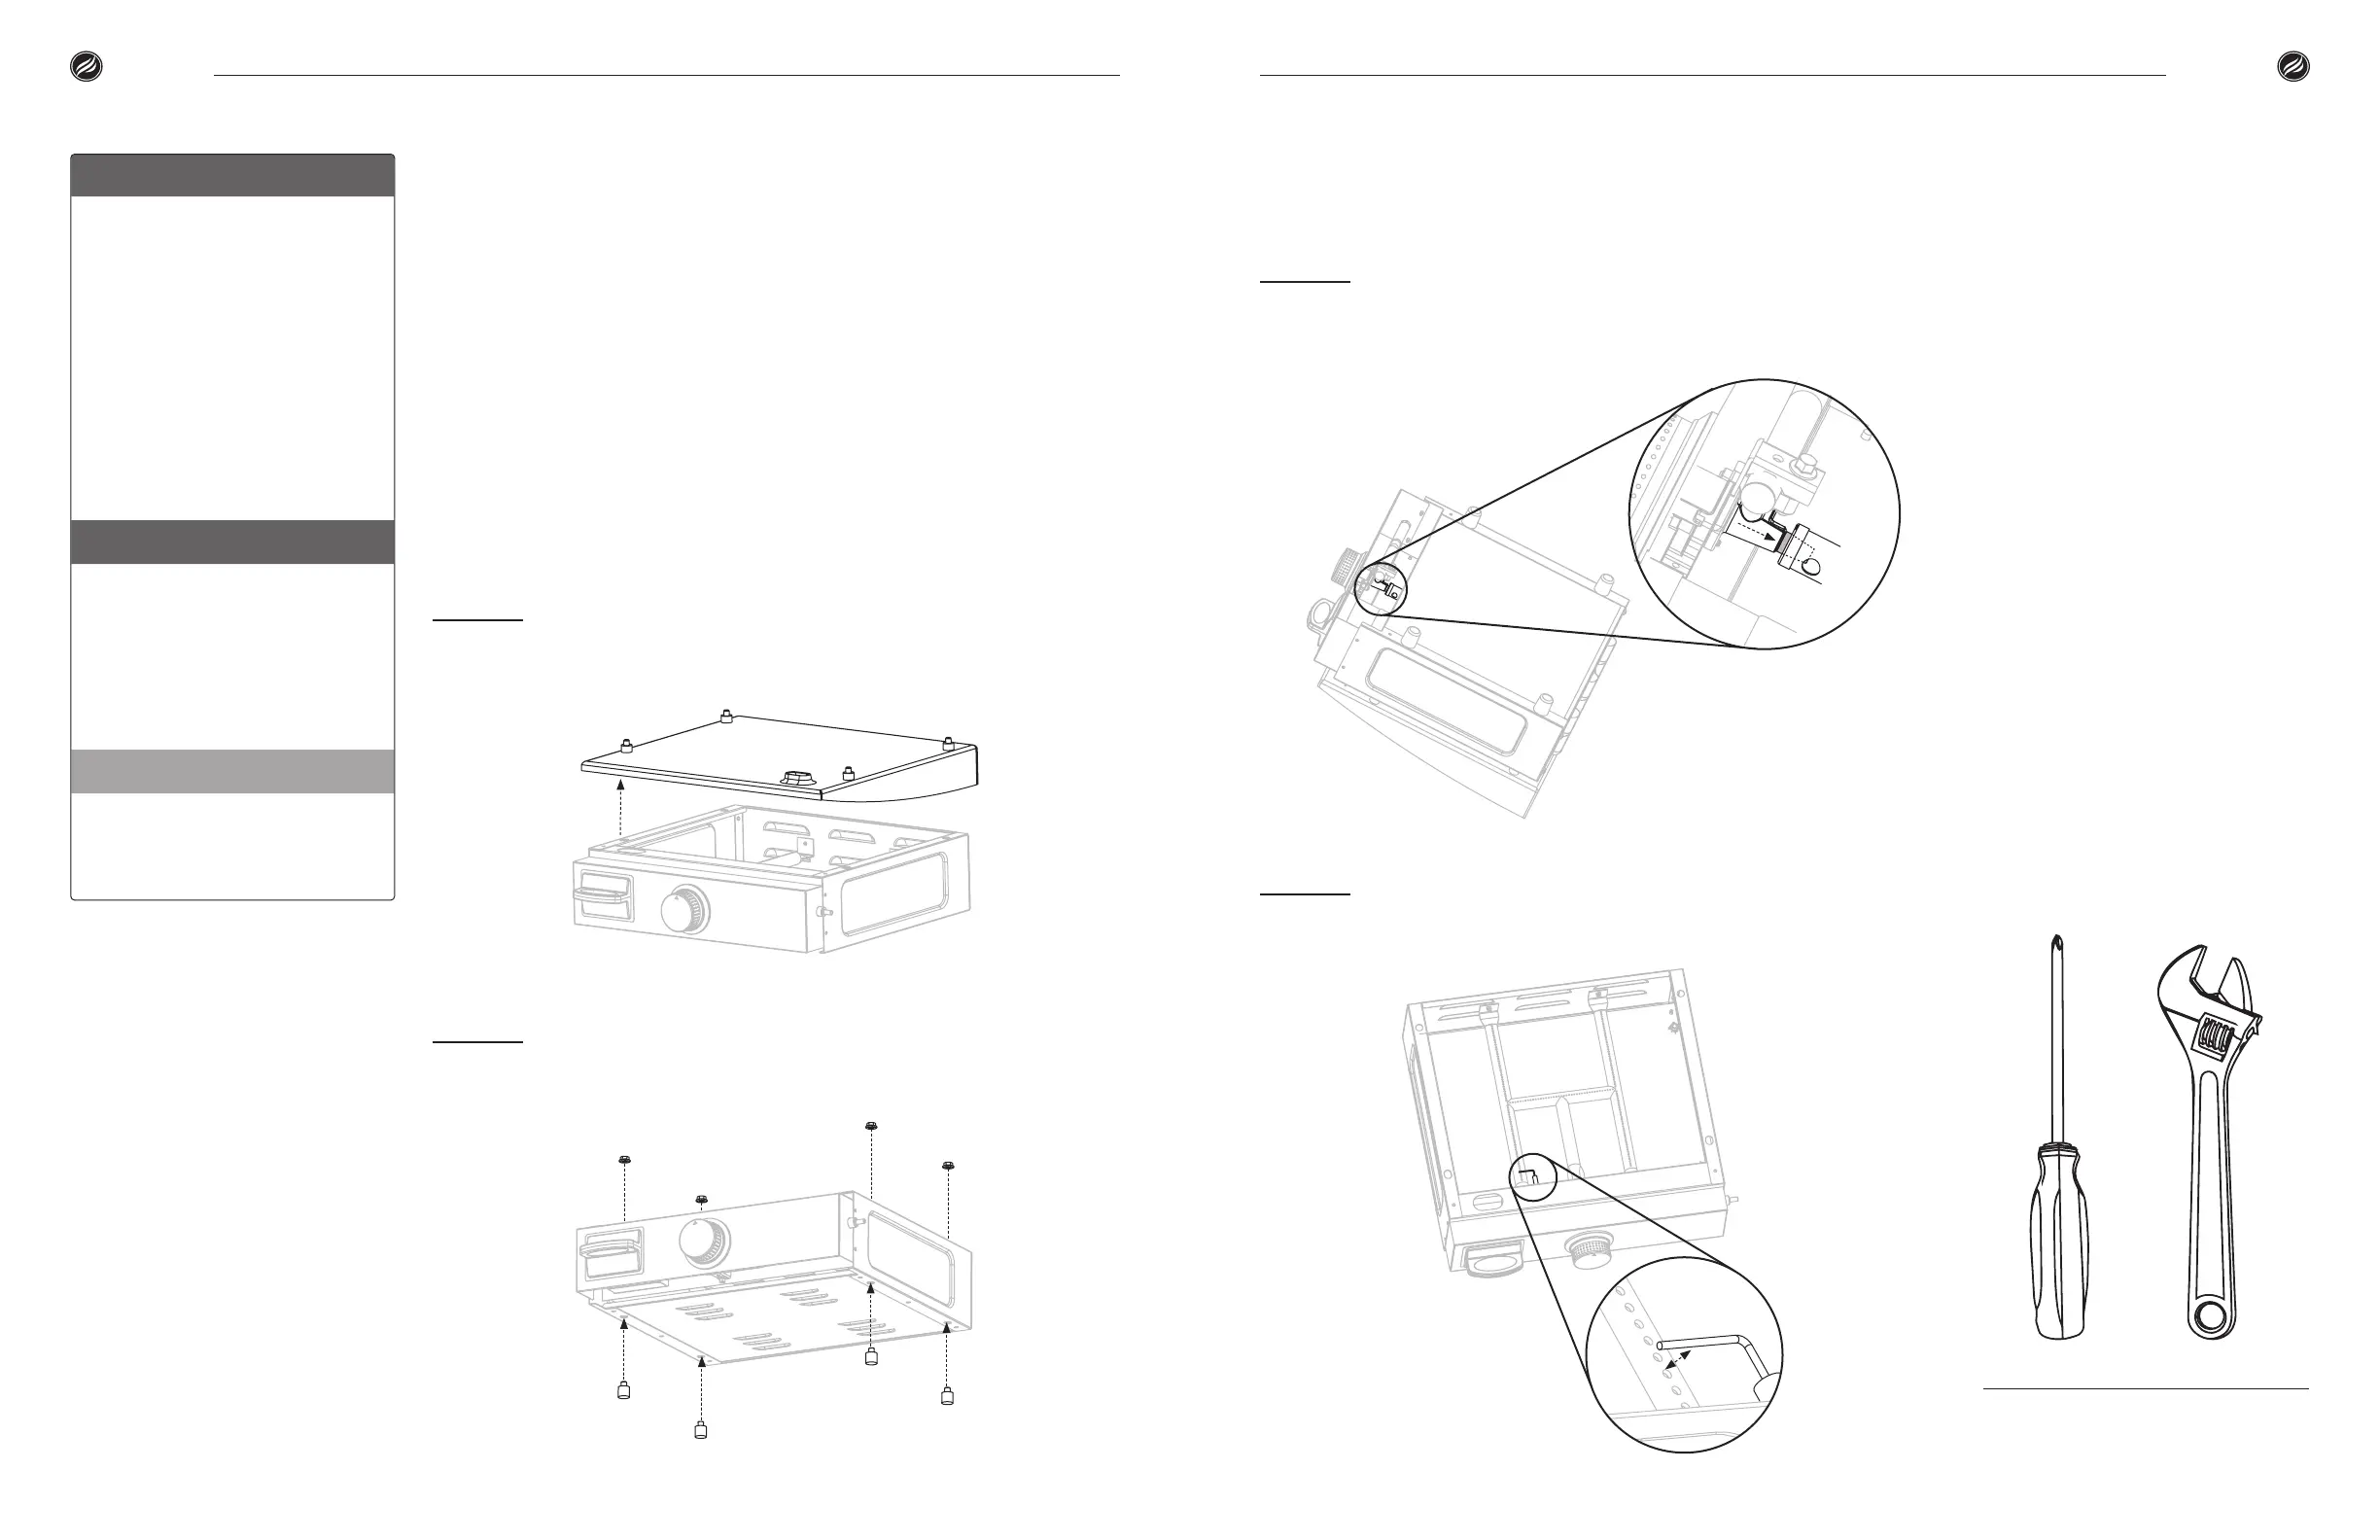
STEP
Remove the griddle body from the packaging. (The griddle top is
placed upside down on the griddle body for shipping and storage.) Take the
griddle top o and set aside.
STEP
Place the griddle upside down on a so surface. Use four (4) M8
ange nuts to attach four (4) griddle feet to the bottom of the griddle.
STEP
Ensure that the fuel nozzle is housed within the burner opening.
STEP
Turn the griddle over so it stands on its legs. Ensure that the
ignition needle is set 3-7mm above the burner tube.
TOOLS NEEDED: Phillips Head
Screwdriver & Adjustable Wrench
3-7mm
Model 1650 | Owner’s Manual | | Owner’s Manual | Model 1650
08 09
Assembly Guide Assembly Guide