! WARNING
NEVER APPLY COLD
WATER ACROSS THE
WHOLE SURFACE OF A
HOT GRIDDLE AT ONCE.
This may cause warping.
! CAUTION
DO NOT USE SOAP ON
THE GRIDDLE COOKING
SURFACE. This will destroy
the griddle’s seasoning.
STEP
To clean griddle aer
each use, cool griddle below 300° F.
Scrape food debris with spatula or
straight metal scraper.
CLEANING THE GRIDDLE COOKING SURFACE
STEP
Wipe down griddle
surface with paper towel.
STEP
Divide griddle surface
into approximately 6" sections
(width of scraper tool). Apply a
small amount of water onto rst
section with a bottle and then
scrape the water and debris toward
the grease trap. Move to the next 6"
section and repeat.
DO NOT USE MORE THAN TWO
TABLESPOONS OF WATER
AT A TIME.
1/4 cup of table salt may be used to
bu o stuck food residue.
STEP
Wipe again with a
paper towel and dry completely.
STEP
Apply thin coat of
cooking oil to maintain seasoning
and protect the griddle top.
NEED HELP?
Register your Blackstone product at
blackstoneproducts.com/register
and contact Blackstone Customer Service
for missing parts, assembly and operation
questions:
PHONE:
435-252-3030 ext 1
EMAIL:
support@blackstoneproducts.com
ONLINE:
blackstoneproducts.com/pages/support
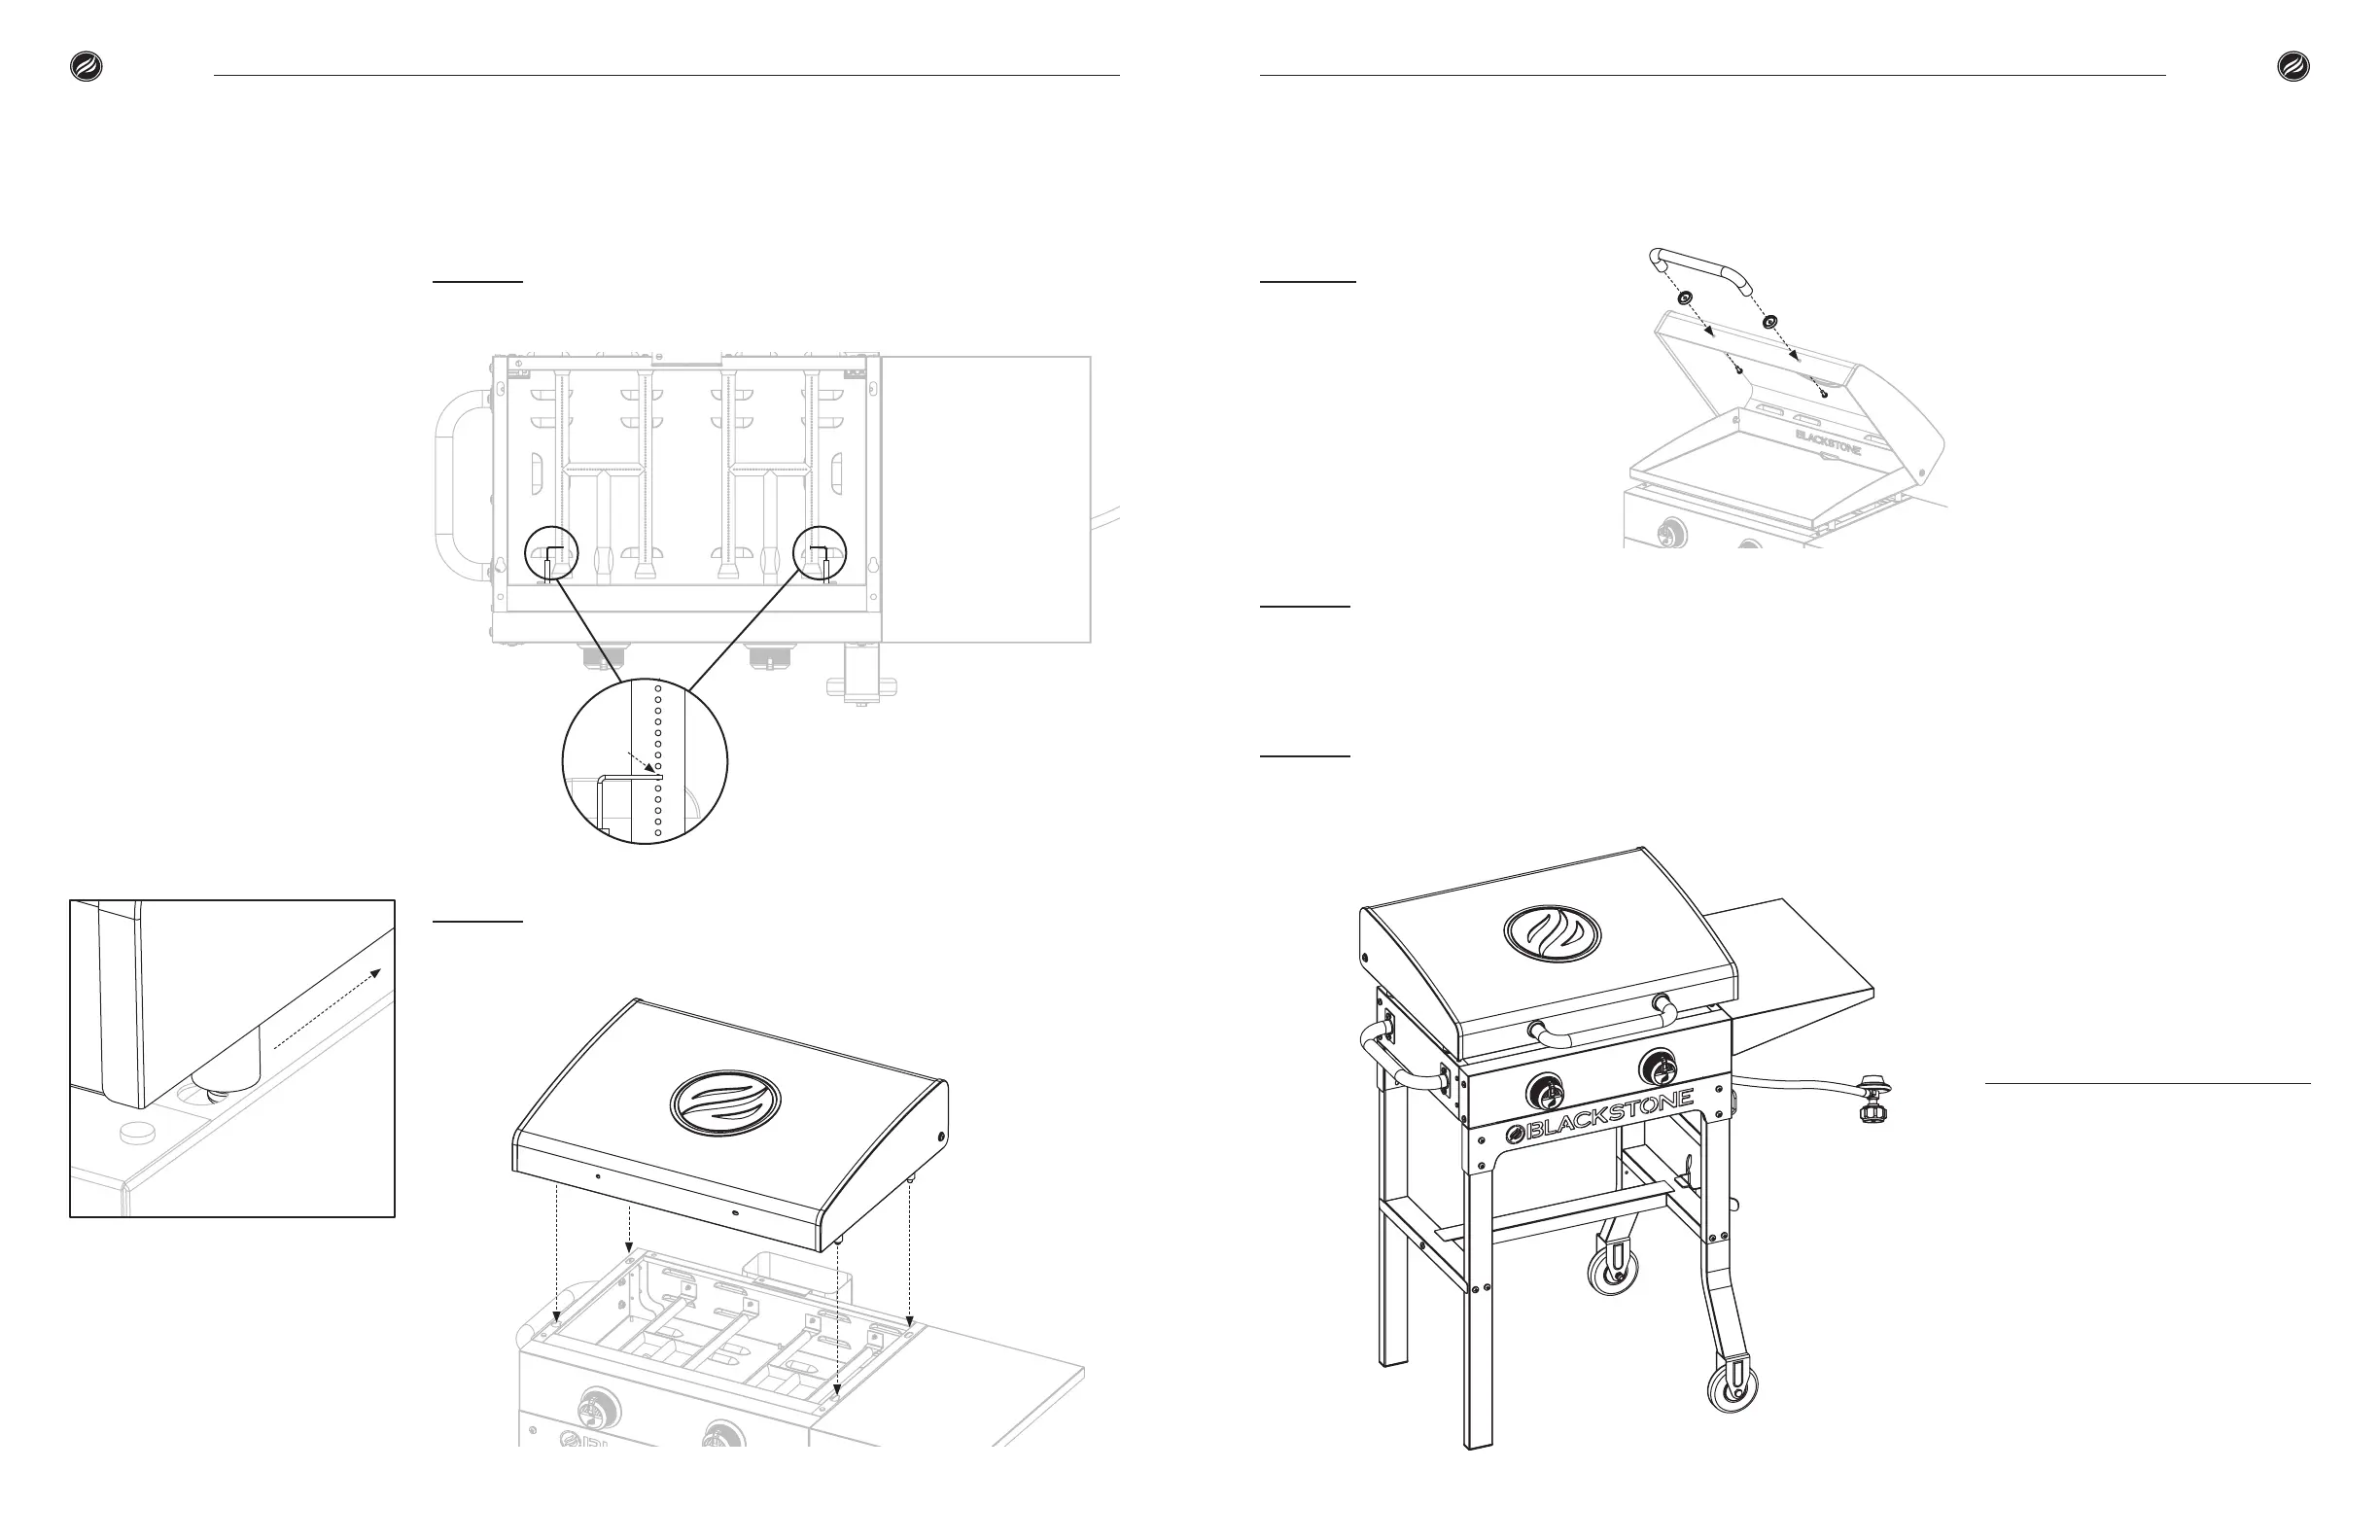
STEP
Ensure the igniter needles are placed 3-7 mm above the
burner tubes.
STEP
With the help of another person, place the griddle top and hood
on the main body by aligning the 4 pins to the holes of the body.
STEP
Install the hood handle
with handle bezels on the hood with
two (2) M6x16 screws.
Make sure the front pins are fully
seated in the holes, then push the
griddle top and hood back to lock
the griddle in place.
STEP
Hang LP Tank (NOT INCLUDED) on tank hanger. Be sure that it
is rmly seated on both upper and lower supports and connect hose. (Please
reference the Connection & Removal section of the Fuel | Propane – 20lb.
Tank chapter.)
STEP
Proceed to the Griddle Seasoning Instructions section of the
Care & Maintenance chapter. Enjoy cooking outdoors on your Blackstone 22”
Griddle Cooking Station!
3-7 mm
Model 1940 | Owner’s Manual | | Owner’s Manual | Model 1940
14 15
Assembly Guide Assembly Guide