ENGLISH
BLACKSTONEPRODUCTS.COM/SUPPORT
OWNER’S MANUAL | ASSEMBLY GUIDE
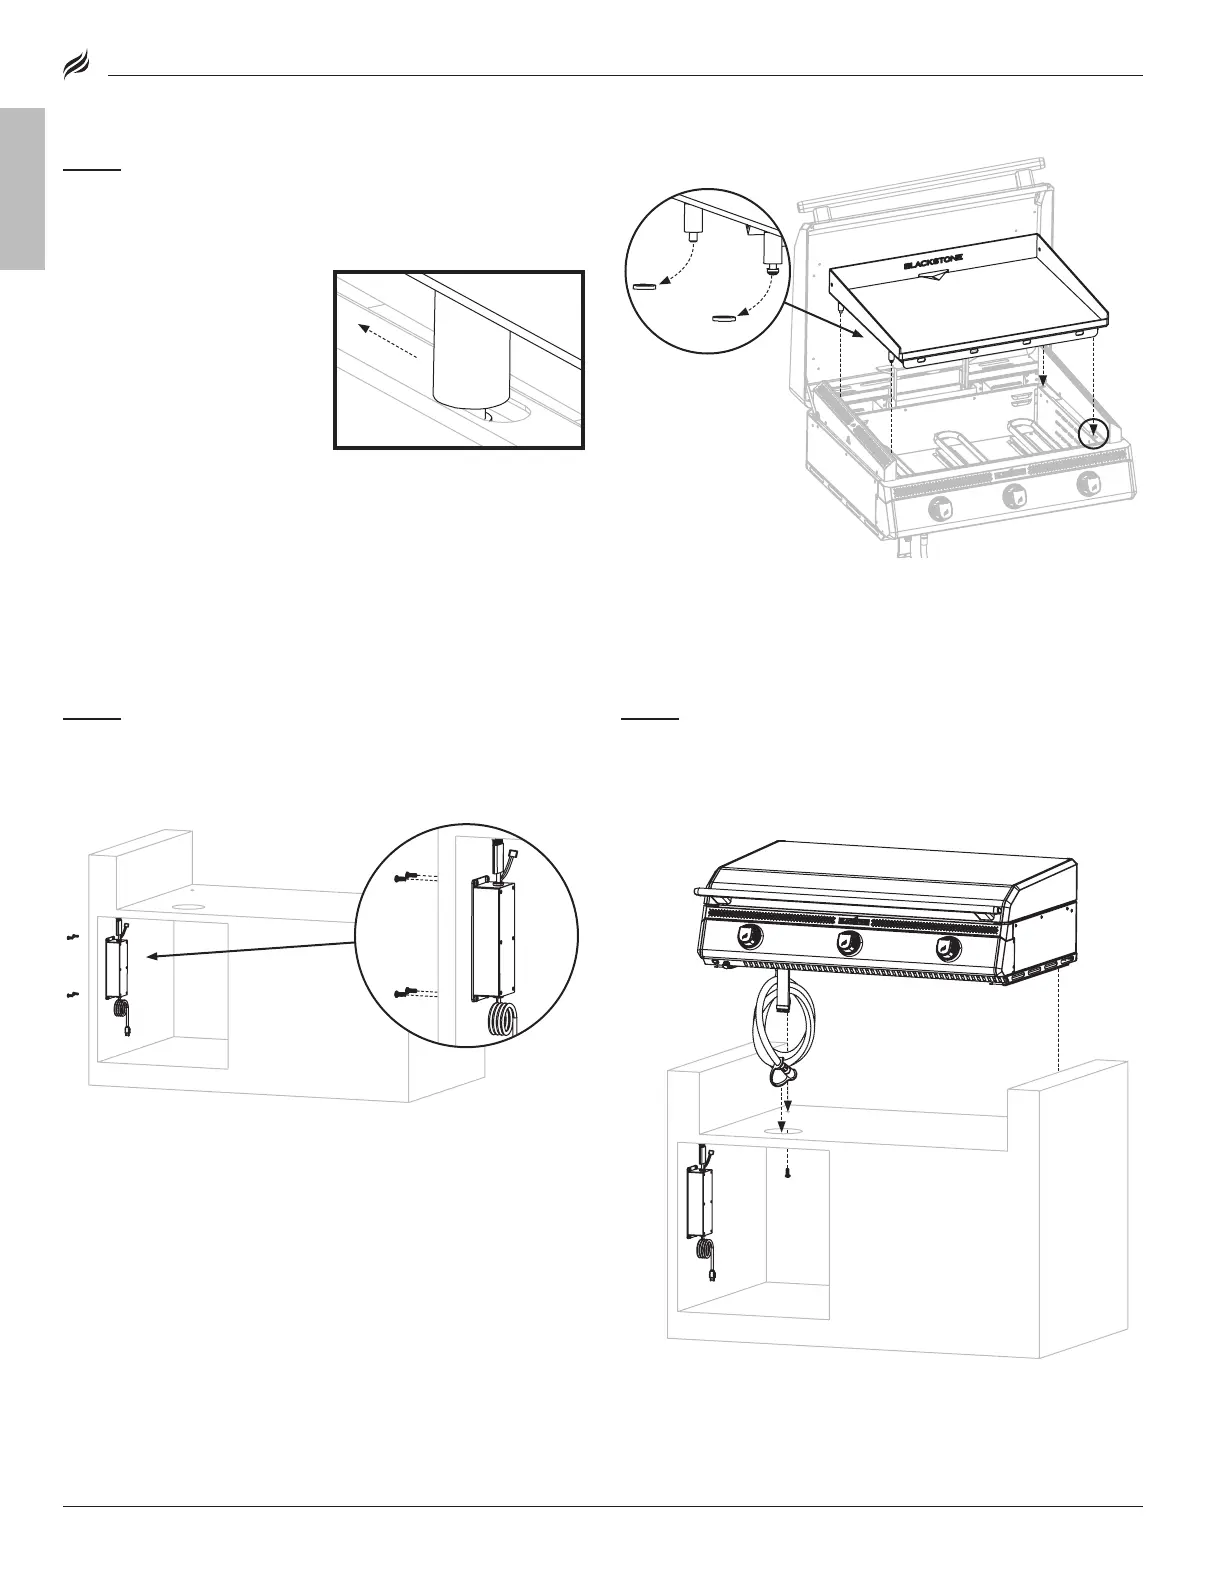
Make sure the front pins are
seated in the holes, then push
the griddle top back.
❶
❶
Place the two front pins into
the front locking holes and push
the griddle top back.
❷
Then, set the two rear pins
into the rear holes.
❶❶
Place the two front pins into
the front locking holes and push
the griddle top back.
❷❷
Then, set the two rear pins
into the rear holes.
Make sure the front pins are
seated in the holes, then push
the griddle top back.
Make sure the front pins are fully
seated in the holes, then push
the griddle top forward to lock
the griddle in place.
Make sure the front pins are fully
seated in the holes, then push
the griddle top forward to lock
the griddle in place.
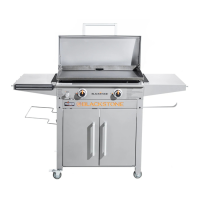
MODEL: 6301
STEP 04
Remove the four (4) protective washers from the griddle foot
pins. With the help of another person, place the griddle top onto
the griddle body by aligning the four foot pins to the holes on top of
the unit.
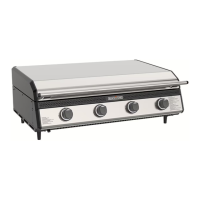
STEP 05
Use four (4) M4x10 screws [c.] to attach the PCB box to the
left side panel of your cabinet.
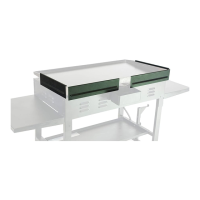
STEP 06
With the help of another person, direct the hose and
electric wires through the cabinet hole and place the griddle body
on top of your cabinet.
Use two (2) M5x10 screws [b.] to attach the griddle body to
your cabinet.
❶
❷