qualified personnel can repair or replace the product and its components.
• Please, keep the device and its components away from children. Children must be ALWAYS under
adult supervision.
• This product is ONLY for HOME INDOOR use only. Recycle it into electronic devices waste, not into
domestic waste.
6.2. Battery Warnings
• This controller works ONLY with the battery pack LI-ON 3.7V/600mAh built-in.
• Do not use the product if it appears to be damaged or leaking, showing discoloration, shape or any
other changes.
• If battery leakage occurs avoid contact with skin, cloths, and wipe off any deposit. If contact occurs,
immediately wash thoroughly and check with a doctor.
• Do no use unauthorized chargers (Car charger, AC Chargers, etc.). Charge the battery following the
instructions given at section 4 of this manual.
• Do not short-circuit the battery terminals.
• Unplug the USB-mini USB cable from the controller when the charging process is finish.
• Do not throw the battery into water or fire.
• Do not disassemble or attempt to repair the device or its components. There are no serviceable
parts inside. Changes or modifications not approved by Ardistel will avoid the user warranty.
• Please, keep the device and its components away from children. Children must be ALWAYS under
adult supervision. Only adults can charge the battery.
• Make sure you keep the controller, clean and dry, away from liquids, dust and dirty. Do not expose it to
extreme weather conditions (heat and cold) or extreme fluctuations in air moisture.
• This product is ONLY for HOME INDOOR use only. Recycle it accordingly, not into domestic waste.
7. TROUBLESHOOTING
7.1. Controller does not work / does not work properly.
Check that the controller is correctly linked to the console. If not, repeat the steps described in
section 3 of this manual.
7.2. Vibration does not work.
Check to see whether the game you're playing supports vibration and that it is enabled on it as well
as on the PS4™ console menu. Refer to your specific game's manual or PS4™ system manual for
more details.
7.3. Motion Sensor or Touchpad function does not work with my game.
This controller does not support the motion sensor or touchpad functions.
7.4. The controller does not charge or the battery pack duration is low.
Charging time is approx. 3-4h, please make a complete charge regularly in order to have the
battery pack conditions the best possible way.
7.5. Controller is detected and is operating normally in the menus but does not work in game
play in any way.
Make sure that the controller is the main controller or player number 1 (please, check the
instructions manual of your PS4™ system for additional details).
For further assistance contact our customer service team in soporte@ardistel.com
*For more information about settings menus and options, refer to your console manual.
9
• You can play and charge simultaneously, but we recommend you not to use the controller during
the charging process in order to fully and charge in a faster way the battery pack.
IMPORTANT: DO NOT USE CHARGERS OR CABLES THAT AREN’T serviceable and approved parts
from Ardistel, because it may damage the device and the warranty will be automatically
cancelled. The warranty will not be applied to products provided by other suppliers or if as a
result of a misuse you damage the product. For the first charge please charge the controller for
3-4h. We recommend to charge the battery when completely exhausted.
5. AUTOMATIC POWER OFF & SLEEP FUNCTION
If you do not use the controller for some time, it will go into Sleep mode to save energy. In order to
activate the controller press HOME and you will be able to use it again. You can adjust the time of
Sleep Mode under SETTINGS menu of your console*.
IMPORTANT: When the power energy level from the batteries is low, the LED indicators from
the player number will flash slowly indicating that you must charge the battery pack (check
section 4 from this manual).
6. WARNINGS AND SAFETY MEASURES
In order to make sure that the controller works properly, please follow the instructions below strictly
and do not misuse the product, keeping in mind the following warnings:
6.1. General Warnings
• If you cannot link the controller, turn it off. Just press and hold HOME button on the controller while
you are in the console main menu, an Options menu will pop up. Select* "Turn Off Controller" and
confirm. Connect again the USB cable to the controller and to the system, and press the HOME
button to re-link it again.
• Check that the energy level from the battery pack is enough. A low level may cause anomalous
functioning in the controller.
• Do not throw the controller or its accessories into water, fire or drop them.
• Keep the device away in a dry and safe place. Do not expose to direct sun light.
• Do not use or expose the device to high or low temperatures (extreme hot/cold conditions or high
levels of moisture). Not paying attention to this warning may damage the product and/or the
battery.
• Keep the controller and its components in a safe and clean place. Quick oscillations or dropping the
controller into hard surfaces may damage the device and/or its components.
• For product general cleaning, carefully wipe the controller with a damp & clean cloth. Avoid putting
a lot of pressure on the buttons or the surface of the controller.
• Do not let the controller powered on when you are not using it. Just press and hold HOME button
on the controller while you are in the console main menu, an Options menu will pop up. Select "Turn
Off Controller".
• If you are not going to use the product for a long time turn off the controller and keep it in a dry
and safe place, away from liquids, dust and dirt; do not expose it to direct sun light, extreme
temperatures (heat or cold) or air moisture fluctuations.
• Use the product properly and following strictly these instructions.
• Do not disassemble or attempt to repair the device or its components. There are no serviceable parts
inside. Changes or modifications not approved by Ardistel will avoid the user warranty. Only Ardistel
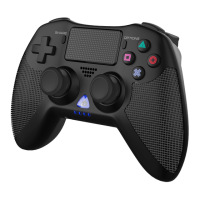
1. PACK CONTENTS
1 x BLUETOOTH® wireless controller compatible with PS4™.
1 x USB charging cable included.
1 x Instructions manual.
2. PRODUCT FEATURES
• Wireless Bluetooth® controller (version 4.2) compatible* with PS4™.
• Rechargeable 600mAh Li-Ion battery pack built-in.
• Ergonomic design specially for long gaming sessions.
• SHARE, OPTIONS and HOME buttons, button in touchpad (no touch function), L2/R2 progressive
triggers.
• Minijack port for headset and speaker also included.
• VIBRATIONDUO™ dual & exclusive vibration motors also included.
• 0.8m USB-microUSB charging cable included.
• Updatable through USB.
3. CONNECTION AND SETUP
In order to connect the controller to your PS4™ system, please follow the steps below:
3.1. For first use or after a system update, you must link the controller with the system
according to the following steps:
• First, make sure your PS4™ system is powered on.
• Plug the USB cable connector into a free USB slot from your console; the LED indicators of the
controller will turn on and make a LED breathing slow effect.
• Next, press the HOME button: first, LED will flash rapidly and then LED will remain still when the
link is successful; now you can unplug the cable from controller and use it.
• LED indicators color change based upon player number: BLUE, RED, GREEN, PURPLE.
3.2. For regular use, when you have already linked the controller following the previous steps:
• With your console PS4™ turned or on off, press HOME button on the controller.
• When LED indicators remain turned on (no flashing), the controller will be linked an ready for use.
IMPORTANT: You may need to re-sync your controller after a PS4™ firmware system update.
If so, please follow the above steps in 3.1.
4. CHARGING THE CONTROLLER
• In order to charge the battery from the controller, plug one side of the USB included cable into the
microUSB plug from the controller, and the other side to a free USB slot in your PS4™ console. NOTE:
You must power on the PS4™ system to start charging process; with the console powered off, the
controller will not charge even with the USB cable plugged.
• During the charging process, all 4 player LED indicators in the controller will flash to indicate that
the charging process has started (LEDs fixed -no flashing- if controller is not linked to the console).
• The controller will be fully charged once the LED indicators stop flashing and remain still.
• When the battery pack power is too low, all 4 LED indicators will start flashing slowly in order to
indicate that you need to recharge the battery pack.
 Loading...