EasyManua.ls Logo

BLACKMER HXL8G - User Manual

Default Icon
16 pages
Print Icon
To Next Page IconTo Next Page
Loading...
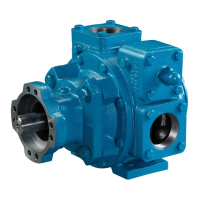
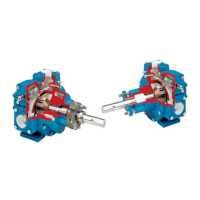
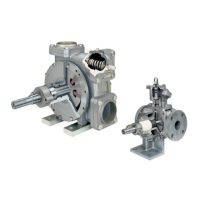
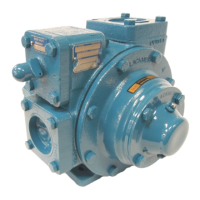
BLACKMER POWER PUMPS
960229
INSTRUCTIONS NO. 102
-
A00
INSTALLATION OPERATION AND MAINTENANCE INSTRUCTIONS
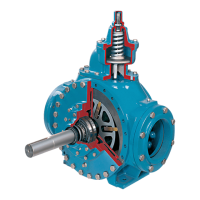
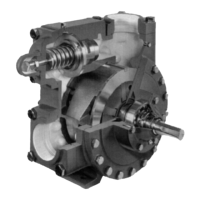
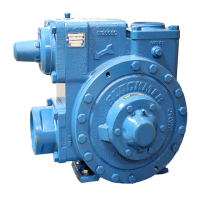
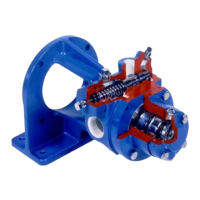
MODELS: HXL6G, HXL8G, HXLJ8G, HXL10E
Section
Effective
Replaces
102
Jun 2020
Jan 2014
TABLE OF CONTENTS
Page
PUMP DATA
Technical Data ........................................................... 2
Initial Pump Start Up Information................................ 2
INSTALLATION
Pre-Installation Cleaning ............................................ 3
Location and Piping .................................................... 3
Pump Mounting .......................................................... 3
Coupling Alignment .................................................... 4
Pump Rotation ........................................................... 4
To Change Pump Rotation ......................................... 4
Check Valves ............................................................. 4
Manual Bypass Valves ............................................... 4
OPERATION
Pre-Start Up Check List .............................................. 5
Start Up Procedures ................................................... 5
Running the Pump in Reverse Rotation ..................... 5
Flushing the Pump ..................................................... 6
Pump Relief Valve ...................................................... 6
Relief Valve Setting and Adjustment .......................... 6
MAINTENANCE
Torque Table .............................................................. 7
Scheduled Maintenance ............................................. 7
Strainers ............................................................... 7
Lubrication ............................................................ 7
Vane Replacement ..................................................... 8
Pump Disassembly (HXL6 and HXLJ8) ...................... 9
Pump Assembly (HXL6 and HXLJ8) ......................... 9
Pump Disassembly (HXL8 and HXL10) ................... 11
Pump Assembly (HXL8 and HXL10) ....................... 12
TROUBLE SHOOTING....................................................... 14
Numbers in parentheses following individual parts indicate
reference numbers on the Blackmer Parts List for the pump
being serviced.
PUMP PARTS LISTS
HXL6 HXL8, HXLJ8 HXL10
102-A01 102-A02 102-A04
Blackmer pump manuals and parts lists may be obtained
from Blackmer's website (www.blackmer.com) or by
contacting Blackmer Customer Service.
SAFETY DATA
This is a SAFETY ALERT SYMBOL.
When you see this symbol on the product, or in the
manual, look for one of the following signal words and be
alert to the potential for personal injury, death or major
property damage
Warns of hazards that WILL cause serious personal
injury, death or major property damage.
Warns of hazards that CAN cause serious personal
injury, death or major property damage.
Warns of hazards that CAN cause personal injury
or property damage.
NOTICE:
Indicates special instructions which are very
important and must be followed.
NOTICE:
Blackmer Power Pumps MUST only be installed in
systems, which have been designed by qualified
engineering personnel. The system MUST conform to all
applicable local and national regulations and safety
standards.
This manual is intended to assist in the installation and
operation of Blackmer Power pumps, and MUST be kept
with the pump.
Pump service shall be performed by qualified technicians
ONLY. Service shall conform to all applicable local and
national regulations and safety standards.
Thoroughly review this manual, all instructions and
hazard warnings, BEFORE performing any work on the
pump.
Maintain ALL system and pump operation and hazard
warning decals.

Questions and Answers

  • M
    Melissa BrayJul 25, 2025
    What to do if BLACKMER Power Pump is not priming?
    • D
      daniel73Jul 25, 2025
      To troubleshoot a BLACKMER Power Pump that is not priming: * Check for worn vanes. * Open suction valve. * Open internal control valve. * Fix air leaks in the suction line. * Clean or replace the clogged strainer. * Clear clogged or restrictive suction line or valves. * Repair or replace broken drive train. * Eliminate vapor lock in pump. * Increase pump speed for priming. * Adjust relief valve to ensure it seats properly. * Ensure vanes are installed correctly. * Correct the rotation of the pump.
  • B
    Breanna AvilaJul 29, 2025
    How to fix reduced capacity in BLACKMER Power Pump?
    • C
      christopher57Jul 29, 2025
      If your BLACKMER Power Pump has reduced capacity, consider the following: * Increase pump speed. * Open suction valves fully. * Fix air leaks in the suction line. * Reduce excessive restriction in the suction line. * Replace damaged or worn parts. * Fix excessive restriction in discharge line. * Repair or replace worn relief valve. * Ensure vanes are installed correctly. * Install liner correctly.
  • K
    kimberlydoughertyAug 3, 2025
    What causes motor overload in BLACKMER Power Pump and how to fix it?
    • T
      Tami WellsAug 3, 2025
      If the motor of your BLACKMER Power Pump is overloading: * Ensure the motor has sufficient horsepower for the application. * Check the wire size, wiring, and voltage to the motor. * Eliminate misalignment in the pump drive system. * Control excessive viscosity, pressure, or speed. * Adjust the bearing locknuts properly. * Replace faulty or worn bearings. * Inspect the rotor to avoid rubbing against the head or cylinder. * Clean dirty mechanical seal faces.
  • B
    Bryan DoyleAug 7, 2025
    How to reduce noise in BLACKMER Power Pump?
    • A
      Alexander ShawAug 7, 2025
      To address noise issues in your BLACKMER Power Pump: * Reduce excessive vacuum on the pump. * Adjust pump speed according to the viscosity. * Move pump closer to fluid source. * Reduce suction lift. * Eliminate entrained air or vapor in the pumpage. * Avoid running pump with a closed discharge line. * Securely mount the pump. * Align pump, reducer, or motor properly. * Check drive line for issues. * Replace worn or damaged bearings. * Anchor piping properly to reduce vibration. * Replace bent shaft or realign drive coupling. * Check and maintain oil levels in gear reducer. * Replace excessively worn rotor. * Repair or replace malfunctioning valves. * Adjust relief valve setting. * Install liner correctly. * Replace damaged vanes.
  • W
    william64Aug 11, 2025
    Why did the shaft break on my BLACKMER Power Pump?
    • P
      Peter JohnsonAug 11, 2025
      To address a broken shaft in your BLACKMER Power Pump: * Inspect for foreign objects entering pump. * Check viscosity compatibility with pump speed. * Ensure relief valve opens. * Control hydraulic hammer. * Align pump driver and drive shaft properly. * Replace excessively worn vanes or vane slots. * Remove settled or solidified material before start-up. * Avoid overtightening V-belts.
  • E
    ebrownAug 16, 2025
    How to prevent damaged vanes in BLACKMER Power Pump?
    • J
      Jennifer HarrisAug 16, 2025
      To prevent damaged vanes in your BLACKMER Power Pump: * Inspect for foreign objects entering pump. * Avoid running pump dry for extended periods. * Prevent cavitation. * Ensure viscosity is appropriate for vanes and pump speed. * Check compatibility with liquids being pumped. * Prevent excessive heat. * Replace worn or bent push rods. * Remove settled or solidified material before start-up. * Control hydraulic hammer. * Ensure vanes are installed correctly.
  • T
    Timothy WagnerAug 20, 2025
    What causes seal leakage in BLACKMER Power Pump?
    • R
      Ryan WrightAug 20, 2025
      To address seal leakage in your BLACKMER Power Pump: * Use compatible O-rings for liquids. * Inspect O-rings for nicks, cuts, or twists. * Repair or clean damaged shaft at seal area. * Avoid overgreasing ball bearings. * Replace excessively worn pump sleeve bearings. * Control excessive cavitation. * Inspect for cracked, scratched, or dirty mechanical seal faces.

Summary

Safety Data

Installation

Location and Piping

Guidelines for optimal pump placement and intake/discharge piping to maximize performance and life.

Pump Mounting

Recommendations for securing the pump base plate to a level foundation for stability and reduced vibration.

Installation Continued

Coupling Alignment

Details on verifying and maintaining proper angular and parallel alignment between pump and driver.

Operation

Start Up Procedures

Step-by-step guide for safely starting the pump and monitoring initial operating parameters.

Operation Continued

Relief Valve Setting and Adjustment

Instructions on how to adjust the pressure setting of the relief valve for proper system protection.

Maintenance

Maintenance Continued

Maintenance: HXL6 and HXLJ8 Models

Pump Disassembly - HXL6 and HXLJ8

Procedure for disassembling HXL6 and HXLJ8 pump models, including removing heads and internal parts.

Pump Assembly - HXL6 and HXLJ8

Instructions for reassembling HXL6 and HXLJ8 pump models after inspection or part replacement.

Maintenance: HXL8 and HXL10 Models

Pump Disassembly - HXL8 and HXL10

Procedure for disassembling HXL8 and HXL10 pump models, covering bearing covers, seals, and liner.

Maintenance: HXL8 and HXL10 Models Continued

Pump Assembly - HXL8 and HXL10

Instructions for reassembling HXL8 and HXL10 pump models, focusing on liner, disc, and mechanical seal.

Maintenance: HXL8 and HXL10 Models Continued Again

Troubleshooting

Troubleshooting Continued

BLACKMER HXL8G Specifications

General IconGeneral
BrandBLACKMER
ModelHXL8G
CategoryPower Pump
LanguageEnglish

Related product manuals