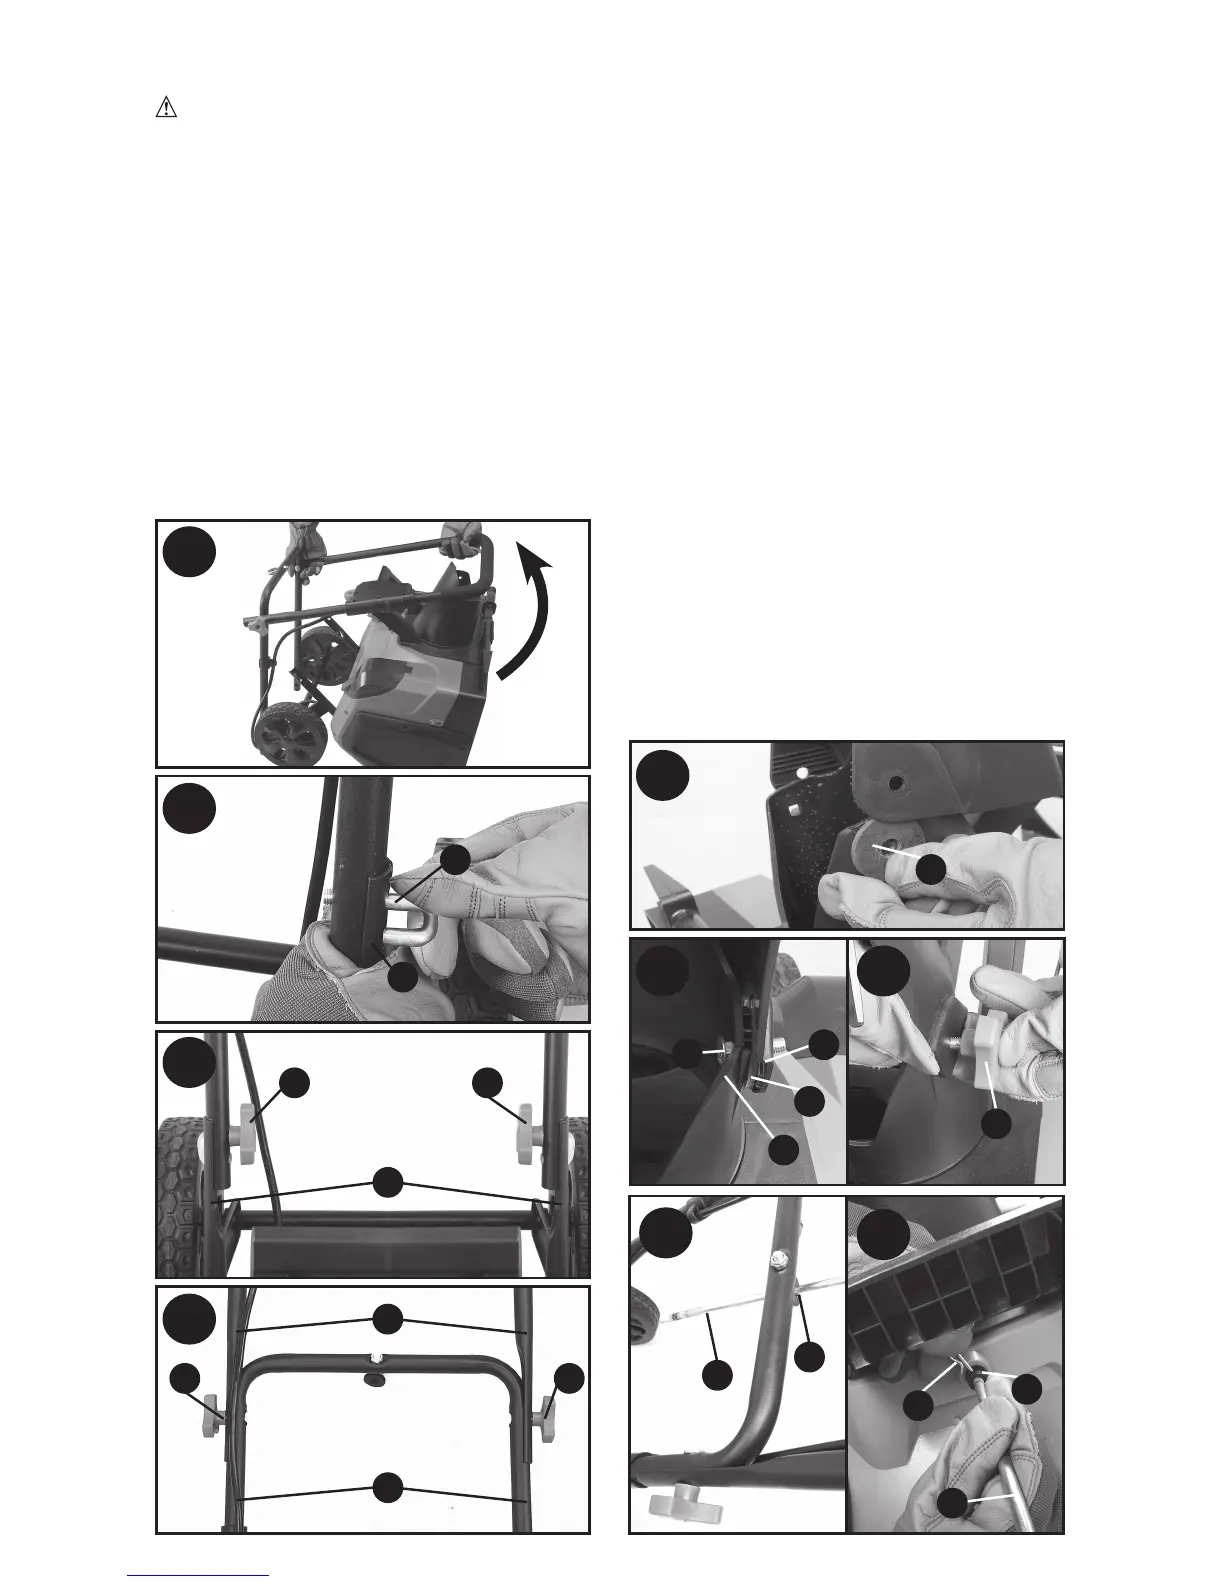
ASSEMBLY
WARNING: Before assembly, make
sure the bail handle (2) is released and
the safety key (3) is removed.
HANDLES
on the upper frame (15) as shown in
Figure 2.
in Figures 3 & 4.
frame (14) to the upper frame (15) by
tightening the handle bolts and frame
Figure 5.
8
DISCHARGE CHUTE
Place the chute deflector / guard (11) onto
align and the deflector handle is pointing
towards the handle bar (1).
Insert a chute gasket (19) in between the
chute connection and secure the assembly
knob (12) on each side of the chute deflector
/ guard as shown in Figures 6, 7 & 8.
position the chute deflector / guard to
the desired height of the snow stream.
Tighten knobs (12) to secure its position.
NOTE: Do not overtighten the deflector knobs.
CHUTE ROTATION ROD
hole in the eye hook (21) located on the
middle frame (14) as shown in Figure 9.
on the main housing.
assembly with the supplied retaining pin
(23) by aligning the pin holes on the rod
and coupler and fully insert retaining pin
as shown in Figure 10
.
2
3
4
5
17
18
6 6
16
66
14
15
6
7 8
10
9
19
11
10
20
19
12
21
5
22
23
5