7
ENGLISH
(Original instructions)
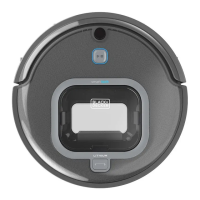
12. Main brush
13. Main brush frame
14. Main brush frame tabs
15. Charging dock
15a. Dock pairing button
16. Charging dock infrared window
17. Charging electrodes
18. Maintenance tool
19. Battery charger
Additional Accessories
A. Side brushes (2)
B. Side brush screws (2)
C. HEPA Filter
The vacuum is recommended for the
following oor surfaces:
u Hardwood/Laminate
u Ceramic/Stone tile
u Low and medium pile carpets (plush carpeting is not
recommended).
Note: Vacuum may not work on some black carpet and
darker oor surfaces, as the sensors may be detecting the
surface as an edge or stairs.
Room Preparation
u Place the cords from other appliances out of the area to
be cleaned.
u Do not operate the vacuum in a room where an infant or
child is sleeping.
u Do not operate the vacuum in an area where there are lit
candles or fragile objects on the oor to be cleaned.
u Do not operate the vacuum in a room that has lit candles
on furniture that the vacuum may accidentally hit or bump
into.
u Do not allow children to sit on the vacuum.
u Do not use the vacuum on a wet surface.
u Test the height of thresholds. Robot cannot climb
thresholds above 10-15mm.
Assembly
u Remove front lens (8) protection lm.
u Ensure the dust bin (9) and main brush (12) are tted
securely.
Installing side brushes (Fig. A)
u Ensure the power switch (1) is in the OFF position.
u Place the vacuum upside down on a at surface.
u Remove the side brush retaining screws (20).
u Place the side brushes (11) into the brush slots (21).
u Install side brush retaining screws.
Charging
Your vacuum can be manually charged via the jack plug or
automatically charged via the charging dock.
u Before charging, ensure the power switch (1) is in the
ON position.
u Before rst use, the battery must be charged for at least
4-5 hours.
Note: While charging, the charger may become warm. This
is normal and does not indicate a problem. The appliance
can be left connected to the charger indenitely.
Warning! Do not charge the battery at ambient
temperatures below 10 °C (50 °F) or above 40 °C (104 °F).
Manually Charge (Fig. B)
u Ensure the power switch is turned ON to charge.
u Plug the battery charger (19) into a wall outlet.
u Slide the jack plug (22) end of the charger into the
charging socket (2) of the vacuum.
u The power indicator (start/ stop button) (3) will blink and
emit a single short beep meaning the vacuum is charging.
The power indicator LED (start/ stop button) will turn off
when the vacuum is fully charged.
Automatically Charge (Fig. C, D)
u Plug the battery charger (19) into a wall outlet.
u Slide the jack plug (22) end of the charger into the
charging dock’s charging socket (23) as shown in Figure
C.
u Place the charging dock base on the oor with the back of
the charger against a wall.
Note: Do not place anything under the charging dock. It
will prevent the vacuum from automatically charging
u Place the vacuum on the charging dock so that the
charging electrodes (17) contact the two charging plates
(7) as shown in Figure D.
Note: If manually placing on dock then ensure power switch
is turned ON
u The power indicator (start/ stop button) (3) will blink and
emit a single short beep indicating the vacuum is charg-
ing. the power indicator LED (start/ stop button) will turn
off when the vacuum is fully charged.
Note: You can check the charging status of the vacuum
from your BLACK+DECKER app.
Note: The vacuum will search for the charging dock when
it is low on battery charge in Auto mode. However, if the
room is too large or the vacuum is obstructed from “seeing”
the dock, it may fail to nd the dock to automatically
recharge. If this occurs, place the vacuum on the charging
dock as described above.
Note: In Spot and Quick Clean Mode, the robot will nish its
cleaning cycle and stop, not returning to the dock, unless the
battery level is low, in which case it will continue searching for
the dock.