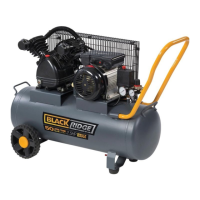
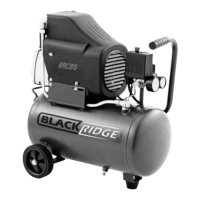
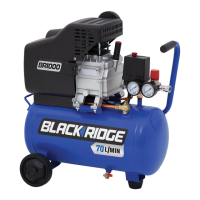
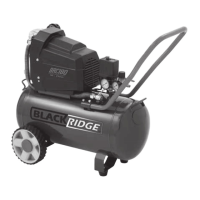
The Blackridge BRC120 is a portable air compressor designed for medium-duty DIY tasks around the home. It is suitable for use with most light-duty air tools, but is not recommended for use with finishing spray guns or high-pressure spray guns.
Function Description:
The BRC120 compressor is designed to compress normal air for various applications. It operates intermittently with a recommended 75% duty cycle, meaning it runs for 45 seconds (motor pumping) and then rests for 15 seconds (motor not pumping). During the motor pumping phase, attached air tools should not be used; tools should only be operated when the compressor is not actively pumping. The compressor is equipped with a pressure switch that automatically starts pumping when the tank pressure drops to 85 PSI and stops when it reaches 115 PSI. Users can adjust the outlet air pressure to match the recommended working pressure of their tools after the initial tank fill.
Important Technical Specifications:
- Model No.: BRC120
- Voltage: 240V AC ~ 50Hz
- Motor: Electric 2 ½ Hp
- Wattage: 1875W
- No Load Speed: 2800 RPM
- Free Air Delivery (FAD): 120 L per minute (measured in accordance with Australian Standard AS 4637-2006)
- Tank Size: 40 L
- Duty Cycle: Ideally 75% (45 seconds ON, 15 seconds OFF)
- Operating Pressure Range: Pumping starts at 85 PSI (minimum) and stops at 115 PSI (maximum).
Usage Features:
- Assembly: The compressor requires minor assembly before initial operation, including fitting the oil breather, wheels, and handle. It is crucial to fully assemble the compressor before use to avoid voiding the warranty and potential personal injury.
- Oil Management: The compressor is pre-filled with SAE30 oil. Before first use, the transport plug must be removed and replaced with the oil breather. The oil level should always be checked before use, ensuring it is above the red dot on the sight glass. To check, lift the wheel end of the compressor about 20cm for one minute, then place it back on the ground. If additional oil is needed, SAE30 oil should be added to the top of the red dot. Overfilling or underfilling with oil should be avoided.
- Air Filter Installation: The supplied air filter must be carefully screwed into the threaded hole on the top of the pump head by hand. Overtightening can damage the air filter or cylinder head.
- Starting and Stopping: The compressor is started by lifting the red ON/OFF button on the pressure switch and stopped by pushing it down. It should always be operated using this button, not the power point switch, to prevent damage and injury.
- Power Connection: The compressor must be plugged directly into a standard 240V AC power point. Extension cords are not recommended as they can cause voltage drop, power loss, and overheating, which will void the warranty. A longer air hose should be used instead if more reach is needed.
- Running In: For a new compressor, a running-in procedure is required: plug in, open the air tap and tank drain tap, start the compressor, and run it for approximately 1 minute under no load to ensure full lubrication. After this, stop the compressor, allow it to cool for 10 minutes, and recheck the oil level. Before restarting, ensure both air tap and tank drain tap are closed.
- Air Pressure Adjustment: The outlet air pressure can be adjusted using the red regulator knob. Turning it anti-clockwise lowers the pressure, and clockwise increases it. The outlet pressure gauge indicates the current setting. Users should consult tool manufacturers for recommended working pressures.
- Safety Valve Check: Regularly check the safety valve by gently pulling the ring outwards when the air tank is full. This should release air under pressure, and releasing the ring should stop the airflow immediately. If it doesn't work correctly, the compressor must be stopped and serviced by an authorized centre.
- Air Tap Operation: The air tap needs to be opened (handle aligned with fittings/hose) to allow air to flow to attached tools and closed (handle at 90° to fittings/hose) when not in use.
- Drain Tap Operation: After each use, the tank drain tap should be opened (lever pulled down to vertical) to drain excess air and moisture. It should be left open during storage to allow moisture to drain and sealed (lever pushed up to horizontal) before starting the compressor again.
- Work Environment: The compressor should be used in a tidy, well-lit, and stable environment, at least 5 meters away from the work area, especially when sanding or spraying liquids. It should not be exposed to rain or damp conditions. Using it on unlevel or unstable ground can cause lubrication issues and pump seizure, which is not covered by warranty.
- Safety Precautions: Always wear safety eye, ear, and respiratory protection. Avoid touching hot components like metal pipes, pump, or motor. Do not force the compressor or use it for purposes not intended. Keep children and pets away from the work area.
Maintenance Features:
- Daily Maintenance (Before Use): Seal the tank drain tap, check the oil level, and check the safety valve operation.
- Daily Maintenance (After Use): Open the tank drain tap, wipe down the compressor, and store it safely and securely.
- Every 50 Hours:
- Replace the air filter.
- Completely drain and replace the oil. To drain, loosen and remove the sight glass, drain oil into a funnel/bottle, dispose of it appropriately, then replace and tighten the sight glass. Wipe up any spills. Refill with fresh SAE30 oil to the top red dot on the sight glass.
- Troubleshooting: The manual provides troubleshooting tips for common issues such as the compressor not starting (check power, ON/OFF switch, tank pressure) or not building pressure (check drain tap and air tap seals), and burnt oil smell (check oil level). For persistent issues, contact an authorized service centre.
- Cleaning: Always disconnect the compressor from the mains power supply and allow it to cool for about an hour before cleaning. Use only a damp soft cloth; never use liquid or solvents.
- General Care: Regularly check the power cord for damage and have it replaced by an authorized service facility if necessary. Keep handles clean and free from oil/grease. Ensure ventilation slots are clean and free of dust to prevent overheating.
The Blackridge BRC120 comes with a 12-month express warranty against manufacturing faults or defects from the date of purchase, provided the original purchase receipt is kept. The warranty is void for commercial use, damage due to transport, negligence, misuse, incorrect setup, corrosion, unauthorized modifications, servicing by non-authorized agents, lack of original purchase receipt, resale, non-servicing, blockages, incorrect accessory fitting, overloading, or damage to attached equipment. For warranty claims or service, customers should contact Smart Marketing Group Pty. Ltd. customer service rather than returning the product to the place of purchase.