9 Blancco 24 Bay Drive Eraser
4. Wait until both software products have fully started.
5. Make sure the drives have been detected, click Refresh button if necessary.
6. Start erasure(s).
7. Fill custom fields (if any).
8. Check report. The report will be sent automatically to the MC at the end of the erasure.
9. If there are any un-erased drives left: remove erased drives and connect new ones and go step
#4.
10. Switch to MC for report handling and license control.
2.1 Install the Drives
The “Caddy-less” trays enable drives to be installed directly in the drive slots of the tower. Please remove
any caddy from the drive.
2.1.1 Insert Drives
1. To install a drive into tower, unlock and open the tower’s flip door
2. Pull the lever to open drive door handle
3. Slide the loose hard drive all the way into the cage and close the handle until the lever clicks.
Drive is now connected to the backplane
4. Once all trays are populated, press the power button (if it is not already on)
5. Close and lock the chassis door to prevent accidental drive removal while purge process is
running.
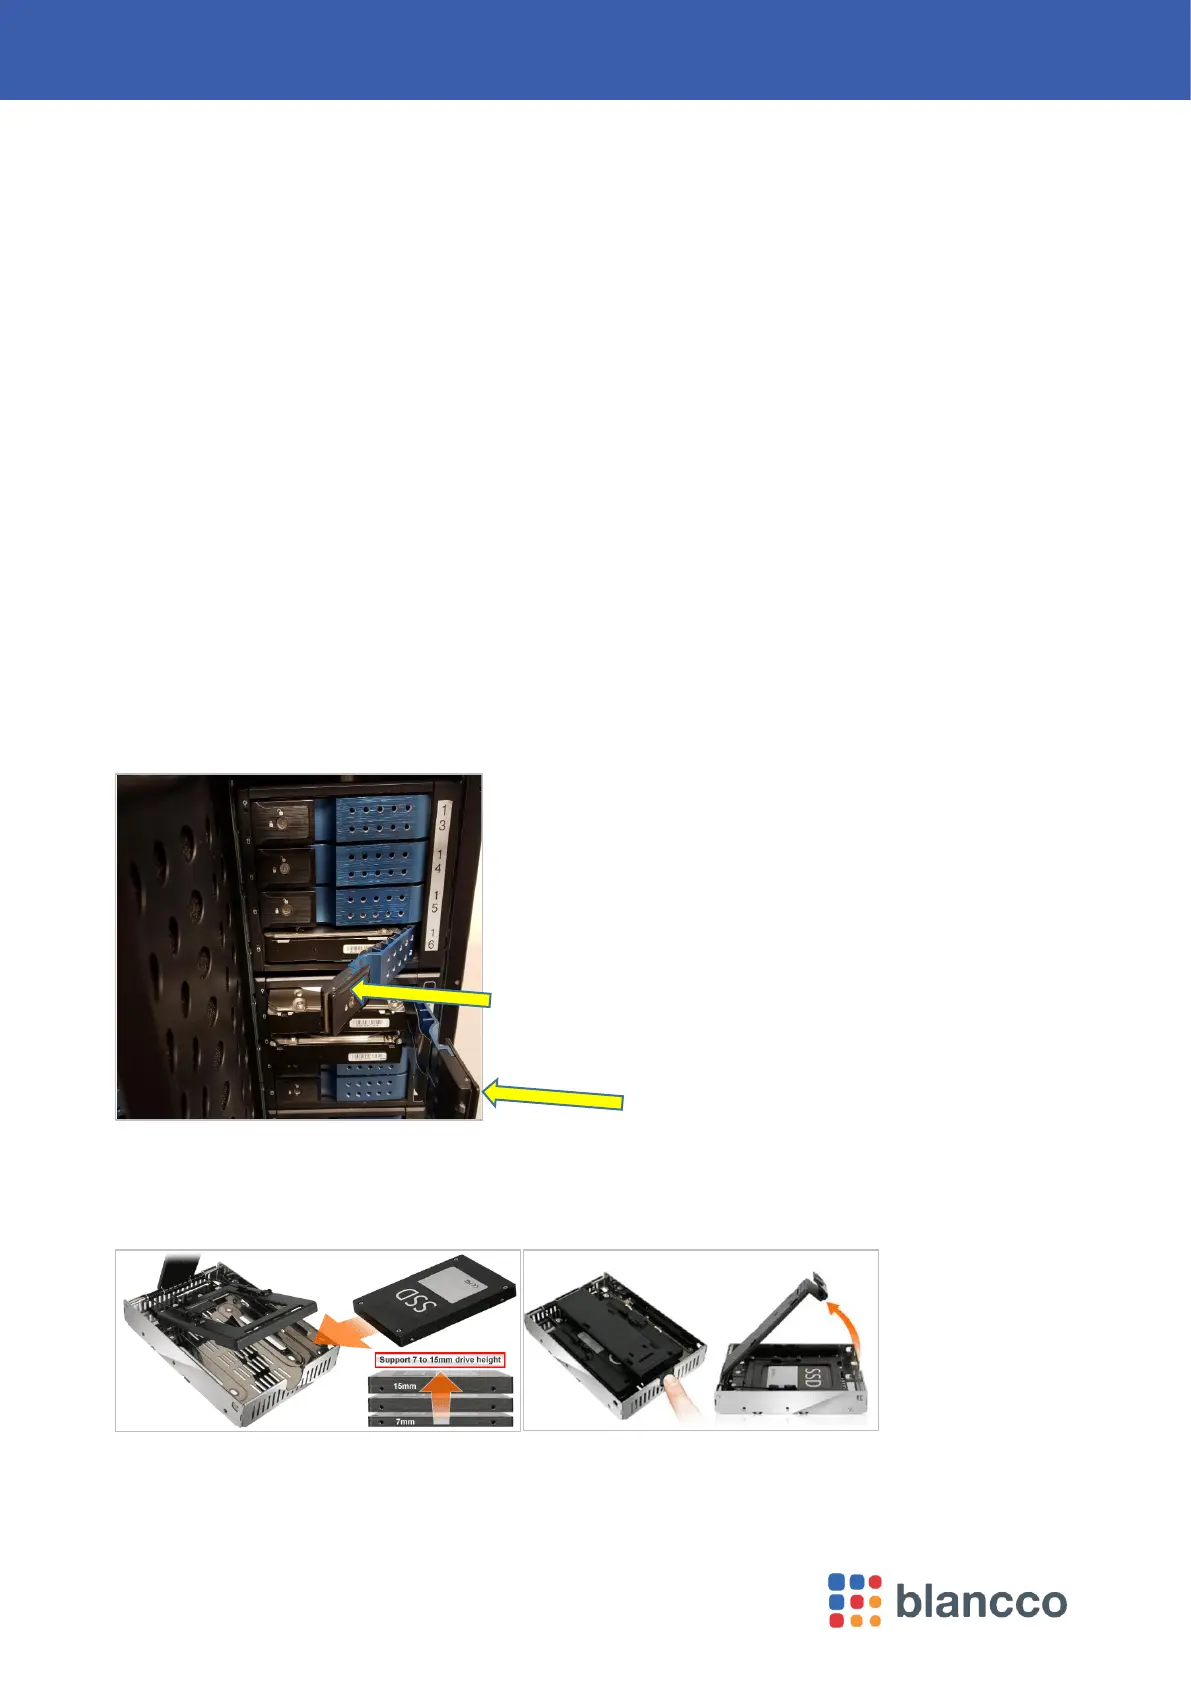
2.1.1.1 For 2.5-inch Hard Drives
2.5-inch drives can be inserted manually as long as it connected to the backplane, however a 2.5-inch to 3.5-
inch adapter would make the task easier. Four each such adapters are provided per appliance. Photos
below show example of one of the adapter.
Push the lever and insert the 2.5” drive, then close the lever – reverse for removal
 Loading...