The following things should be checked before starting the dishwasher.
The content of this manual is very helpful to the users.
After installation, please make sure to keep this manual.
1
The dishwasher is level and fixed properly
2
T he i nlet val ve i s o pen
3
T here is no lea kag e at t he c onn ecti ons of t he conduc ts
4
The wires are tightly connected
5
The power is switched on
6
The inl et an d dr ain ho ses a re knott ed
7
All packing materials and printings should be taken out from the dishwasher
Extension Hose
If you needa drainhose extension, make sure to use a similar drain hose.
It mu st b e no lon ger th an 4 metres ; ot herw ise the c leani ng effe ct of t he di sh washer could be reduc ed .
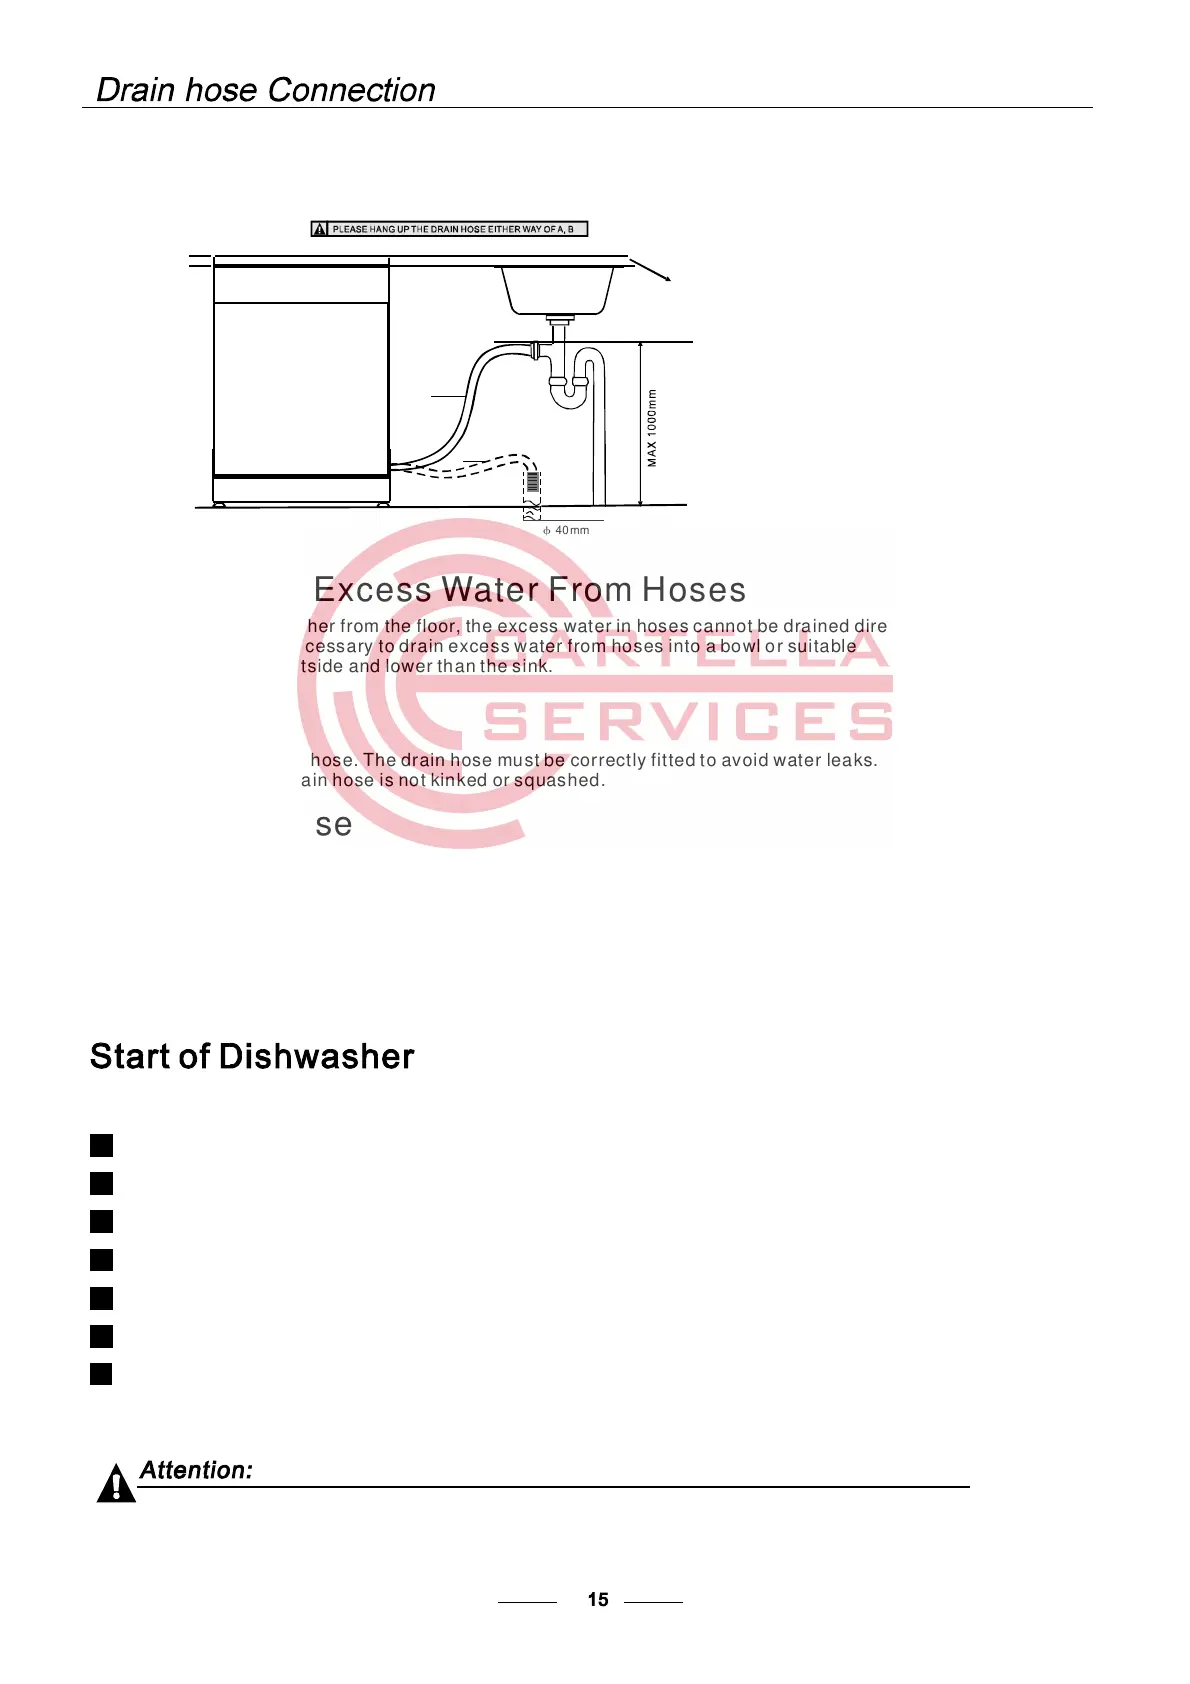
Wa t e r O u t l et
Connect the wat er drain hose. The dr ain h ose mu st be corr ect ly fit ted t o av oid water lea ks.
Ensur e that the w ate r dra in hose is no t kin ked or s q uas hed.
If th e sin k is 1000 mm hig her from the f loor, th e exc ess water in hose s c annot be d ra ined d ir ectly
into the sink. It will be necessary todrain excesswater from hoses into a bowlor suitable
conta ine r that is held out side and lower th an t he si nk.
How to Drain Excess Water From Hoses
Syphon Connection
Insert t he drai n h ose into a dra in pipe with a minimum di ameter o f 40mm , or let i t run into the sink, ma king sure to
avoid bendin g or cr imping it. T he to pof the hose mus t be les s than 1000m m.
Insert th e drain h ose into a d rain pipe with a m ini mum diam ete r o f 40mm, or let it run into th e si nk, makin g sure to
avo id bendin g o r crimpin g it. The to p of th e ho se mus t be less t han 100 0m m.
A
Counter
Front
Drain pipe
NOT E
The top of thehose
must be less t han
1000mm.
φ 40mm
B