STARTING THE ENGINE
To be done only on the starting stand - Fig. 2. After opening the tank filling
hole, fill the tank with fuel and close it by screwing - in cap.Open the petrol
supply cock by turning the small lever into position “ON”, Fig.3. Set the choke
lever into position “C” , Fig. 3. Without turning the accelerating handle, pull
gently twice the starting wire and by next quick pull start the engine. It is not
allowed to pull the starting wire up to full winding off. After a short engine run,
put the choke lever back to position “A” and let the engine run about 1 min.
Let the Minimotard on the larking stand and, if need be, adjust the no - load
speed to such a rate lest coupling should take along the no - load speed to
such a rate lest coupling should take along the rear wheel. For adjustment use
the adjustment screw No. 4 on the carburetor, Fig. 3.
Fig. 2
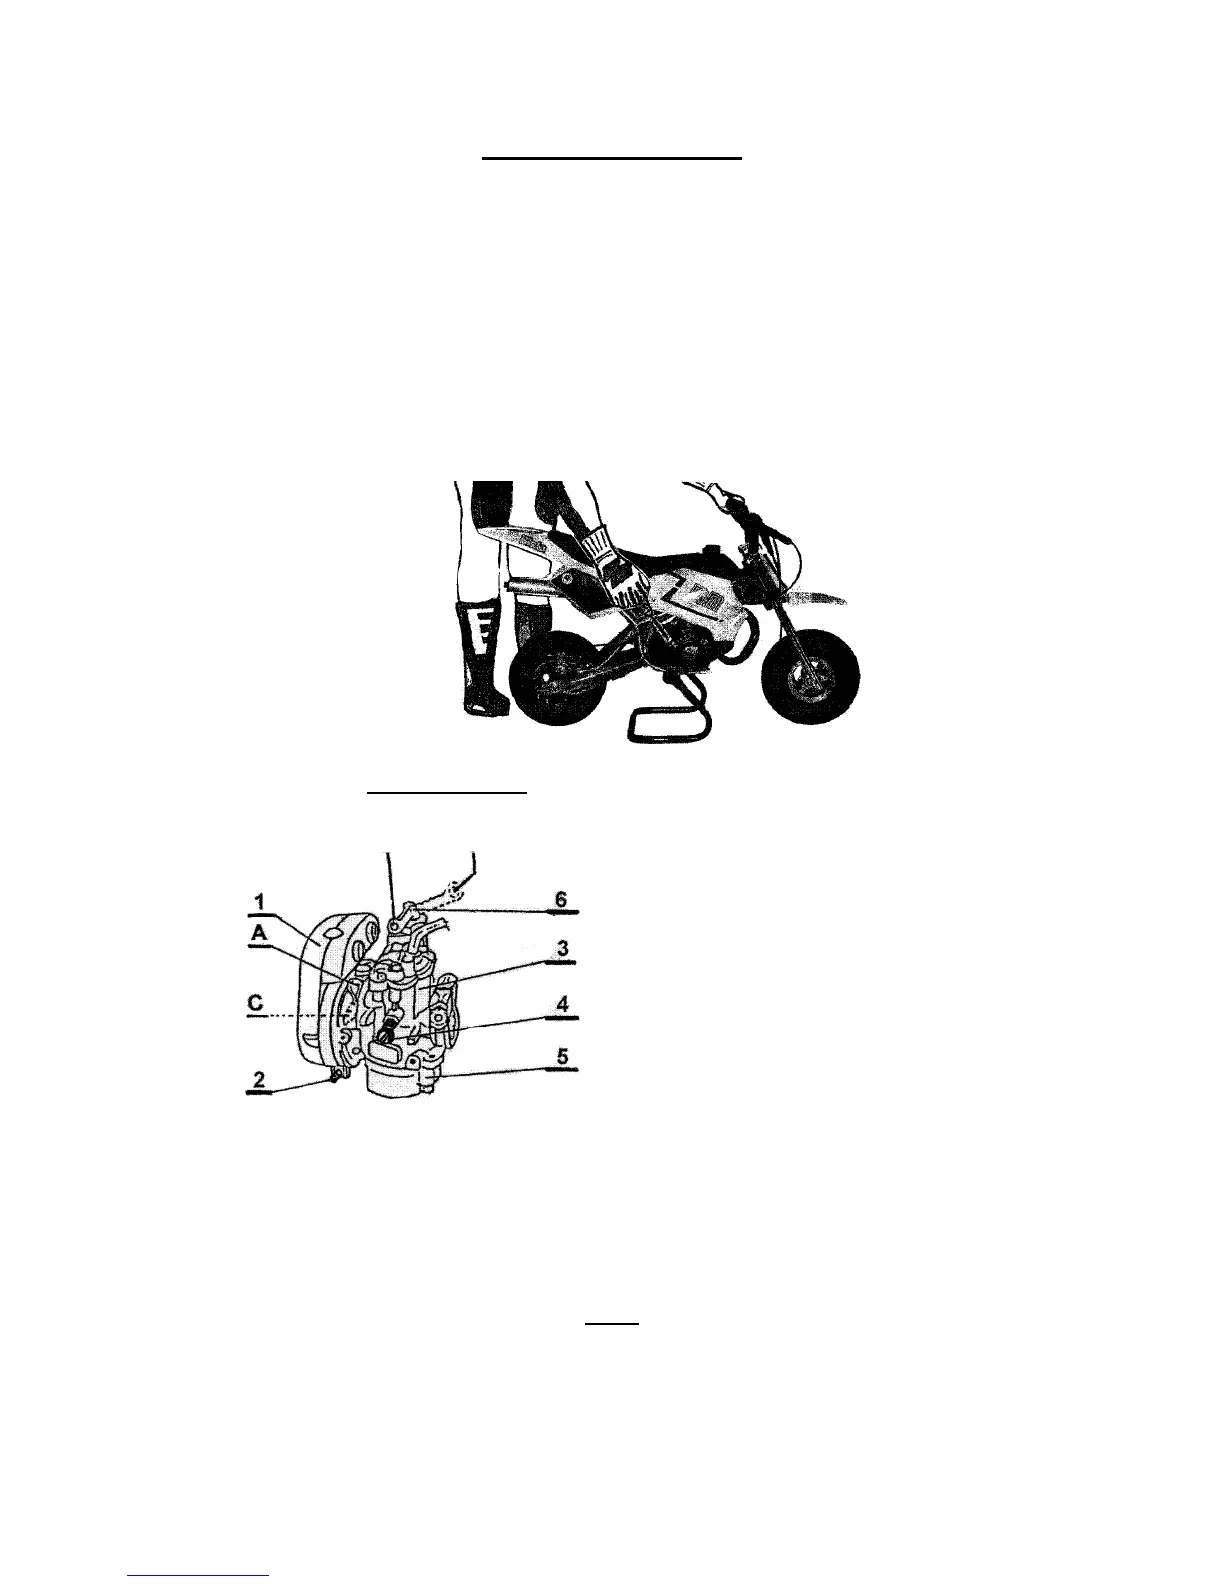
Fig. 3 CARBURETOR
ON OFF 1. Suction chamber
2. Sleeve screw
3. Carburetor body
4. Adjusting screw of no - load run
5. Float chamber
6. Fuel cock
A – choke lever for ride
B – choke lever for cold - starting
It is necessary to adhere to the following instructions for flange reassembling:
always use a new plastic ring 110.078.00 which is inserted into the flange!
Tighten up the screw with torque 5 Nm.
Use of bigger torque can cause carburetor damage which is not covered by
warranty !! Use of smaller torque can cause slackeing of the carburetor.
Check up the screw tightness after every 5 hours of riding!
RIDE
After mounting the Minimotard and slow turning the acceleration handle, you
are starting your ride. Before braking, turn back the acceleration handle and
depress slightly the front brake lever and then the rear brake lever. Beware of
the wheels not to get them in skid.
4
 Loading...