INSTRUCTIONS
-
GENERAL OPERATION
“Press” means momenlaly press of less than l/Z second
Turning Unit On
Vehicle
lgnlbon
must be on To turn
unit
on. press PWR Button.
Turning Unit Off
Press the PWR Button to turn
the
u”,t off
Volume
Press + or-to quickly increase or decrease the volume to the desired level. The volume
level is indicated in
lhe
Display Window. To make a fine adjustments to the volume level.
press the other
part
of the button before the volume level disappears
from
the display.
You can then gradually adjust the volume
I”
either direction, making precise adjustment
easy.
Adjustable Turn-O” Volume
First
adfust
the volume to the
(maxtmum)
volume level
dewed
when the
unit
IS
turned on
Press and hold the PWR Button for more than two seconds The
untt
turns off and the
turn-on volume level
IS
memowed When the
unit
8s
turned
cm.
the volume
wll
be at the
mamonzed
Iavel.
avan
II
the
unit
was turned off
while
the volume was at a
hlgher
level
However,
II
the volume
IS
turned off when the volume level
IS
lower than the stored
Tum-
On volume level. the volume
wit
be at the lower level when the
untt
IS
turned back on
Setting the Clock
Turn tha unll on
Press the AUD Button for four seconds until the
ckxk
starts
bltnkmg
(The
display
wtll
change after
two
seconds Ignore
thls
and
c~nbnue
to hold for two
more
seconds ) Once the clock
starts
blmkmg.
Press the A Button to set the hour, and press
the V Button to sat the
mtnutes
(To change the
minute
lndlcatot
to the nearest hour ( 00),
you
can
press
the BND Button
)
Press the AUD Button agal” to
acttvata
tha clock
Changing the Information Displayed
* To change the display priority in the radio mode from clock lo function or funcbon to
clock. press
the
AU0 Button for
hvo
seconds
The
display
prlonty
changes
* To change the display temporarily in the radio mode from clock to funcbon or
funcbon to clock, press and release the
AU0
Button
’
After fwa seconds, the dtsplay
changes back to the
pnonty
tnformatlon.
Bass and Treble
Press and release as many times as needed AUD Button to select the Bass made.
once
mare
to reach the Treble mode. The level is indicated in the Display Window. Press the +
Button or
-
Button
10
increase or decrease the
level:
BahCe
Press
AU0
Button as
needed
to select the Balance made. The balance is indicated in the
Display Window. Press the + Button to increase the left speaker output or press the
-
Button to increase the right speaker output to the desired
level:
Fader
Press
AU!3
Button as
needed
to select the Fader
mode.
The level
of
output for front and
back speakers is indicated in the Display Window. Press the + Button to decrease the
rear
speaker output. Press the-Button to decrease the front speaker
OUIDU~:
*
five
seconds after you complete your
adfustments,
the
untt
wll
automabcally
return lo
the volume mode and the
display
wit
revert back to the
pnonty
dtsplay,
clock or funcbon.
YOU can also
press
and release AUD as needed lo return to VOLUME,
which
appears
after FADER
,n
the AUD Button cycle.
AUD Button Summary
*
Pressing and
ralaasmg
the AUD Button accesses these modes I” this
succass~on.
*
Temporary
Dtsplay
Change(s), Bass, Treble. Balance, Fader. Volume.
*
Prassmg
the AUD Button for two seconds
chanqas
the
dtsplav
~nor,tv
between clock
and function.
.,.
,
*
Pressing
the AUD Button for four seconds accesses the time adjustment
mode.
*
Whtle
in any AUD
mode.
if
no
button is pressed for
four
seconds, the unit returns to the
volume adjustment mode and priority display.
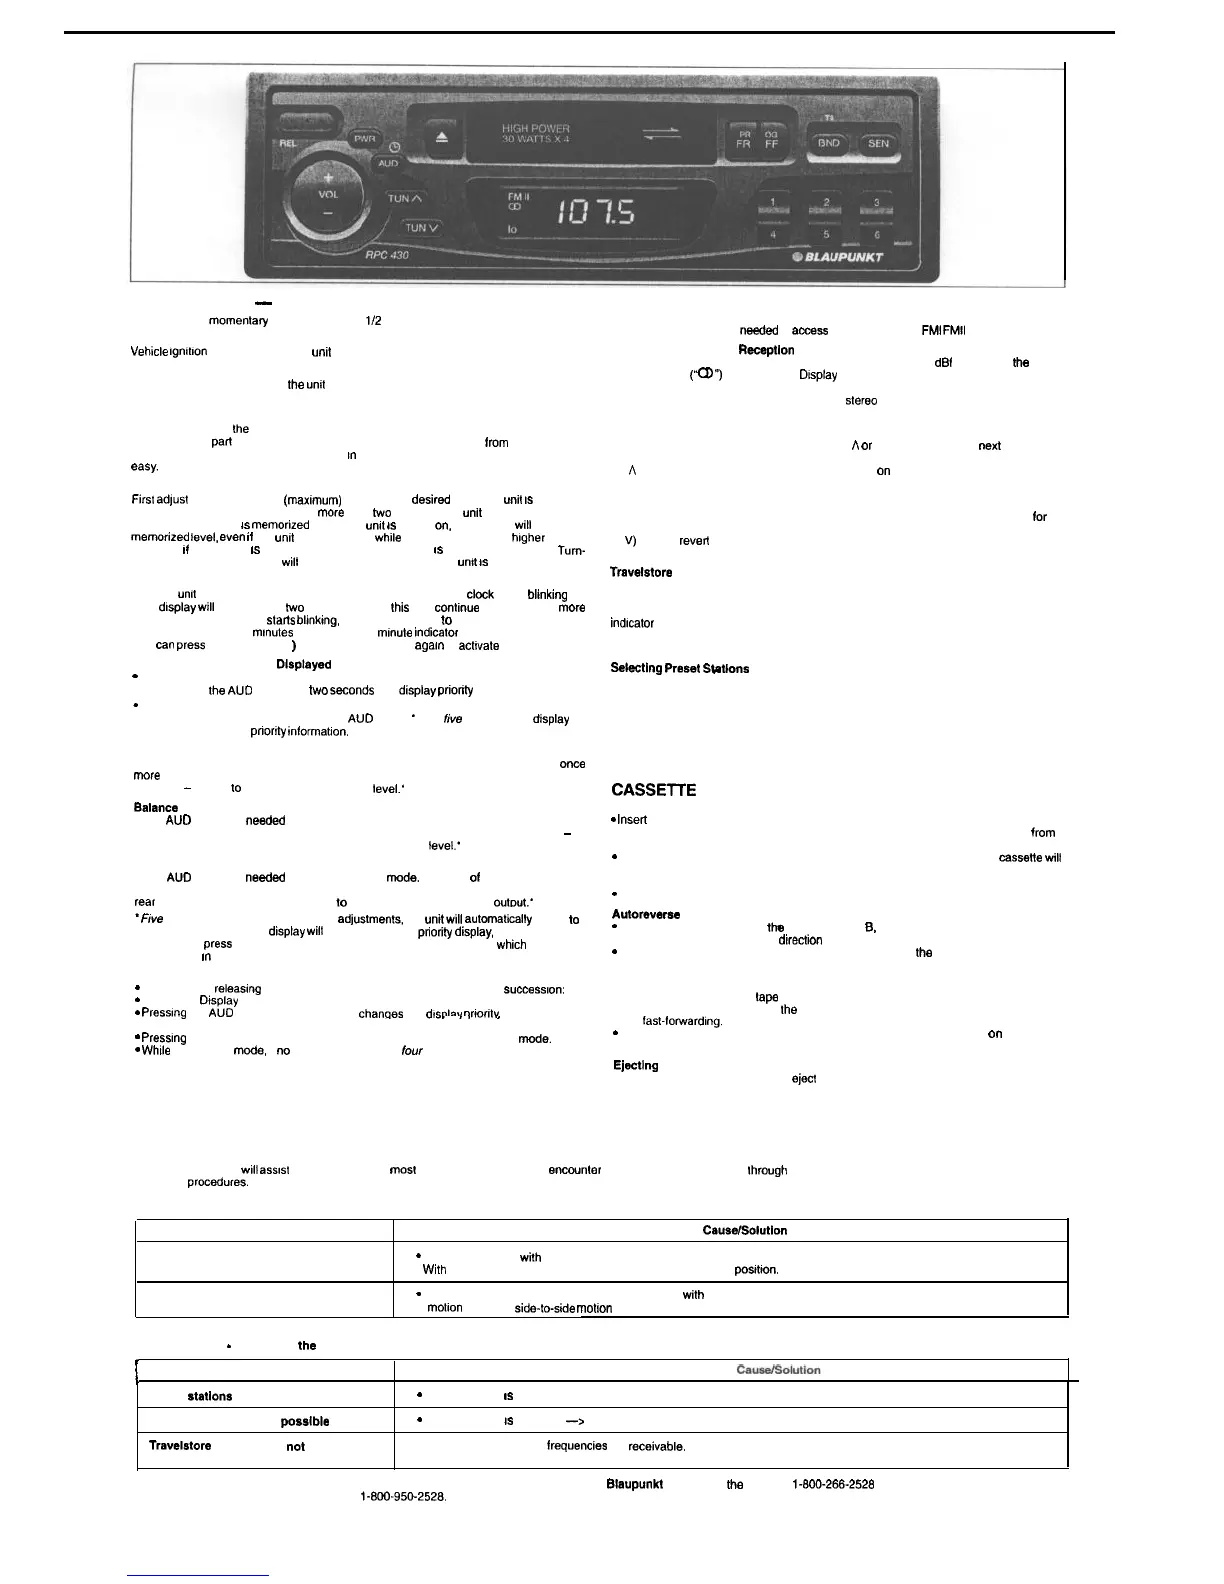
RADIO OPERATION
Band Selection
Press the BND Button as needed to access the desired band, FMI FMII or AM.
Automatic Stereo/Mono Reception Adjustment
When an FM stereo program with a signal strength of at least 60 dBf is tuned in, me
stereo indicator
(a
“)
appears in the Display Window. If the FM stereo program is weak
and noisy, the unit automatically blends the signals, eliminating the noise and gradually
converts to the monaural or “mono” made. The sterao symbol will disappear from the
Display.
Automatic Seek Tuning
Select the desired band. Press and release the
A
or
V button to seek the next receivable
station. To stop seeking and return to the previously tuned frequency, press the other of
the
A
or V buttons. If the frequency is already stored
on
a preset button on the active
band. the preset number will appear briefly.
Manual Tuning
Select the desired band. To begin manual tuning, press and hold the h or V button
lor
0.5 seconds. Five seconds after you complete your adjustments. the Tuning Controls
(A V) Buttons revert to Seek Tuning. If the frequency is already stored on a preset button
on the active band,
the
preset number will appear briefly.
Travelstore
This feature allows you to automatically store 6 receivable FM and 6 receivable AM
stations, which is especially handy when you travel to a different reception area.
Select the desired band. The” press BND Button again for 2 seconds. The band
indkxtor
begins to blink. Beginning with the last station received the unit automatically
scans the band for the six stations with strong signals. Once completed, the unit returns
to the previously-tuned frequency.
Selecting preset SIotlons
Choose the desired band using the BND Button. Press the preset button that has the
desired station.
Manually Storing Individual Presets
1. Tune in the desired station using seek or manual tuning.
2. Press the preset button on which you want to store the station for 2 seconds. To
confirm that the station is stored, the audio mutes temporarily, the frequency blinks in
the display, and the preset number appears briefly.
CASSElTE PLAYER OPERATION
Cassette Tape Play:
*
lnselt cassette into Cassette Door. Note: Make sure that the side of the cassette with
the tape exposed is facing to the right side and that all slack has bee” removed lrom
the tape prior to insertion.
*
The insertion of the cassette will automatically override the radio, and the cassene
will
begin to play. When the cassette deck is being used, the display will indicate which
direction the tape is going.
*
The tape will continue to play until ejected after which the radio will play.
Autoreverse
Tape Function
*
Automatic: When the end of
the
tape (side A or 8, program 1 or 2) is reached, the
tape will automatically reverse
diraction
and play the other side of the tape.
*
Manual: To reverse tape direction during playback, press
the
PROG (Program)
Buttons. The change in direction and in tape program will be confirmed in the Display.
Fast Winding of Tape
No matter which side of the lapa that is playing:
. To fast-forward the tape. press
the
FF Button. The direction arrow will blink to confirm
the
fast-fonvardmg.
*
To fast-rewind the tape, press the FR Button. The direction arrow stays
on
and the
opposite arrow blinks to confirm the fast-rewinding.
Ejactlng The Tape
Press the Cassette Eject Button to eject the tape. The radio will play.
TROUBLESHOOTING GUIDE
The following check
wll
assist
in the correction of
most
problems which you may
ancountar
with your unit. Before going
lhrough
the check list below, refer back to the connection and
operating
procadures.
General
No sound.
Trouble
CauselSolutlo”
* Adfust the volume
wth
the + button.
.
With
a P-speaker system, set the fader control to the center
postbon.
Indications do not appear on the
display window.
*
Remove the front panel and clean the connectors
wtth
a cotton swab and isopropyl alcohol (90% or htgher) with a” in/out
mobon
-- NOT a
side-to-stde
mobon
Radio reception - (Make sure Ihe antenna Is connected, extended. and dry Inside)
I
Trouble
Preset statlons are not receivable.
Automatic tuning Is not possible
Travelstore
feature does not complete
storing of six stations.
*
The broadcast
IS
too weak.
*
The broadcast
IS
too weak
-->
Use manual tuning
. Not enough broadcast
frequencies
are recenable.
If the above mentioned solutions do not help to improve the situation, consult your nearest Blaupunkl dealer or in
the
USA call 1-600-266-2526
For dealer referral or product brochure call 1-600-950-2526.
 Loading...