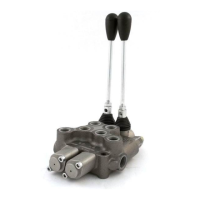
BM40/2 JOYSTICK MONOBLOCK DIRECTIONAL CONTROL VALVE / INSTRUCTIONS MANUAL
6
CHANGING THE VALVE SPOOL AND SEALS (See drawing 1):
Step 1. Remove the Handle (Part 3) from the Handle Cap (Part 4).
Step 2. Remove the Bolts (Part 6.2) with a 4mm hex key and remove the Positioner Cap (Part 6).
Step 3. Using a 4mm hex key remove the Positioner (Part 6.1).
Step 4. Remove the bolts (Part 4.1) with a 4mm hex key and remove the Handle Cap (Part 4).
Step 5. Always start on the Positioner Cap side when removing the O-rings. Move the spool (Part 5) only far enough to expose the
O-ring (Part 5.1). Be careful not to push the spool too far past the O-ring groove as this will cut the O-ring on the Handle
Cap side. Remove the O-ring with a pick.
Step 6. Remove the spool through the Positioner Cap end of the valve. Remove the Handle Cap side O-ring with a pick.
Step 7. Lightly oil the new spool with clean hydraulic uid. Insert the spool into the valve and push and pull it within the valve
casting to make sure there is very little resistance. If resistance is felt please try a new spool to eliminate binding.
Step 8. Push the spool back on the Handle Cap end so the O-ring can be installed in the groove.
Step 9. After the O-ring is installed in the Handle Cap end slowly push the spool from the Positioner Cap end to expose the O-ring
groove. Be careful not to push the spool too far past the O-ring groove as this will cut the O-ring on the Handle Cap side.
Install the O-ring in the groove.
Step 10. Install the Handle Cap rst and tighten the bolts to 4.8 ft. lbs.
Step 11. Install the Positioner into the spool and tighten to 9.6 ft. lbs. Then install the Positioner Cap and tighten the bolts to 4.8 ft.
lbs..
Step 12. Add the Handle to the valve and move it back and forth to see if you feel any sticking of the spool. If it is not sticking the
installation is complete.
If it feels like it’s sticking, loosen the Caps and realign, then try it again, this should x the sticking issue.
CHANGING THE SPRING POSITIONER TO DETENT POSITIONER (See drawing 1):
Step 1. Remove the Bolts (Part 6.2) with a 4 mm hex key and remove the Positioner Cap (Part 6).
Step 2. Using a 5 mm hex key remove the old Positioner (Part 6.1).
Step 3. Screw the new Positioner onto the spool and tighten to 9.6 ft. lbs.
Step 4. Install the Positioner Cap and tighten the bolts to 6.3 ft. lbs.
SETTING THE RELIEF VALVE
An adjustable relief valve is standard on all monoblock directional valves. Standard factory setting is 2,100 PSI.
The relief pressure is adjusted by releasing the Nut (Part 1.2), and turning the Adjusting Screw (Part 1.1) with a 4 mm hex key wrench.
Turning the Adjusting Screw clockwise will increase the pressure and counter-clockwise will decrease the pressure (a pressure gauge
must be installed in the inlet line whenever the relief pressure is adjusted). Adjustable pressure range is 1,300 PSI to 3,600 PSI. Do not
backout adjusting screw to the point it falls out.
 Loading...