EasyManua.ls Logo

Blomberg GSS 1380 User Manual

Blomberg GSS 1380
12 pages
To Next Page IconTo Next Page
Page #1 background imageLoading...
Page #1 background image
23
Water drainage
Connecting the drainage hose.
Take care to ensure that the water intake hose is not bent
or squeezed.
Check that the drainage hose is firmly seated in place.
Extension hoses
If a hose extension is required, a drainage hose of equal
quality must be used
The maximum length must not exceed 4m. Otherwise,
the machines cleaning process is negatively influenced.
Siphon connection
The drainage height must be between 50 and 100 cm
above the floor.
Use hose clamps to fasten the drainage hose to the
siphon.
Electrical connection
Please refer to the type plate for information on current
type, mains voltage, and fuse protection.
The type plate is located on the inside of the door.
The mains plug must be freely accessible after installation.
Power cables and insulated cables must not be accessible
after installation.
AQUASAFE+ (depends on the model)
The Aquasafe+- system protects you from water damage
which may be caused at the water inlet hose.
Do not immerse the systems valve box into water; it
contains electrical components.
In case of damage, pull out the power supply plug.
Do not shorten or lengthen the hose insert, since it
contains electrical cables and components.
If your machine ever experiences faults in operation,
check the notes and advice in the operating manual.
If this does not fix the problem, our customer service
staff is available to you.
3/4
min 10
AQUASAFE+
18
21
01020 30 40 50 60 70 80 90 100 110
12cm
min 4cm
max 110 cm
min 50 cm
Service
11
Dear customer,
Before starting, it is essential that you read carefully right
through the installation and operation instruction booklet
before plugging in to the mains socket. The following
instructions should prevent the risk of personal injury
and/or damages to the machine.
Please keep these documents for later reference in a
safe place.
This operating manual has been written for different
machines and some of the features mentioned here may
not apply to your specific machine.
Question and Answer IconNeed help?

Do you have a question about the Blomberg GSS 1380 and is the answer not in the manual?

Blomberg GSS 1380 Specifications

General IconGeneral
TypeFreestanding
Height85 cm
Width60 cm
Depth60 cm
Washing Performance ClassA
Delay StartYes
Dimensions (H x W x D)85 x 60 x 60 cm
Washing ProgramsIntensive, Economy

Summary

AQUASAFE+ System

Water Drainage

Connecting the Drainage Hose

Ensure water intake hose is not bent or squeezed and drainage hose is firmly seated.

Extension Hoses

Use equal quality, max 4m length for drainage hose extensions.

Siphon Connection

Drainage height must be 50-100 cm; use hose clamps.

Electrical Connection

Service and Support

Installing Your Dishwasher

Water Connection

Connect to cold/warm water (max 60°C), not open devices. Check pressure.

Permissible Water Pressure

Lowest 0.3 bar, highest 10 bar. Contact technician for low pressure.

Connecting the Water Inlet Hose

Ensure hose is not bent, use 3/4" tap, check for leaks, close tap after rinse.

Technical Features

Directions for Assembly

Safety Notes for Installation

Check for transport damage, contact supplier if damaged, never install damaged machine.

Installing Your Dishwasher Safely

Ensure correct electrical connections, grounded socket, and accessible plug.

Water and Drainage Connections

Properly connect water inlet and drainage hoses as per instructions.

Disposal and Safety Instructions

Recycling and Disposal

Dispose of packaging and old machine according to regulations.

Before Installation Safety

Check machine for transport damages. Never install if damaged.

Before First Use Safety

Ensure proper grounding, check power supply data, disconnect from mains.

Troubleshooting: Dishes Break

Dishes Break - How to Fix

Load dishwasher as suggested and do not overload baskets.

Troubleshooting: Foam

Foam - How to Fix

Avoid pre-washing with excess detergent; clean spilled rinse aid.

Troubleshooting: Water Remains

Water Remains - How to Fix

Clean filters and ensure the relief hose is properly placed.

Troubleshooting: Paling of Decoration

Paling of Decoration - How to Fix

Ensure items are dishwasher safe; avoid aluminium and silver items.

Troubleshooting: Scratched Dishes

Scratched Dishes - How to Fix

Check salt container lid, water hardness, detergent storage, and loading.

General Safety Precautions

Electrical Safety

Do not use extension cables; use original plug; ensure plug is accessible.

Children's Safety

Supervise children, keep detergents away, water is not drinking water.

Daily Operation Safety

Use for household dishes only; do not open door during operation.

In Case of Problems

Disconnect from mains for repairs; do not pull cable; turn off water supply.

Get to Know Your Machine

View of the Machine

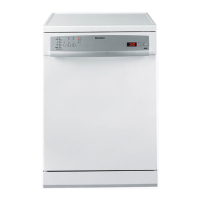
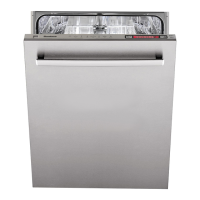
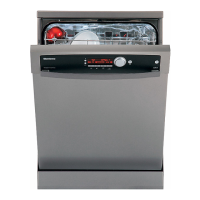
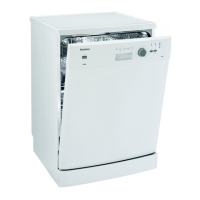
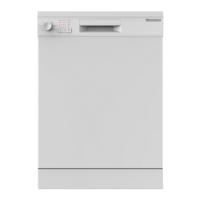
Identifies key components of the dishwasher, including housing and baskets.

Control Panel Overview

Explains the function of various buttons and indicators on the control panel.

Troubleshooting: Food Residue

Food Leftovers - How to Fix

Remove coarse dirt, use pre-wash or run cycle without detergent.

Troubleshooting: Machine Not Grounded

Machine Not Grounded - How to Fix

Check system grounding to prevent static electricity damage.

Troubleshooting: Rust Stains

Dish Items with Rust Stains

Rust-sensitive cutlery or dishes are not suited for dishwashers.

Troubleshooting: Detergent Dispenser Issues

Detergent Dispenser Problems

Ensure dry dispenser, proper detergent fill, correct lid closure, and avoid clumping.

Setting Water Hardness

Softening the Water

Dishwashers require soft water; use salt to prevent lime scale.

Measuring Water Hardness

Use a test strip or contact local water company to determine water hardness.

Setting Water Hardness Level

Procedure to set the appliance's water hardness level via buttons.

Troubleshooting: Smell

Smell of New Machine

Smell disappears after a few washing runs.

Dirty Filters

Clean all strainers and filters as described in the manual.

Dishes Stand Unwashed

Remove dirt, run pre-wash program, keep door closed to prevent smells.

Troubleshooting: Milky Appearance

Glass Corrosion - How to Fix

Choose low temp program, use less detergent, check water hardness.

Troubleshooting: Rust Stains

Rust Stains on Surface

Check salt container lid; salt can damage metal surfaces.

Filling the Dishwasher Salt

Important Notes on Salt Usage

Use only special dishwasher salt; avoid coarse grain or table salt.

Salt Container Operation

Open cap, fill with water (first use), add salt using funnel, close cap.

Troubleshooting: Dishes Not Drying

Dishes Not Drying - How to Fix

Check loading, rinse aid, unloading time, program selection, and cutlery quality.

Troubleshooting: Tea, Coffee, Other Stains

Tea, Coffee, Other Stains - How to Fix

Select higher temperature program; store detergents properly.

Troubleshooting: Calcium Streaks

Calcium Streaks - How to Fix

Increase rinse aid supply or refill the rinse aid dispenser.

Troubleshooting: Cleaning Results Unsatisfactory

Dishes Not Becoming Clean

Check loading, program, spray arms, filters, and detergent/rinse aid levels.

Filling the Rinse Aid Dispenser

Rinse Aid Function

Rinse aid improves rinsing and prevents watermarks; use dishwasher-specific products.

Opening the Rinse Aid Dispenser

Press the lock to open the dispenser lid.

Setting the Dose of Rinse Aid

Adjust the dispenser regulator (levels 1-6) based on visible watermarks or streaks.

Filling the Detergent Dispenser

Detergent Types

Types of detergents: phosphate/chlorine, phosphate/no chlorine, neither. Use salt with phosphate-free detergents.

Detergent Storage and Use

Store detergents cool/dry, out of reach of children; use correct amount.

Two-in-One and Three-in-One Detergents

Combined detergents may offer satisfactory results under specific conditions.

Using Combined Detergents

Check product specs; follow packet instructions; place tablets in dispenser.

Cleaning the Dishwasher

Regular Cleaning Importance

Regular cleaning ensures longer product life and reduces recurring problems.

Cleaning External Surfaces

Use a gentle household cleaner for the outside and door seals.

Cleaning the Filters

Remove and clean main, coarse, and micro filters thoroughly under running water.

What Should Not Be Washed

Unsuitable Items for Dishwasher

Lists items like rust-sensitive steel, wooden handles, non-heat resistant plastics.

Loading the Dishwasher

General Loading Guidelines

Remove food leftovers, place items with openings downwards, avoid overloading.

Lower Basket Loading

Use for plates, bowls, pots; folding plate supports provide more room.

Upper Basket Loading

Load with dessert plates, cups, glasses; adjust height setting as needed.

Cutlery Basket Loading

Place cutlery with sharp tips and edges horizontally in the upper basket.

Troubleshooting: Spray Arms Clogged

Cleaning Spray Arms

Remove spray arms, clean nozzles under running water to clear blockages.

Troubleshooting: Filter Inset Blocked

Cleaning Filter Inset

Clean filter in water inlet hose to prevent dirt deposits from pipes.

Troubleshooting: Dishwasher Will Not Run

Dishwasher Not Running Checks

Check plug, fuses, water supply, door closure, and On/Off button.
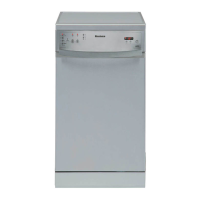
Related product manuals