04
How to Use
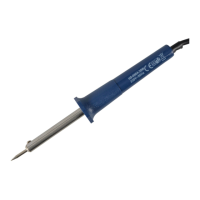
1. Plug the soldering iron into the mains. This will turn the soldering iron on automatically.
2. Place the soldering iron on the stand and allow to heat up for a couple of minutes.
3. Once your soldering iron has heated, pick up the soldering iron by the handle in one hand and
hold a piece of solder in your other hand.
4. Hold the soldering iron to the place where the two metal components will meet for about a
second to heat them up. You want to heat the metal parts not the solder itself.
5. Then touch the solder to the heated components. As the solder starts to melt it will flow into
the gaps that it needs to fill. Continue to do this until a sufficient amount of solder is melted.
6. Allow the solder to cool. This should take no longer than a few seconds.
7. Make sure that there aren’t any gaps between the components or excess solder.
Cleaning the Soldering Iron Tip
• Ensure the soldering tip is cleaned after every use when it has completely cooled down.
• Clean the soldering iron tip to limit build up over time.
• Wipe the soldering iron tip with a damp, cellulose sponge.
• Use dampened steel wool to get rid of surface stains or rust. This will remove any heavy
staining. Avoid sandpaper as this is too corrosive for solder iron tips.
Tinning the Soldering Iron Tip
After cleaning the soldering tip it is advised to coat the soldering tip in a thin, even layer of solder.
This helps to protect the tip from rust.
• ALWAYS wear eye protection while tinning the soldering tip.
• ALWAYS wear protective gloves and wash your hands once you have finished.
• Melt a small amount of solder over the soldering tip in a thin coat. This will help to keep the
soldering irons heat flow even when it is next used.
 Loading...