EasyManua.ls Logo

Bluewave NP5022 User Manual

Bluewave NP5022
12 pages
To Next Page IconTo Next Page
Page #1 background imageLoading...
Page #1 background image
LOW MOUNT SPA COVERLIFT
Installation Instructions
CUSTOMER SERVICE HOTLINE: 1-800-759-0977
BlueWave, 1745 Wallace Ave., St. Charles, IL 60174
!! CAUTION !!
IMPORTANT!! READ ALL INSTRUCTIONS CAREFULLY
BEFORE BEGINNING INSTALLATION
Please read all instructions and
precautions in this installation sheet
before using this equipment. Save this
installation sheet for future reference.
Use this Spa Coverlift only as described
in this installation sheet. Inspect and
tighten all parts regularly, replace any
worn or missing parts immediately.
!! WARNING !!
Adult assembly required. This package
contains small parts which are a
choking hazard. Keep children away
from bags and parts until assembled.
Dispose of packaging with care.
(Spa and Spa Cover Not Included)
ITEM NUMBER: NP5022
-1 -
Mfg#3200103
DO NOT attach o r incorporate e lectrical app liances or accessories into or onto T he Spa Coverlift as an
electrical hazard could be created, resulting in injury or death.
DO NOT lean, sit, stand on or play around The Spa Coverlift that could cause a loss of balance resulting in
injury.
Use of The Spa Coverlift for any application other than fo r wh ich it was designed is solely at th e
purchaser’s
risk and Blue Wave will not be held liable for such use resulting in injur y, property damage or
damage to the product.
Question and Answer IconNeed help?

Do you have a question about the Bluewave NP5022 and is the answer not in the manual?

Bluewave NP5022 Specifications

General IconGeneral
BrandBluewave
ModelNP5022
CategorySpa Accessories
LanguageEnglish

Summary

Spa Coverlift Safety and Warnings

Mandatory Pre-Installation Safety Review

Emphasizes reading all instructions meticulously before starting installation to ensure a safe and correct setup process.

Guidelines for Safe Coverlift Operation

Advises users to follow installation sheets, use only as intended, and conduct regular inspections for wear or damage.

Critical Assembly and Usage Hazard Alerts

Warns about adult assembly requirements, choking hazards from small parts, and dangers from electrical integration or improper support use.

Spa Coverlift Preparation and Parts

Spa Clearance and Mounting Orientation

Specifies required 2-foot clearance around the spa and recommends coverlift mounting orientation for optimal spa access.

Essential Tools for Coverlift Assembly

Lists necessary tools including screwdrivers, drill bits, marker, and wrench for proper installation.

Coverlift Components and Spa Size Configuration

Identifies all included parts and illustrates how to configure the coverlift for spa covers up to 72" and those between 73"-96".

Spa Coverlift Assembly Steps

General Assembly Best Practices

Provides foundational advice: clear workspace, two-person assembly, correct part orientation, and incremental tightening.

Step 1: Mounting Bracket Installation Prep

Covers identifying and horizontally mounting the left and right brackets to the spa's radius, warning against vertical placement.

Step 2: Attaching Pivot Stoppers and Bolts

Details inserting pivot arm stoppers into bracket centers and pivot arm bolts into side corners, including the placement of small washers.

Step 3: Securing Pivot Arms and Stoppers

Guides the secure attachment of locknuts to stoppers and bolt nuts to bolts, followed by adding large washers to the opposite side.

Step 4: Mounting Brackets to Spa Cabinet

Instructs on attaching the pre-assembled brackets to the spa sides, specifying height and screw types for secure mounting.

Step 5: Installing Pivots and Spacer Blocks

Covers placing spacer blocks and side arm pivots onto the pivot arm bolts, securing them with washers, nuts, and final caps.

Step 6-A: Cover Support Assembly (Spas < 72")

Explains connecting cover support arms to the coupler for spa covers up to 72 inches, ensuring correct orientation.

Step 6-B: Cover Support Assembly (Spas > 72")

Details attaching coupler extensions and connecting support arms for larger spa covers (73"-96"), ensuring proper fit.

Step 7: Final Coverlift Arm Assembly

Guides final adjustments for parallel positioning of coupler pieces and support arms, and securing all connections with self-tapping screws.

Coverlift Operation Guide

Procedure for Removing Spa Cover

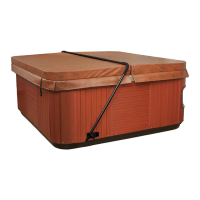
Outlines the steps to fold the cover, lift it with the bar, and slide it back off the spa.