This document describes the BluMill Robot Vacuum Cleaner (model MT-710), a device designed for automated indoor home cleaning. It offers various cleaning modes and features to ensure efficient and convenient floor maintenance.
Function Description
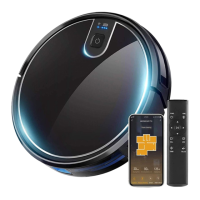
The BluMill Robot Vacuum Cleaner is a robotic device designed to autonomously clean floors. It can vacuum and mop, adapting to different floor conditions. The robot is equipped with side brushes to clean edges and corners, a roller brush for general cleaning, and a dust compartment for collecting debris. For mopping, it uses a water tank assembly with a mopping cloth. The device can be controlled via a remote control or a smartphone application, offering multiple cleaning modes and suction power settings. It also features automatic charging, returning to its charging dock when the battery is low.
Important Technical Specifications
- Model: MT-710
- Input Voltage: DC 14.4V
- Power: 30W
- Battery Capacity: DC 14.4V Li-ion 2500mAh
- Dust Compartment Capacity: 0.6L
- Cleaning Time: 120 minutes
- Charging Time: 300 minutes
- Remote Control Battery: DC 3V (AAA)
- Remote Control Method: Infrared
- Remote Control Transmission and Reception Distance: 5 meters
- Power Adapter Input: 100-240V/50-60Hz
- Power Adapter Output: 19V/0.6A
- Filters: HEPAX 2 (High Efficiency Filter) and Primary Filter
- Connectivity: 2.4G WiFi (5G WiFi not supported)
Usage Features
The robot vacuum cleaner offers several features for ease of use and effective cleaning:
Safety Regulations:
- Not suitable for children under 8 years old or individuals with mental disabilities without supervision.
- Children should not ride on or play with the product.
- Avoid using in rooms where infants sleep.
- Clear power cords and small items from the floor to prevent blockages.
- Fold over carpet edges and ensure hanging curtains or tablecloths do not touch the ground.
- When cleaning near stairs or obstacles, test the product's edge detection. Use protective barriers if necessary to prevent falls and ensure they do not cause injury.
- Use only manufacturer-recommended accessories.
- Ensure power supply voltage matches product specifications.
- For indoor home environments only; not for outdoor, commercial, or industrial use.
- Use only original rechargeable batteries and charging docks.
- Ensure dust compartments and filter materials are installed before use.
- Do not use near open flames, fragile items, or in extreme temperatures (above 40°C or below -40°C).
- Keep hair, clothes, fingers, and other body parts away from openings and operating parts.
- Do not use on wet or waterlogged surfaces.
- Do not vacuum stones, waste paper, flammable materials (toner, printer ink), cigarettes, matches, ash, or items that may cause fire.
- Do not vacuum burning items.
- Ensure the suction outlet is not blocked; clear dust, cotton wool, or hair for smooth air circulation.
- Handle the power cord carefully; do not drag, pull, use as a handle, clamp between doors, or pull around sharp corners.
- Do not use if the power cord, power outlet, or charging dock is damaged, or if the product has been dropped, damaged, used outdoors, or exposed to water. Contact customer service for repairs.
- Turn off the product switch before cleaning and maintenance.
- If not used for a long time, remove the battery and store it safely. Clean the battery compartment if leakage occurs.
- The product uses a long-life battery; contact after-sales service for replacement if needed.
Rapid Operation:
- Installing Side Brushes: Attach the right brush to the bottom right mounting port and the left brush to the bottom left mounting port, ensuring they are securely in place.
Charging Operation:
- Charging Dock Placement: Connect the adapter to the charging dock. Place the dock flat against a wall, ensuring 1 meter of clearance on the left and right, and 2 meters in front. Avoid highly reflective surfaces nearby.
- Turning On the Main Unit: Press the Start/Pause key to turn on. It's recommended to keep the unit in the charging dock after each use to ensure proper function.
- Main Unit Charge: Place the unit in the charging dock, ensuring the charging pole is properly positioned. Turn on the power switch to enter standby mode.
- A flashing red light indicates the battery needs charging.
- A flashing blue light indicates the battery is charging.
- The blue light turning off indicates charging is complete.
- Charge continuously for more than 6 hours before first use.
- Ensure the charging pole is correctly positioned.
Start/Stop Cleaning:
- Press the main unit's key or the remote control's 10 key to start or stop.
- Before selecting a mode, ensure the outer ring of the key is blue and the unit is activated. If not, briefly press the main unit's key.
- The unit enters sleep mode after 10 minutes of standby if the key light is off.
Mode Selection (via Remote Control):
- Fixed-point Mode: For concentrated dirt, the cleaner focuses on a designated area in a spiral route.
- Edge Mode: For cleaning room corners, the unit cleans around fixed objects (like walls) and returns to the charging dock.
- Return Charging Mode: The unit automatically returns to the charging dock when the battery is low. Can also be activated by pressing the 'Home' button or pressing the 'Power' button twice.
- Twice Cleaning Mode: Press 'Full Go' on the remote control. The robot cleans, returns to the dock for a full charge, then automatically cleans the same area again.
Suction Power Setting (via Remote Control):
- Press the 'Turbo' button to select Max, Standard, or Low suction power.
- Standard Mode: For daily cleaning.
- Max Mode: Increases suction power for deeper cleaning (e.g., rugs).
- Low Mode: Reduces noise, suitable for wooden and tiled floors.
Using the Water Permeable Mopping Cloth:
- Replace the dust compartment with the water tank assembly for mopping.
- Do not use the water tank assembly on carpet. Fold carpet edges to prevent soiling.
- Monitor water levels and refill as needed. Remove the water storage compartment when adding water.
- Remove the water permeable wiper assembly when charging.
- Add Water: Open the water inlet cover and add water.
- Attach Mopping Cloth: Close the water inlet cover and attach the mopping cloth.
- Install Water Tank Assembly: Press the dust compartment release button to remove the dust compartment and replace it with the water tank assembly.
WiFi Connection:
- Scan the QR code or search for 'Smart Life' to download the App.
- Register an account and log in following App instructions.
- Open the App and click {add device}, {Small Home App}, {Robot Vacuum}.
- Ensure the WiFi indicator is flashing or long press the key until it flashes. Click the WiFi indicator on the App.
- Enter WiFi account and password (supports 2.4G WiFi only).
Maintenance Features
Regular maintenance is crucial for the longevity and performance of the robot vacuum cleaner.
Dust Compartment and Filter:
- Turn off the main unit and unplug the charging dock before cleaning.
- Step 1: Remove the dust compartment, open its cover, and clean it.
- Step 2: Remove the dust filter. The HEPA filter should not be washed; pat it to remove dust.
- Step 3: Flush the dust compartment and the primary filter with water.
- Step 4: Dry the dust compartment and dust filter assembly naturally for more than 24 hours to ensure a long life.
Water Tank Assembly:
- Cleaning the Mopping Cloth:
- Remove the water tank assembly and mopping cloth after mopping.
- Rinse and dry the mopping cloth.
- Pour out any remaining water from the reservoir.
- Maintenance: Rinse the reservoir and allow it to dry.
Roller Brush Assembly and Cleaning:
- Remove the roller brush cover plate, then remove the roller brush.
- Cut off any hair wrapped around the roller brush.
- Use the cleaning brush to clean the roller brush.
- Installation: Take out the vacuum assembly, install the roller brush, replace the cover, and press to lock.
Side Brushes:
- Pull out the side brushes and wipe them with a clean cloth.
Other Assembly:
- Clean the universal wheel to reduce entangled hair.
- Clean the sensor to maintain its sensitivity.
- Use a dry cloth to clean the charging poles on the bottom of the main unit or the charging dock.
Alarms (Troubleshooting):
The manual provides a table of common issues, display lights, APP content, and solutions:
- Side brush jammed: Red light on, "Please check whether side brushes are jammed." -> Clean side brush.
- Fan abnormality: Red light on, "Motor cooling error." -> Wait an hour before using.
- Roller brush jammed: Red light on, "Please check whether roller brush is jammed." -> Clean roller brush.
- No dustbin inside: Red light on, "Please check whether dustbin is installed correctly." -> Check dustbin position.
- Failure of surface detection: Red light flashing, "Please check whether wheels are on the floor." -> Clean surface detector, ensure not lifted up.
- Stuck: Red light flashing, "Please help me, I'm stuck." -> Move to an open space.
- Low battery: Red light flashing, "Battery low, please recharge me." -> Manually move cleaner to charging dock.
- Charging abnormality: Red light flashing, "Please turn on the power switch in order to charge." -> Turn on power switch.
- Gyroscope fail: Red light flashing, "Navigation failure, please restart me." -> Turn on switch again.