13
contact support@blustream.co.uk | support@blustream.com.au
CUSTOM PRO MATRIX USER MANUAL
1. Power down the matrix and remove the external power supply prior to removing or installing the modular
boards.
2. Handle the boards with care, ensuring that components on the boards are not knocked or damaged during
installation.
3. Slide the board within the plastic guide rails on the inside of the chassis.
4. When installing the modular boards please make sure the board is located firmly within the chassis, and the
retaining screws are tightened by hand to secure the board into position. Do not overtighten.
5. The Custom Pro matrix can only support a maximum of 8 x inputs (2 x modular boards) and 8 x outputs (2 x
modular boards) for the 8x8 chassis, and a maximum of 16 x inputs (4 x modular boards) and 16 x outputs (4 x
modular boards) for the 16x16 chassis.
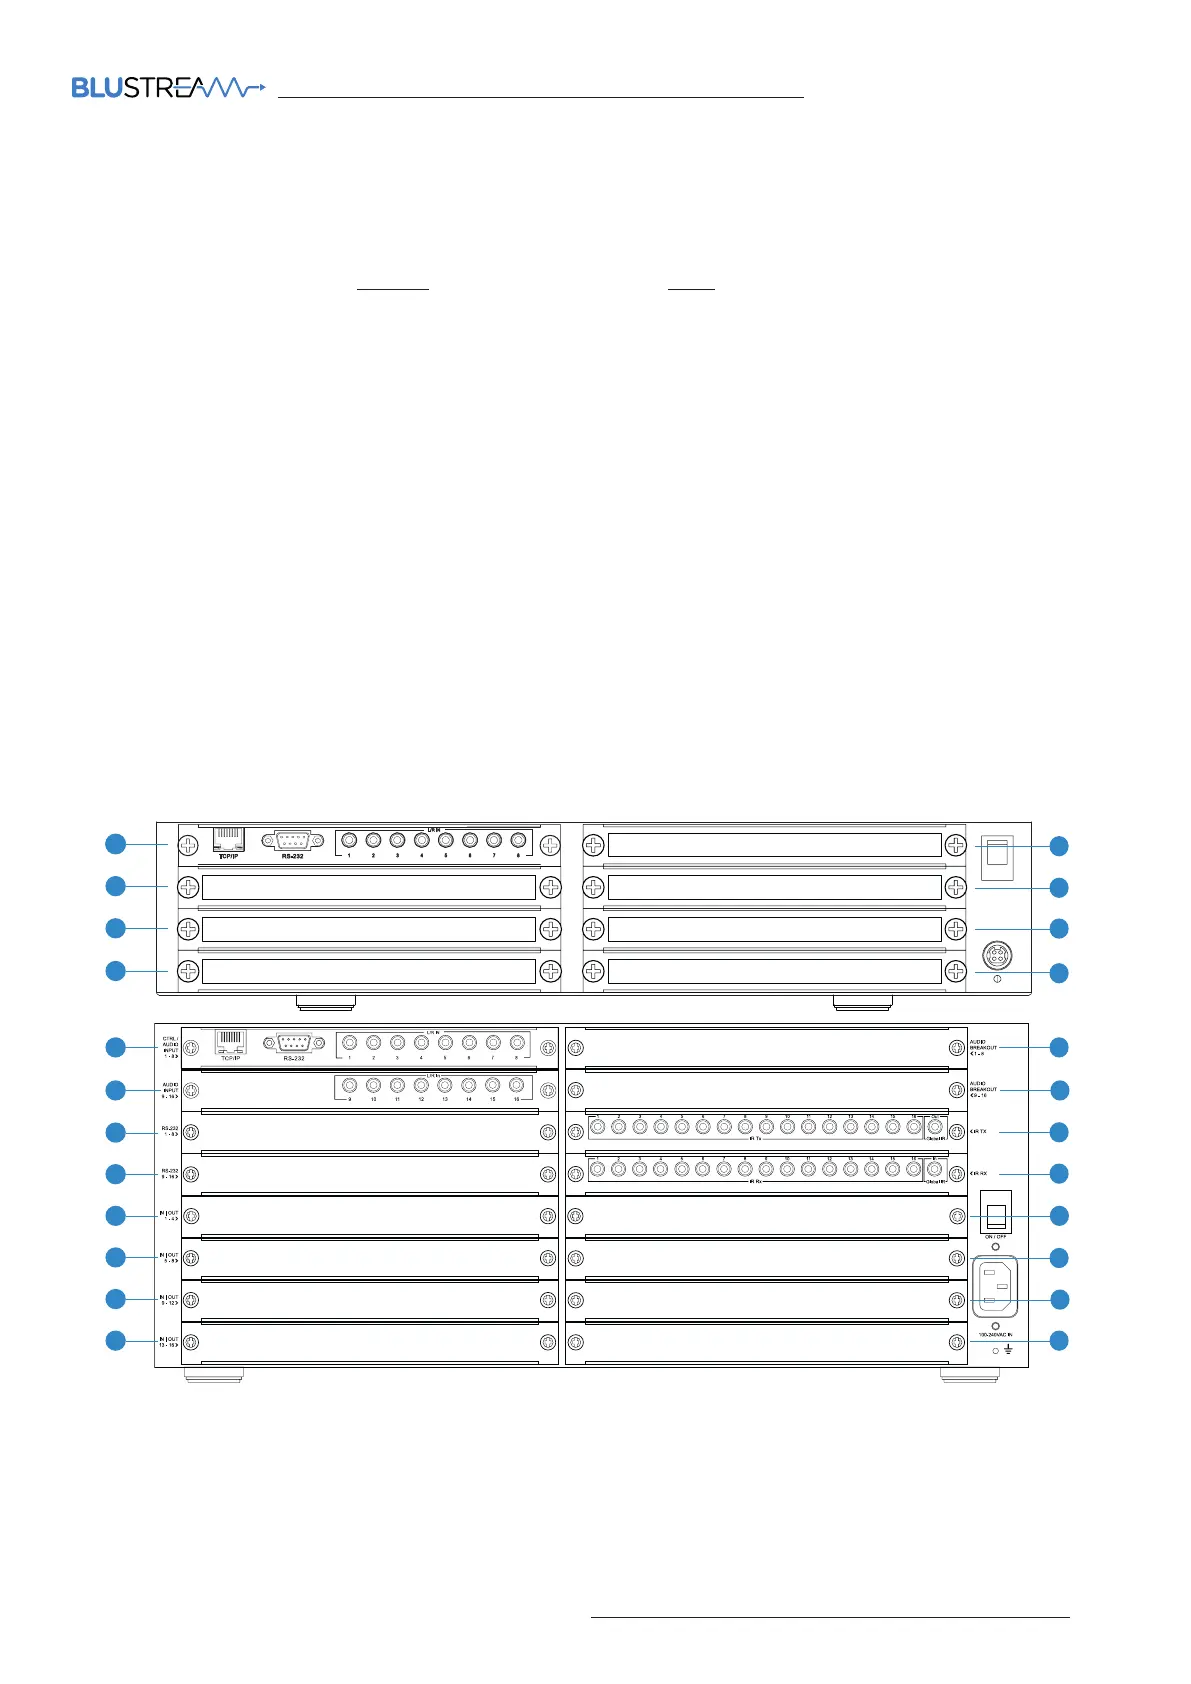
• Location/s A - main communication board only (supplied)
• Location/s B - RS-232 routing board/s only
• Location/s C - video input board/s only
• Location/s D - audio breakout board/s only
• Location/s E - bi-directional IR control board/s only (supplied in the 16x16 chassis)
• Location/s F - video output board/s only
Installing the modular matrix boards in the chassis is a simple process, but please note the following:
Installing Modular Matrix Boards
EE
Once all Custom Pro matrix modular boards are installed, connect the external power supply and power the matrix.
BB
CC
CC
AA
AA
BB
BB
CC
CC
CC
CC
DD
DD
FF
FF
DD
EE
EE
FF
FF
FF
FF
AA