03
contact support@blustream.co.uk / support@blustream.com.au
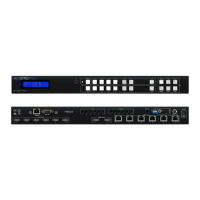
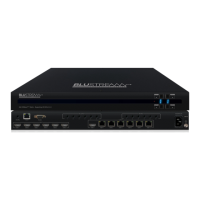
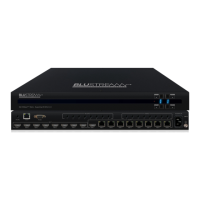
The HMXL88 8x8 HDMI Matrix has six HDbaseT (HDBT) lite outputs and
two HDMI only outputs enabling eight sources to be distributed to eight
HDTV displays.
Using HDBT lite chipsets six of the zone outputs can distribute 1080P video,
HD audio and bi-directional IR up to a distance of 70m over Cat5e/Cat6
cable. Each source can be routed to any display using the front-panel push
buttons, IR remote control, RS-232 interface, or via TCP/IP and EDID adjust-
ments are also available to ensure the better flexibility.
Introduction
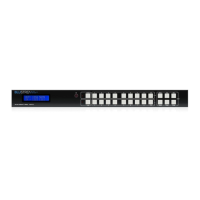
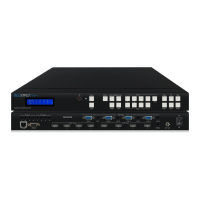
Front Panel
• Supports resolutions up to
1080p@60HZ,48-bit deep colour,
4k@30HZ
• HDBT chipset inside for the output
distance up to 70 metres at 1080p,
and up to 40m in 4k
• Power over cable (POH) enables
the matrix to power any attached
HEX70B-Rx receivers.
• Allows any source to be displayed on
multiple displays at the same time
• Allows any HDMI display to view any
HDMI source at any time
• Dolby TrueHD and DTS-HD master
audio pass through HDMI output
• Advanced EDID management for
rapid integration of sources and
displays
• Front-panel LCD display for status
feedback
• Multiple switching mode through
push button, IR, RS-232 control and
TCP/IP control
• Easy installation with rack-mounting
ears
• Full 3D pass- through.
• HDCP compliant
FEATURES:
1 2 4
11
5
12
6
13
7
14
8
15
9
16
3
10
1 LCD display – Show the status of
input-output selection, menu and
EDID info.
2 IR receiver window – Receives IR
from a hand held remote control or
processor.
3 Power LED indicator – Indicates the
power status of the matrix.
4 Power button – Press to toggle the
power of the matrix on/o.
5 HDMI output selection button 1 to
8 – Press to select the output from
1 to 8.
6 All button for HDMI outputs – Press to
select all of the outputs from 1 to 8.
7 Menu button – Press to enter EDID
setup mode. Three EDID segments
will display on the LCD panel listed
as: INPUT, VIDEO and AUDIO, for
example: IN1 1080P 2.0CH, means
to set 1080P 2.0CH EDID to INPUT1.
The blinking segment is the adjust-
able parameter.
8 Up – Press to change up through
the adjustable values.
9 ESC – Press to quit EDID setup
menu.
q Lock LED indicator – Indicate the
status of the key lock.
w Lock button – Press to lock the but-
tons on the front panel.
e HDMI input selection button 1 to 8 –
Press to select the input from
1 to 8.
r PTP – Press to mirror all inputs and
outputs (e.g. output 1 to input 1,
output 2 to input 2 and so on).
t Select – Press to select an EDID
parameter to change. Selected seg-
ment will blinking.
y Down – Press to change down
through the adjustable values.
u Enter – Press to set EDID to speci-
fied INPUT or copy EDID from speci-
fied OUTPUT to specified INPUT.