Step 1
Step 2
A1
68
87
87
2
A5
87
87
68
A2
13
87
87
68
A3
68
87
87
A4
4
90
69
69
B2
B3
47
46
B1
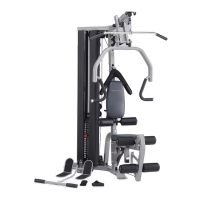
Note: Save one of the packaging Styrofoam blocks to aid assembly.
Open carton and unpack all parts. Check to ensure you have the following parts:
1. Main frame with plastic shrouds and pedal frames attached
2. Front Stabilizer
3. Rear Stabilizer
4. Front Upright Assembly
5. Monitor
6. Left and Right Foot Pedals
7. Assembly Kit with nuts, bolts, end caps, etc.
All other parts listed are pre-assembled.
Place a Styrofoam block from the box under the rear of the Main Frame (1). Remove the protective cover
from the rear of the Main Frame (1). Attach the Rear Stabilizer (13) to the Main Frame using the pre-
assembled Washers (87) and Bolts (68). Repeat the procedure for the Front Stabilizer (2).
Note: This step could require two people.
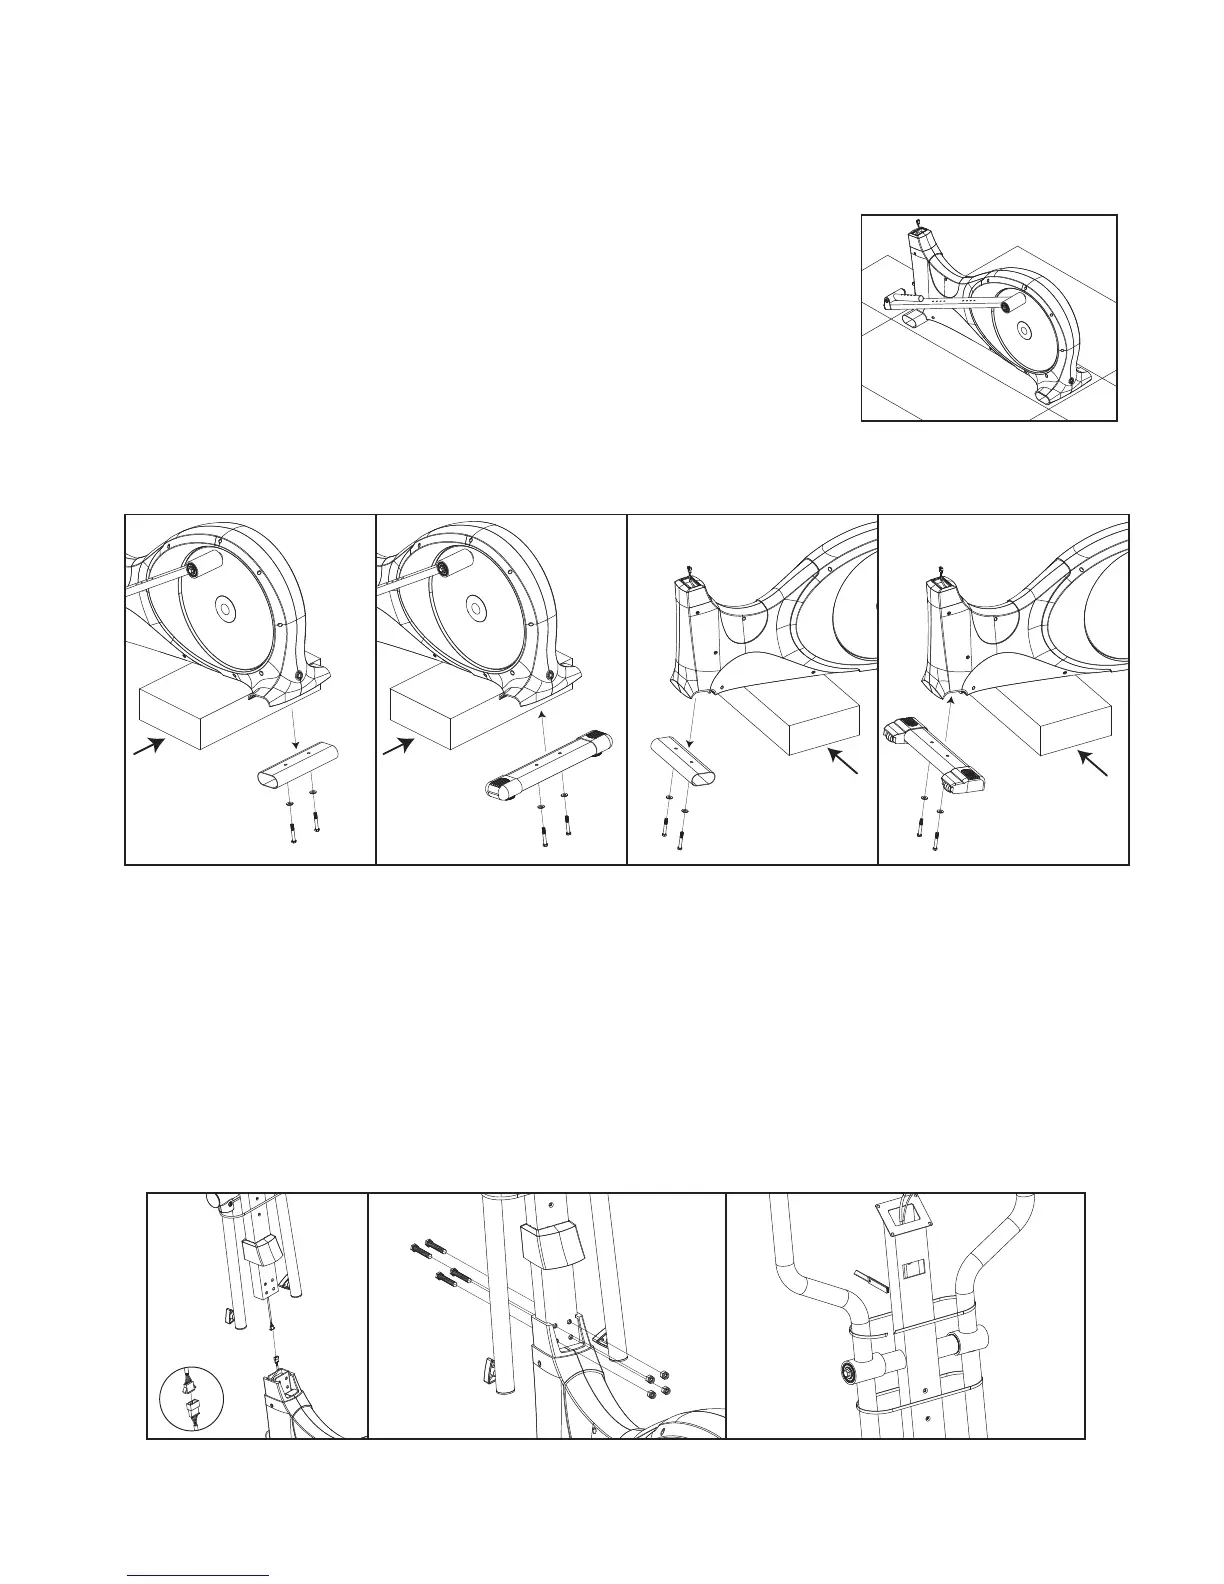
Slide the Hollow Cover (22) onto the Front Upright Assembly (4) as shown in figure B1. Connect the
Upper (47) and Lower (46) Computer Cables. Make sure the plugs are fully seated. Do not push too
hard. Slide the Front Upright Assembly (4) onto the Main Frame (1), and then attach using four 3/8" X 2-
1/4" Hex Threaded Bolts (69) and four 3/8" Nylon Nuts (90). Cut the retaining ties on the Dual Action
Arms.
5
Do not fully tighten the bolts (69) until after Step 3, and after the computer is attached and working properly.
 Loading...