Do you have a question about the BODYGUARDZ Pure 2 Edge and is the answer not in the manual?
Remove old protector and case, clean screen with alcohol wipe and cloth, then remove dust with a large sticker.
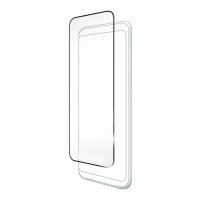
Place the installation guide over the phone to ensure proper alignment.
Check the screen again and remove any remaining dust using a large dust removal sticker.
Remove the new protector from its backing, align one end on the screen, and lay it down.
Use a cleaning cloth for big bubbles and small stickers for dust specks under the protector.
Take pride in your good work after successful installation.
Remove old protector and case, clean screen with alcohol wipe and cloth, then remove dust with a large sticker.
Place the installation guide over the phone to ensure proper alignment.
Check the screen again and remove any remaining dust using a large dust removal sticker.
Remove the new protector from backing, align one end, and use a squeegee to lay it onto the phone.
Use a squeegee for big bubbles and smaller stickers for dust specks under the protector.
Take pride in your good work after successful installation.
This document provides step-by-step instructions for installing BodyGuardz screen protectors, specifically for the Pure 2 Edge and PRTX families. It outlines a clear, user-friendly process designed to ensure a successful and bubble-free application, enhancing the protection of your smartphone screen.
The BodyGuardz screen protector serves as a protective layer for your smartphone's display. Its primary function is to shield the screen from scratches, scuffs, and minor impacts that can occur during daily use. By creating a barrier between the phone's original screen and external elements, it helps to maintain the pristine condition and resale value of your device. The Pure 2 Edge and PRTX protectors are engineered to offer robust defense while preserving the touch sensitivity and visual clarity of the underlying display. They are designed to adhere seamlessly to the screen, becoming an almost invisible shield that works tirelessly to keep your phone looking new. The installation process is crucial to the protector's effectiveness, ensuring full coverage and proper adhesion without compromising the user experience.
The installation process for both the Pure 2 Edge and PRTX screen protectors is designed to be straightforward, even for first-time users. The instructions emphasize a methodical approach, starting with thorough screen preparation.
Initial Cleaning: The first step involves removing any existing screen protector or phone case. This is followed by a comprehensive cleaning of the phone screen using an alcohol wipe and a cleaning cloth. This ensures that the screen is free from oils, smudges, and grime that could interfere with adhesion.
Dust Removal: A critical step in achieving a bubble-free installation is the removal of dust. The instructions recommend using a large dust removal sticker to meticulously pick up any remaining dust particles from the screen. This attention to detail prevents tiny specks from getting trapped under the protector, which can lead to unsightly bubbles.
Install Guide (Pure 2 Edge Family): For the Pure 2 Edge protectors, an "install guide" is provided. This guide is placed over the phone, likely to assist in aligning the screen protector perfectly. Proper alignment is essential for full screen coverage and to ensure that the protector does not obstruct any sensors, cameras, or speakers.
Screen Check: Before applying the protector, users are advised to perform another screen check to ensure no new dust has settled. If any dust is found, the large dust removal sticker should be used again. This iterative cleaning process is key to a flawless application.
Protector Application:
Bubble Removal:
Final Result: The final step encourages users to "Take pride in your good work!" This highlights the satisfaction of a successful, self-installed screen protector that provides optimal protection.
While the screen protector itself is a maintenance feature for the phone, the instructions also implicitly guide users on maintaining the protector's integrity during installation.
In summary, the BodyGuardz screen protector installation guide is designed to empower users to effectively protect their devices. By following these clear, step-by-step instructions, users can achieve a professional-grade installation, ensuring their phone screens remain safeguarded against the rigors of daily use. The focus on cleanliness, precise application, and post-application refinement underscores a commitment to both product quality and user experience.
| Type | Screen Protector |
|---|---|
| Thickness | 0.33 mm |
| Oleophobic Coating | Yes |
| Touch Sensitivity | Maintains touch sensitivity |
| Material | Aluminosilicate Glass |
| Compatibility | Specific to device models (varies) |
| Features | Edge-to-edge coverage |
| Protection | Scratch and impact resistance |
| Installation | Easy |