EasyManua.ls Logo

BODYGUARDZ PURE User Manual

Default Icon
6 pages
To Next Page IconTo Next Page
Page #1 background imageLoading...
Page #1 background image
INSTALLATION INSTRUCTIONS
bodyguardz.com
BODYGUARDZ PURE®/PURE 2/SPYGLASS® WITH EXPRESS ALIGN
®
EXPRESS ALIGN
INSTALL
BREAKDOWN:
OPEN TO GET STARTED
1
2
3
4
EXPRESS ALIGN TRAY
This plastic tray precisely aligns the glass to your device.
4
CAP SHEET
A clear film that protects the anti-smudge coating on the glass.
3
GLASS PROTECTOR
The thin, ultra-strong glass that will protect your device.
2
RELEASE LINER
A clear film that protects the adhesive side of the protector.
1
While holding the
tray, peel o the
release liner to
expose the adhesive,
then place the tray
on top of your device.
Through the opening in
the tray, firmly press
and hold the glass
protector down with
your fingers, while
pulling the tray o with
your other hand.
Use the included
cleaning cloth to
push out any bubbles,
then peel o the
cap sheet.
Nice Work!
Installation is complete.
1
2
3
Check orientation
of phone and protector
Extra bubbles will
disappear within 24-48 hrs.
Tray will come off and
protector will adhere to phone
DUST REMOVAL
AFTER INSTALLATION:
Use the provided dust
removal stickers to pull out
any trapped dust. Carefully
lift up the corner of the
glass closest to the dust
particle and place the sticky
side of the strip against the
piece of dust. Then, pull dust
sticker straight out.
TO REMOVE PROTECTOR:
Carefully lift one corner and
slowly pull the glass o
your device.
BEFORE
YOU BEGIN
Remove case from
your phone (if any)
Place phone on a flat
surface, screen-up
Clean your phone’s
screen thoroughly
Watch our install video:
bodyguardz.com/install
PRO TIPS
Question and Answer IconNeed help?

Do you have a question about the BODYGUARDZ PURE and is the answer not in the manual?

BODYGUARDZ PURE Specifications

General IconGeneral
BrandBODYGUARDZ
ModelPURE
CategoryCell Phone Accessories
LanguageEnglish

Summary

Express Align Installation

Before You Begin

Prepare your device and workspace before installing the screen protector.

Component Breakdown

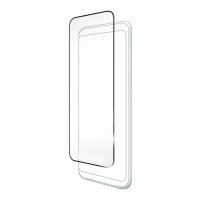
Identifies the different parts included in the installation kit.

Installation Steps

Step-by-step guide for applying the screen protector using the Express Align tray.

Without Express Align Installation

Dust Prevention

Crucial step to clean the screen thoroughly before applying the protector.

Installation Process

Step-by-step guide for applying the screen protector without the alignment tray.

Post-Installation Tips

Advice on removing trapped dust and how to remove the protector.

HD Contour & HD Impact Installation

Preparation

Clean your device screen and wash your hands before starting the installation.

Installation Steps

Step-by-step guide for applying the HD Contour and HD Impact screen protectors.

UltraTough Installation

Preparation

Prepare your device and hands before installation for best results.

Gel Application Method

Detailed instructions for applying the protector using the gel method.

Dry Application Method

Detailed instructions for applying the protector using the dry method.

Armor Carbon Fiber Installation

Easy Installation Process

Guide on applying the carbon fiber armor skin using air-release technology.

Apple Device Specifics

Special considerations for applying the armor skin to Apple devices.

UltraTough MacBook Installation

Preparation and Application Gel

Prepare your MacBook and understand the gel application for protector installation.

Installation Steps and Tips

Step-by-step guide and specific tips for installing the UltraTough protector on a MacBook.

Related product manuals