6
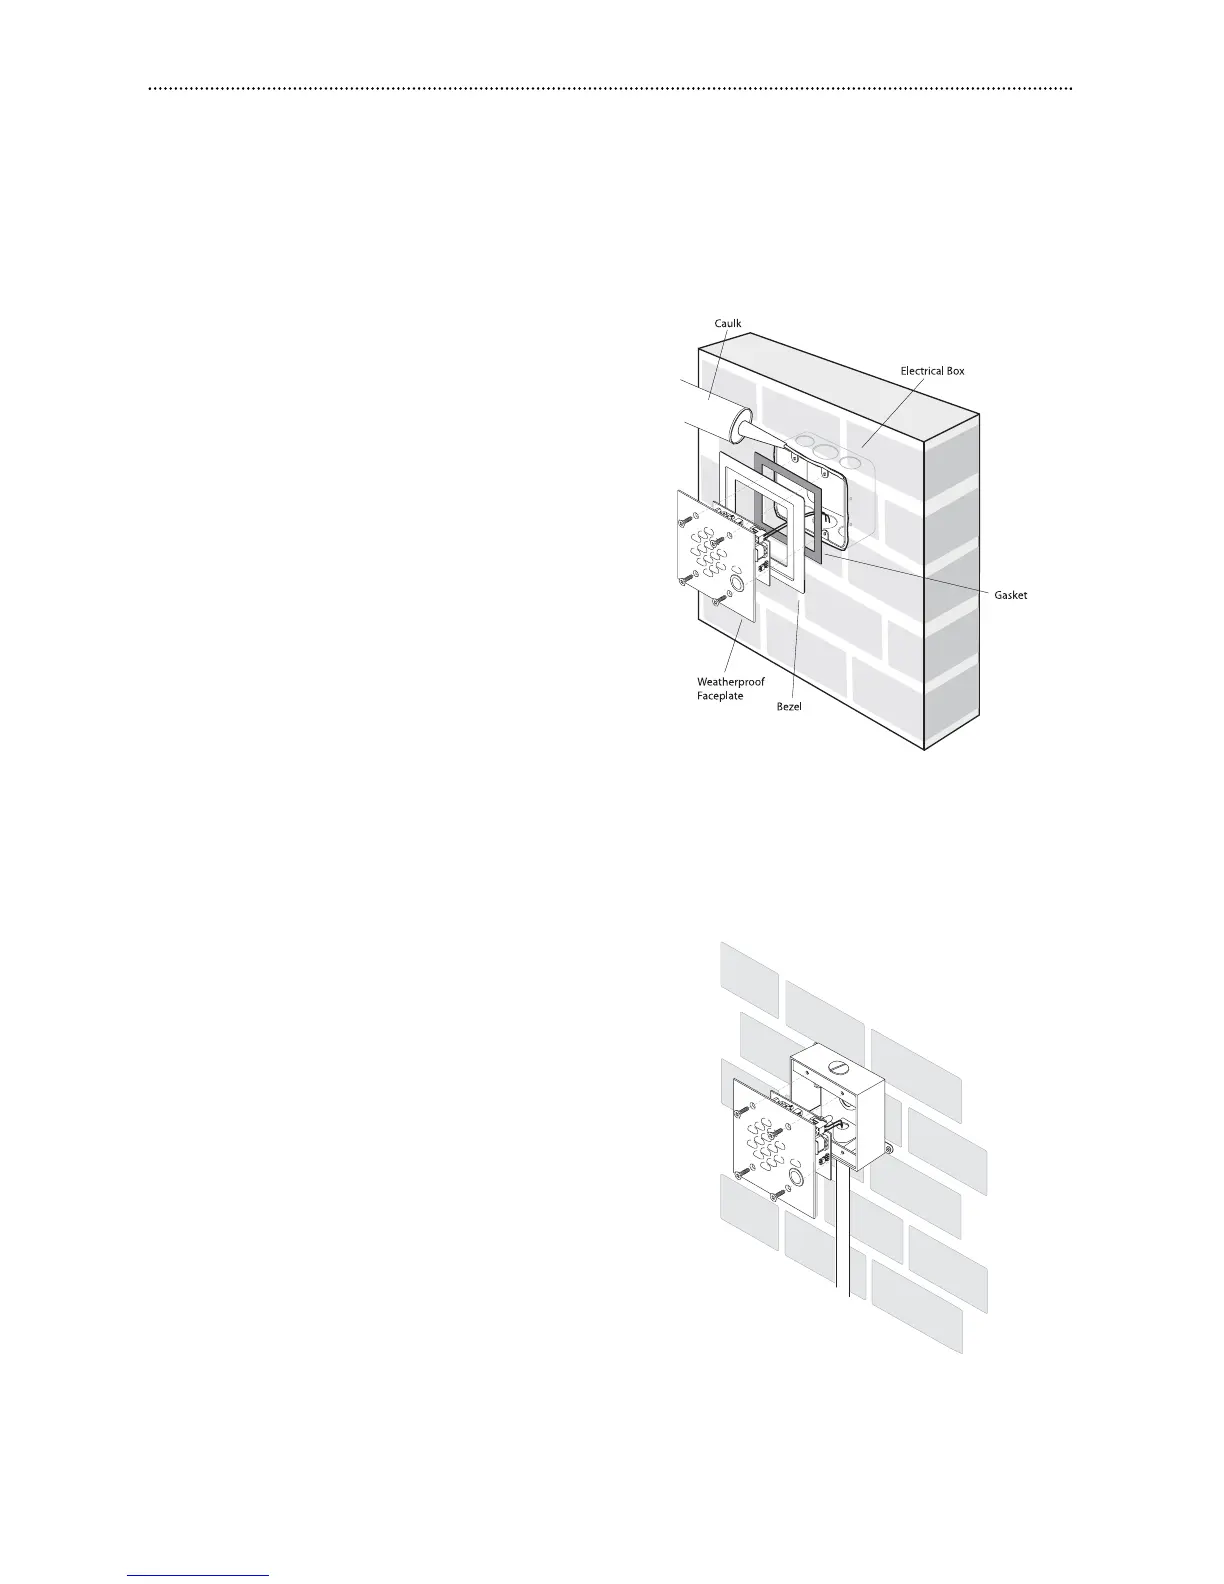
Installation
The ADP1 is designed to fit in most standard dual gang electrical boxes. Make sure to
use the proper box type for intended installation (e.g., flush or surface mount, indoor
or outdoor location, etc.).
Flush Mounting the ADP1 (Indoor/Outdoor)
1. Cut rough opening and install
appropriate electrical box.
Note: The box must be flush with the
surface within 1/16".
2. For outdoor installations, caulk
around the box, filling any gaps
between the box and the rough
opening.
3. Attach the self-adhesive gasket to
the back side of the bezel.
4. Make electrical connections and
attach the faceplate to the electrical
box while capturing the bezel
between the two using the four hex
drive screws (tool provided).The
faceplate fits into the depression in
the bezel.
Surface Mounting the ADP1
(Indoor/Outdoor)
1. Mount electrical box.
2. Make electrical connections and
attach the faceplate to the electrical
box using the four hex drive screws
(tool provided). Do not use the
bezel for surface mount installations
as the elevated sharp corners of the
bezel could pose a hazard.