7
Purging and Priming the Sprayer
All new units are performance-tested at the factory and are shipped with test uid in the uid secon to prevent corrosion during shipment and storage. If you
have already used your pump, some water or solvent used in cleaning may remain in the uid secon. Whether your sprayer is new or if you have already used
it, this uid must be purged and thoroughly cleaned out of the system prior to use. Follow the steps below.
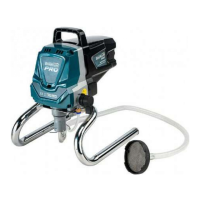
1. Place a full container of spraying material under-
neath the sucon tube (a). Secure the return tube (b)
into a waste container.
2. Turn the pressure control dial to maximum pressure.
Turn the PRIME/SPRAY knob to PRIME.
3. Plug in the sprayer and move the ON/OFF switch to
the ON (l) posion.
4. Switch the pump OFF (O). Remove the return tube
from the waste container and place it in its operang po-
sion above the container of spraying material. Use the
metal
The unit will begin to draw material up the sucon
tube, into the pump, and out the return tube. Let the
unit cycle long enough to remove test uid from the
pump, or unl spray material is coming from the re-
turn tube.
Purging and Priming the Spray Hose
1. Unlock the spray gun and turn the PRIME/SPRAY
knob to PRIME.
The spray p SHOULD NOT be aached to your
spray gun when purging your spray hose.
2. PULL the trigger and aim the spray gun at the side wall of a
waste container. If using oil-based materials, the spray gun must
be grounded while purging (see warning below).
Keep hands clear from uid stream. Ground the gun by holding it
against the edge of a metal container while ushing. Failure to do
so may lead to a stac electric discharge which may cause a re.
3. While pulling the trigger, switch the pump ON (l), AND turn the PRIME/SPRAY knob to SPRAY. Hold the trigger unl all air,
water, or solvent is purged from the spray hose and material is owing freely.
If the PRIME/SPRAY knob is sll on SPRAY,there will be high pressure in the hose and spray gun unl the PRIME/SPRAY knob is
turned to PRIME.
 Loading...