en Vacuum-sealing in the container
8
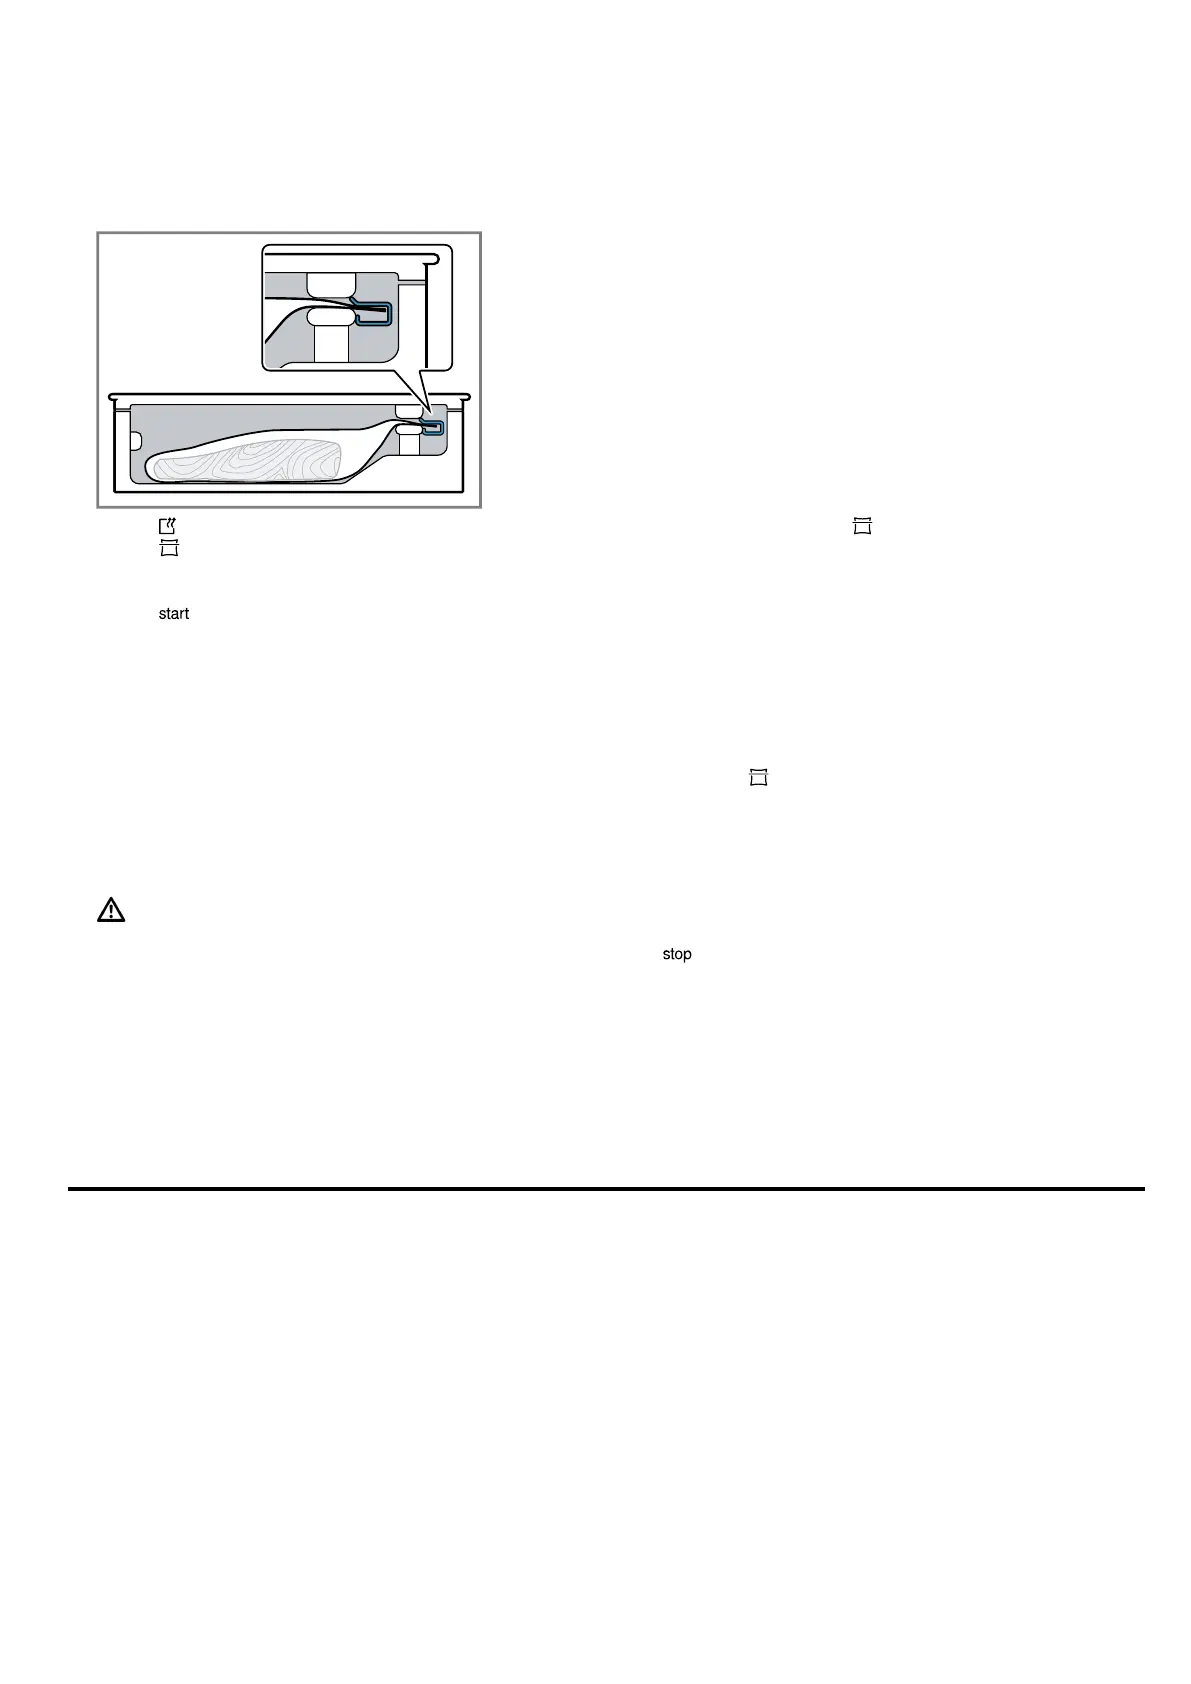
4.
Ensure that the centre of the bag and the ends of
the bag are lying flat on top of each other on the
heat-sealing bar. To ensure that the heat-sealing
seam is perfectly closed, secure the bag using the
bag clamp.
5.
Touch to select the vacuum-sealing level.
6.
Touch to select the heat-sealing time.
7.
Tightly close the glass lid and hold it there for a few
seconds.
8.
Touch to start the vacuum-sealing process.
a The vacuum-sealing process starts. The vacuum-
sealing level indicators pulsate in orange one after
the other until the selected value has been reached.
a The heat-sealing process starts. The vacuum-sealing
level indicators pulsate in orange one after the other
until the selected level has been reached.
a The vacuum-sealing process can take up to
twominutes.
a At the end of the process, the compartment is ventil-
ated. A signal tone will sound.
9.
Once the vacuum-sealing process is finished, open
the glass lid.
10.
WARNING‒Risk of burns!
The heat-sealing bar in the vacuum-sealing compart-
ment becomes extremely hot if the appliance is
used frequently and there are long heat-sealing
times.
▶ Never touch the hot heat-sealing bar.
▶ Keep children at a safe distance.
Remove the heat-sealed vacuum-sealing bag from
the compartment.
11.
After vacuum-sealing, check the heat-sealing seam
on the bag.
‒ Carefully pull the seam apart.
‒ If the seam does not stay together, select a
higher heat-sealing level.
‒ If the seam is deformed, select a lower heat-seal-
ing level or leave the appliance to cool down.
Note:If you vacuum-seal food in bags several times in
succession, the heat-sealing bar becomes increasingly
hotter. This may impair the quality of the heat-sealing
seam. After several vacuum-sealing processes, select a
lower heat-sealing time or leave the appliance to cool
for approx. 2minutes between the processes.
7.4 Early heat-sealing
Use this function if you only want to pack your delicate
food in a bag so that it is air-tight, without the contents
sitting too tightly against the bag.
1.
To stop the vacuum-sealing process and heat-seal
the bag early, touch .
a The appliance displays the vacuum-sealing level un-
til it is reached.
a At the end of the process, the compartment is ventil-
ated.
a An audible signal sounds.
2.
Open the glass lid.
3.
Remove the heat-sealed vacuum-sealing bag from
the compartment.
Note:To heat-seal the bag, the vacuum-sealing drawer
requires a specific degree of vacuum.
If you touch first, the vacuum-sealing drawer pumps
air out of the compartment until this degree has been
reached. The bag is then heat-sealed.
7.5 Cancelling the vacuum-sealing process
in the bag
1.
To cancel the vacuum-sealing process early, touch
.
a The appliance displays the vacuum-sealing level un-
til it is reached.
a The bag is not heat-sealed.
a The lid opens slightly and the compartment is ventil-
ated.
a An audible signal sounds.
2.
Remove the vacuum-sealing bag from the compart-
ment.
8 Vacuum-sealing in the container
In the container, vacuum-sealed food has a longer shelf
life.
8.1 Vacuum-sealing in the container
Vacuum-seal the food in a suitable vacuum-sealing
container in order to preserve the food for longer.
1.
Open the glass lid.
2.
Plug the vacuuming adaptor into the air outlet.
 Loading...