F220 Series | Installation Instructions | 4.0 Wiring information EN | 8
Bosch Security Systems | 8/05 | 4998138694D
4.6 Wiring the F220-B6RS
The alarm loop relay (Terminals NO and C) is a Form
A relay rated 0.5 A use at 60 VDC
Table 8: F220-B6RS terminal functions
(see Figure 12)
DC−IN/OUT
a1/a2
DC + IN b1
DC + OUT b2
Remote LED output c
Alarm Contact NO, Form A contact (Terminal 1)
Alarm Relay C, Form A contact (Terminal 2)
Interconnect Feature
INT, SYNC (see Figure 12)
Terminal 3
Auxiliary DC supply SEP+ (Terminal 4)
Auxiliary DC supply SEP- (Terminal 5)
If using external supply switches, 1 and 2 must be in the OFF
position.
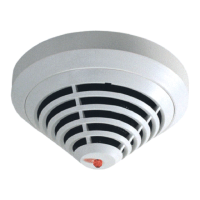
4.7 135/135F/190F/P/PTH/PC/PTHC
Heat/Photoelectric Smoke Detectors
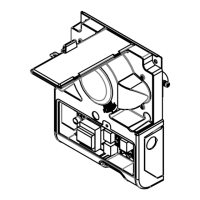
1. Mount and wire the base according to its
instructions.
2. Attach the base skirt by aligning the four hardware
keys, or turn the base skirt slowly clockwise until it
rests in place. Press firmly to latch it onto the fixing
clamps (See Figure 10).
- Use the tamper tab (locking bar) to prohibit
detector removal as follows:
3. The snap off locking bar (X) is part of the base
molding. Shift the locking bar (X) into the position
shown in Figure 9 to engage it.
4. Install the detector by lining up the LED on the
detector head with the bar on the base skirt and
turning clockwise. When the LED lines up with the
“T” on the base skirt the detector is secure (see
Figure 11).
Figure 9: Activating the locking bar (X)
1 2
3
X
X
X
X
X
X
1 - Locking bar (X) prior to removal
2 - Locking bar (X) mounted but inactive
3 - Lock activated
The detector skirts and heads are keyed.
Do not force onto the bases.
Figure 10: Attaching the base skirt
1
2
1 - Hardware keying (four places)
2 - Snap detail (four places)

 Loading...