-11-
affect your results. Secure and let the laser tool re-level.
– After re-leveling use the laser receiver or
visible line to locate and mark the position
of the laser on the wall (Position B).
– Mark the centerline between Position A
and Position B (Position C). Calibration is
necessary if the vertical difference between
Position A and Position C or Position B
and Position C is greater than the specified accuracy of
3/32” (2.4mm).
– Repeat the above steps to ensure a correct reading. If
the distance is greater than specified accuracy, you will
need to calibrate the laser tool.
Calibration
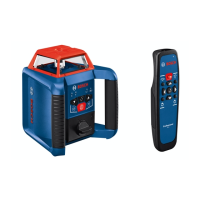
Calibration of the laser tool can be done using the RC
1 Remote 19 (optional accessory). After the Accuracy
Check do the following steps, being careful not to change
the height of the laser tool.
– After completing the Accuracy Check for the X axis
(Y axis) turn off the laser tool, being careful not to change
the height of the laser tool.
– Switch the laser tool on by pressing and
holding the On/Off button 2 for a minimum of
15 seconds. When the leveling indicator 1
lights, release the On/Off button 2. Within
3 seconds, press and release the On/
Off button 2. The laser tool in now ready to
calibrate the X axis (Yaxis).
– While the laser tool is leveling and the leveling motor
is running, the leveling indicator 1 flashes rapidly.
Once the laser tool is ready to be adjusted, the leveling
indicator 1 flashes slowly.
– Use the remote 1A and 2A buttons to
position the laser line onto Position C that
was determined with the accuracy check.
When moving the position of the laser line,
the leveling indicator 1 may flash rapidly. The
laser line will be in its new position once
the leveling indicator 1 flashes slowly.
– When the laser line is positioned to Position
C, press the remote 5A button to save
the calibration. This will also turn the laser tool off.
– Repeat the calibration steps for the Y
axis. Pressing the remote 4A button switches
between the X axis and Y axis for calibration.
The shock-warning indicator 3 flashes
red when the Y axis is selected and the
leveling indicator 1 turns off. Make sure the
correct axis is selected by observing the
leveling indicator 1 and shock-warning
indicator 3 before positioning the laser line and saving
the calibration.
– After calibration is completed, repeat the
Accuracy Check to ensure that the laser tool
has the correct calibration.
If you are unable to calibrate the laser tool, have it
checked at a Bosch after sales service agent.
1A
2A
3A
4A
5A
6A
5A: Save data
4A: Change axis (You can adjust X axis, change to y
axis, adjust it, then save data for both)
3A: Switch between rotate and spot mode
2A & 1A: Move beam up and down
7A
 Loading...