10 | English
1 619 P10 336 | (15.10.12) Bosch Power Tools
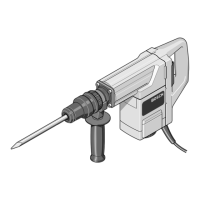
Intended Use
The machine is intended for chiselling work in concrete, brick,
masonry and asphalt as well as for driving in and compacting,
when using the respective accessories.
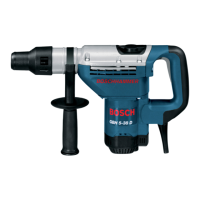
Product Features
The numbering of the product features refers to the illustra-
tion of the machine on the graphics page.
1 Dust protection cap
2 Locking sleeve
3 Chisel adjustment switch (Vario-Lock)
4 Lock-on button for On/Off switch
5 On/Off switch
6 Auxiliary handle (insulated gripping surface)
7 Handle (insulated gripping surface)
8 Knurled nut for auxiliary handle
Accessories shown or described are not part of the standard deliv-
ery scope of the product. A complete overview of accessories can
be found in our accessories program.
Technical Data
Assembly
Before any work on the machine itself, pull the mains
plug.
Auxiliary Handle (see figure A)
Operate your machine only with the auxiliary handle 6.
The auxiliary handle 6 can be set to any position for a secure
and low-fatigue working posture.
– Loosen the knurled nut 8, rotate the auxiliary handle 6
around the axis of the machine to the required position and
tighten the knurled nut 8 again.
– The auxiliary handle 6 can be mounted to a different posi-
tion. For this, completely unscrew the knurled nut 8 and
then pull out the hexagon bolt upward. Pull off the auxiliary
handle 6 to the side and turn around the remaining clamp-
ing element by 180°. Mount the auxiliary handle 6 in re-
verse order.
Changing the Tool
With the SDS-max tool holder, simpler and easier tool chang-
ing is possible without additional aids.
The dust protection cap 1 largely prevents the penetration of
dust into the tool holder during operation. When inserting the
tool, pay attention that the dust protection cap 1 is not dam-
aged.
A damaged dust protection cap should be changed im-
mediately. We recommend having this carried out by
an after-sales service.
Inserting (see figure A)
– Clean and lightly grease the shank end of the tool.
– Push back the locking sleeve 2 and insert the tool in a twist-
ing manner into the tool holder. Release the locking sleeve
2 again in order to lock the tool.
– Check the latching by pulling the tool.
Removing (see figure B)
– Push back the locking sleeve 2 and remove the tool.
Dust/Chip Extraction
Dusts from materials such as lead-containing coatings,
some wood types, minerals and metal can be harmful to
one’s health. Touching or breathing-in the dusts can cause
allergic reactions and/or lead to respiratory infections of
the user or bystanders.
Certain dusts, such as oak or beech dust, are considered
as carcinogenic, especially in connection with wood-treat-
ment additives (chromate, wood preservative). Materials
containing asbestos may only be worked by specialists.
– Provide for good ventilation of the working place.
– It is recommended to wear a P2 filter-class respirator.
Observe the relevant regulations in your country for the
materials to be worked.
Operation
Starting Operation
Observe correct mains voltage! The voltage of the pow-
er source must agree with the voltage specified on the
nameplate of the machine. Power tools marked with
230 V can also be operated with 220 V.
Switching On and Off
–To start the machine, press the On/Off switch 5 and keep
it pressed.
– To lock the pressed On/Off switch 5, press the lock-on
button 4.
–To switch off the machine, release the On/Off switch 5 or
when it is locked with the lock-on button 4, briefly press
the On/Off switch 5 and then release it.
When not using the power tool, switch it off in order to save
energy.
Demolition Hammer GSH 5
Article number
3 611 C37 0..
Rated power input
W1100
Impact rate
min
-1
2850
Impact energy per stroke ac-
cording to EPTA-Procedure
05/2009
J7.5
Chisel positions
12
Tool holder
SDS-max
Weight according to
EPTA-Procedure 01/2003
kg 5.6
Protection class
/II
The values given are valid for a nominal voltage [U] of 230 V. For differ-
ent voltages and models for specific countries, these values can vary.
OBJ_BUCH-1745-001.book Page 10 Monday, October 15, 2012 1:30 PM
 Loading...