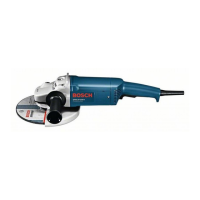
ASIEN • Printed in Germany • BA 1 609 929 C74 • GWS 21/24/26 • OSW 09/01
English - 5
Screw on the clamping nut 11 and tighten with
the two-hole spanner (see Section “Quick Clamp-
ing Nut”).
An O-ring (plastic
part) is inserted in
the retainer mount-
ing flange 9 around
the spigot.
If the O-ring is missing or damaged, it will have
to be replaced (Stock No. 1 600 210 039) before
the retainer mounting flange 9 is mounted.
☞
After mounting the grinding tool but be-
fore switching it on, check that the
grinding tool is correctly mounted and
that it can turn freely.
Flap disc
Remove the protective hood 6 and mount the
hand protector 17. Place the special retainer
mounting flange 9 (optional extra, Stock No.
2 605 703 028) and the flap disc on the grinder
spindle 5. Screw on the clamping nut 11 and
tighten with the two-hole spanner.
Rubber Sanding Plate 19
Remove the protective hood 6 and mount the
hand protector 17.
Prior to mounting the rubber sanding plate 19,
place the 2 spacing discs 18 onto the grinding
spindle.
For mounting, see the illustration page.
Screw on the round nut 21 and tighten with the
two-hole spanner.
Cup Brush 22/Disc brush
Remove the protective hood 6 and mount the
hand protector 17.
The grinding tool must be screwed onto the grind-
ing spindle 5 until it rests firmly against the
grinder spindle flange at the end of the grinder
spindle threads. Tighten with an open-ended
spanner.
Grinding cup
When working with grinding cups, use a
special protective hood for the grinding
cup 15.
The grinding cup 16 should protrude from the
hood 15 only as far and as long as absolutely
necessary to perform the work.
Reset the protective hood 15 to this distance.
For mounting, see the illustration page.
Screw on the clamping nut 11 and tighten with a
suitable offset two-hole spanner.
All grinding tools described in these operating in-
structions can be used (roughing and cutting
discs of synthetic resin-bonded, fiber-reinforced
material).
The permissible speed [rpm] or the circumferen-
tial speed [m/s] of the grinding tools used must
correspond minimally to the values given in the
table.
For this reason, always observe the permissible
rotational/circumferential speed on the label of
the grinding tool.
The quick clamping nut 12 (optional extra) can be
used instead of the clamping nut 11. Grinding
tools can be mounted without using tools.
The quick clamping nut 12 may be used only
for roughing and cutting discs.
Use only a flawless, undamaged quick clamp-
ing nut 12.
When screwing on, take care that the printed side
does not point to the grinding disc. The arrow
must point to the index mark 28.
9
Approved Grinding Tools
max.
[mm] [mm]
Db d[rpm] [m/s]
180
230
8
8
22.2
22.2
8 500
6 500
80
80
180
230
–
–
–
–
8 500
6 500
80
80
100 30 M 14 8 500 45
Quick Clamping Nut
(Optional Extra)
b
d
D
D
D
b
d
GWS 21/24/26 (C74) - Buch Seite 5 Mittwoch, 17. Oktober 2001 11:21 11
10 • 1 609 929 C74 • TMS • 02.08.01
 Loading...