en Installation instructions
46
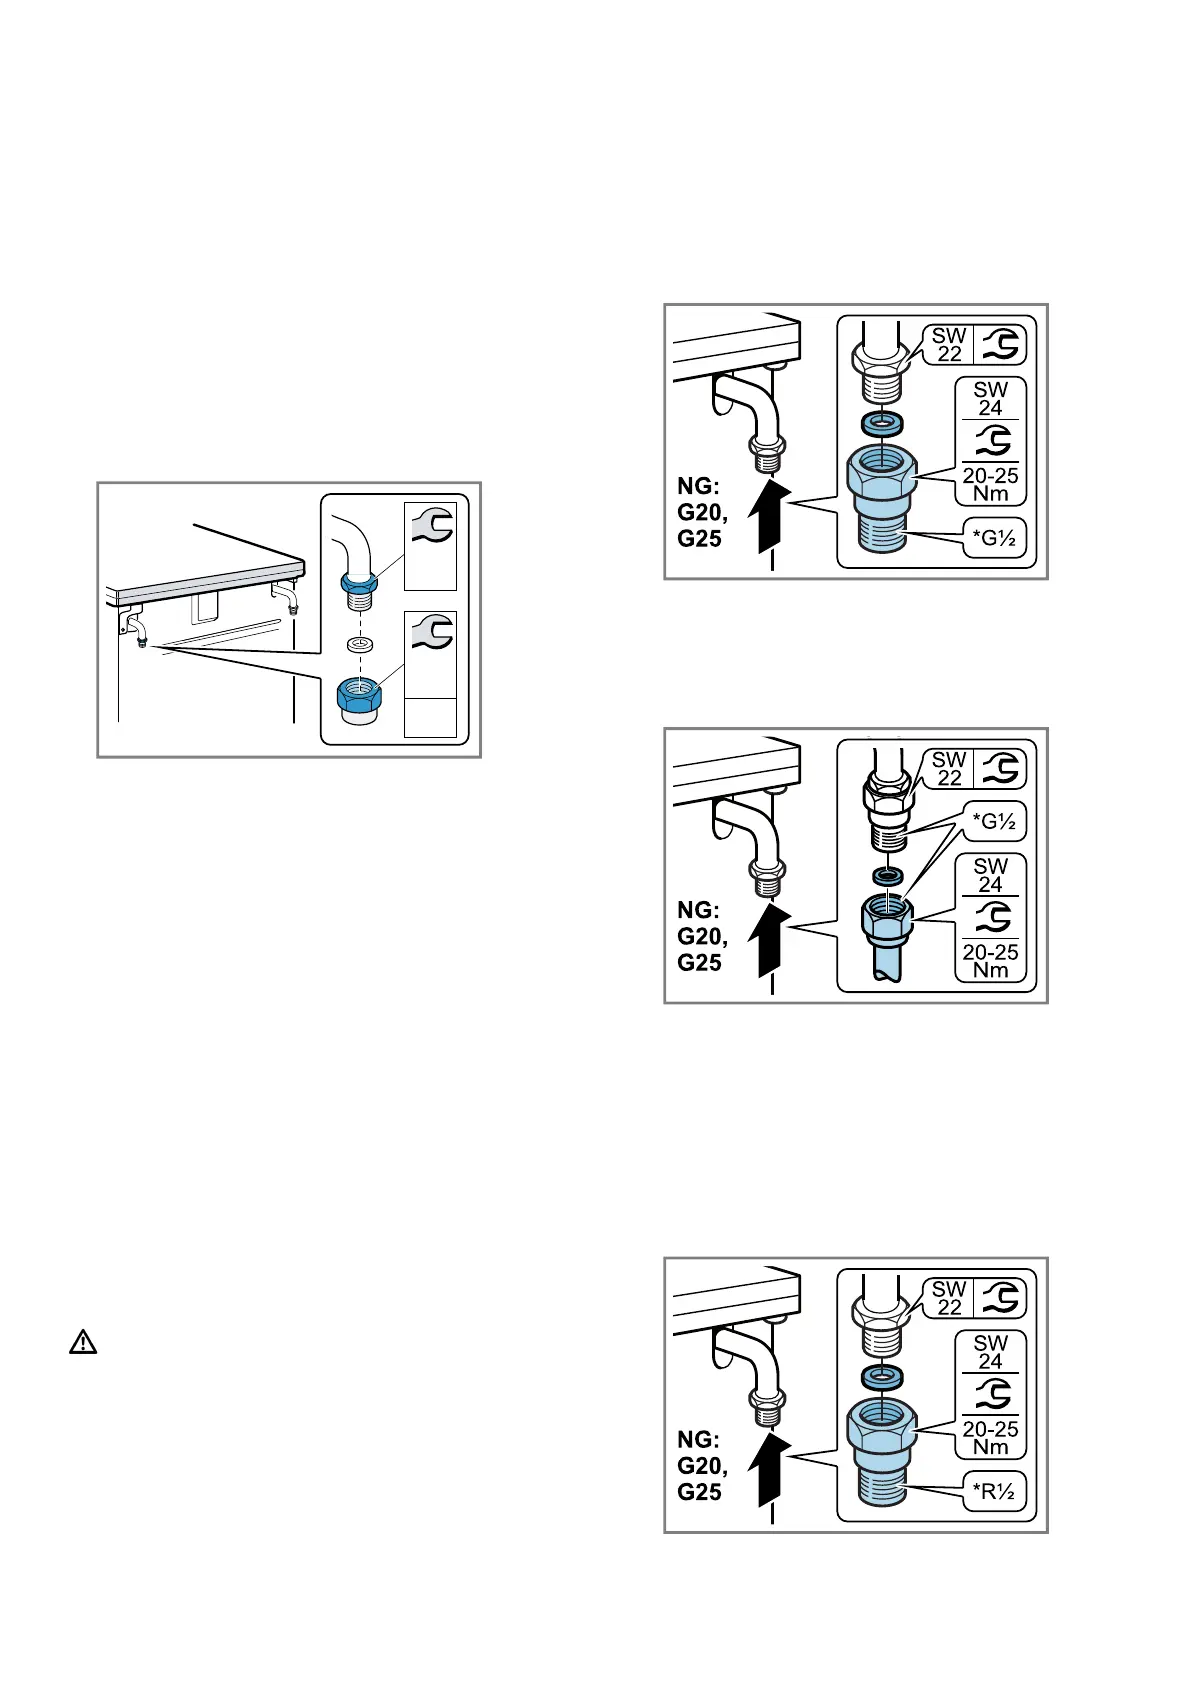
23.3 Selecting the gas connection side
On many appliances, you can carry out the gas con-
nection on the right- or left-hand side. If necessary, you
can change the connection side.
Requirements
¡ Shut off the main gas line.
¡ Seal the gas connecting piece on the side that is not
being used with a blind plug.
1.
Place the new seal in the blind plug. Ensure that the
seal is seated correctly.
2.
Note:Use a torque wrench when connecting the ap-
pliance.
Secure the gas connecting piece to the appliance
using a 22 mm spanner and place the blind plug
onto the connecting piece using a 24 mm spanner.
3.
After changing the connection side, carry out a leak
test. You can find additional information about this in
the section entitled "Leak and function test"
→Page50.
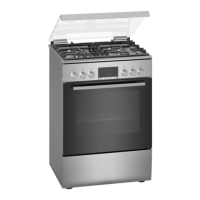
23.4 Gas connection
These instructions apply only if the appliance is in-
stalled in countries that are specified on the rating
plate.
If the appliance is installed and used in a country that
is not specified on the rating plate, add installation and
assembly instructions that contain the necessary in-
formation for the connection conditions for the appli-
ance in the respective country.
Note:Use a torque wrench when connecting the appli-
ance.
Natural gas connection (NG)
If you are using natural has (NG), the gas supply
should be connected via a gas pipe or a safety gas
hose with threaded fittings at both ends.
Connection types:
¡ *G½: EN ISO 228 G½ (TS EN ISO 228 G½)
¡ *R½: EN 10226 R½ (TS 61-210 EN 10226 R½)
WARNING‒Risk of explosion!
A gas leak may occur due to a damaged connection
nozzle.
▶
When connecting the gas pipe or safety gas hose,
never tighten the gas connecting piece on the appli-
ance using a 22 m spanner. This may damage the
connecting piece.
Connection in accordance with EN ISO 228 G½ (TS
EN ISO 228 G½)
1.
Insert the new seal in the connecting piece. Ensure
that the seal is seated correctly.
2.
Secure the gas connecting piece to the appliance
using a 22 mm spanner and place the connecting
piece into the connecting piece using a 24 mm
spanner.
3.
Place the new seal into the gas pipe or safety gas
hose. Ensure that the seal is seated correctly.
4.
Secure the connecting piece using a 24 mm span-
ner. Use a 24 mm spanner to place the threaded fit-
ting of the gas pipe or safety gas hose on the con-
necting piece and tighten it firmly.
5.
Open the gas connection shut-off. Carry out a leak
test →Page50.
Connection in accordance with EN 10226 R½ (TS
61-210 EN 10226 R½)
1.
Insert the new seal in the connecting piece. Ensure
that the seal is seated correctly.
2.
Secure the gas connecting piece to the appliance
using a 22 mm spanner and place the connecting
piece into the connecting piece using a 24 mm
spanner.