English | 17
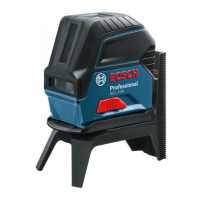
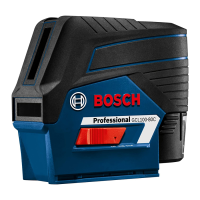
Point and line laser GCL 2-50
Working range
A)
– Standard laser lines 15m
– Laser lines with laser re-
ceiver
5–50m
– Laser points 10m
Levelling accuracy
B)C)
– Laser lines ±0.3mm/m
– Laser points ±0.7mm/m
Typical self-levelling range ±4°
Typical levelling time <4s
Operating temperature –10°Cto+50°C
Storage temperature –20°Cto+70°C
Max. altitude 2000m
Relative air humidity max. 90%
Pollution degree according to
IEC61010-1
2
D)
Laser class 2
Laser type 630–650nm, <1mW
C
6
1
Divergence
– Laser lines 0.5mrad (full angle)
– Laser points 0.8mrad (full angle)
Pulse frequency
– Operating without re-
ceiver mode
6kHz
– Operating with receiver
mode
10kHz
Tripod mount 1/4"; 5/8"
Batteries 3×1.5V LR6(AA)
Operating duration in operating mode
B)
– Cross-line and point mode 6h
– Cross-line mode 8h
– Line mode 16h
– Point mode 22h
Weight according to EPTA-
Procedure01:2014
0.49kg
Dimensions (length×width×height)
– Without rotating mount 112× 55× 106mm
– With rotating mount 132× 81× 163mm
Point and line laser GCL 2-50
Protection rating IP54 (dust and splash-
proof)
A) The working range may be reduced by unfavourable environ-
mental conditions (e.g. direct sunlight).
B)
At 20–25°C
C) The values stated presuppose normal to favourable environ-
mental conditions (e.g. no vibration, no fog, no smoke, no direct
sunlight). Extreme fluctuations in temperature can cause devi-
ations in accuracy.
D) Only non-conductive deposits occur, whereby occasional tem-
porary conductivity caused by condensation is expected.
The serial number (13) on the type plate is used to clearly identify
your measuring tool.
Assembly
Inserting/Changing the batteries
It is recommended that you use alkaline manganese batter-
ies to operate the measuring tool.
To open the battery compartment cover(7), press the lock-
ing mechanism(8) and lift open the battery compartment
cover. Insert the batteries.
When inserting the batteries, ensure that the polarity is cor-
rect according to the illustration on the inside of the battery
compartment.
If the batteries become weak, the battery warning
indicator(2) will flash green. The laser lines will also flash for
approximately fiveseconds every tenminutes. The measur-
ing tool can still be operated for approximately onehour
after the first flash. If the batteries drain completely, the
laser lines will flash one more time just before automatic
shut-off.
Always replace all the batteries at the same time. Only use
batteries from the same manufacturer and which have the
same capacity.
u Take the batteries out of the measuring tool when you
are not using it for a prolonged period of time. The bat-
teries can corrode and self-discharge during prolonged
storage in the measuring tool.
Working with the RM1rotating mount
(seefiguresA1–A3)
You can use the rotating mount(15) to rotate the measuring
tool 360° around a central, always visible plumb point. This
enables you to set up the laser lines without having to
change the position of the measuring tool.
Place the measuring tool with the guide groove(9) on the
guide rail(16) of the rotating mount(15) and slide the
measuring tool all the way onto the platform.
To disconnect the measuring tool, pull it off the rotating
mount in the opposite direction.
Rotating mount positioning options:
– Standing on a flat surface,
– Screwed to a vertical surface,
– On metallic ceiling strips using the ceiling clip(19),
Bosch Power Tools 1 609 92A 4HH | (16.11.2020)
 Loading...