English - 2
■ Care should be taken to ensure that the oper-
ator or foreign objects do not come into contact
with the running sanding belt.
■ When grinding metal, flying sparks are pro-
duced. Take care that no persons are endan-
gered. Due to danger of fire, no combustible
materials should be located in the vicinity
(spark flight zone).
■ Never allow children to use the machine.
■ Bosch is only able to ensure perfect operation
of the machine if the original accessories in-
tended for it are used.
Observe correct mains voltage: The voltage of
the power source must agree with the voltage
specified on the nameplate of the machine.
Equipment marked with 230 V can also be con-
nected to 220 V.
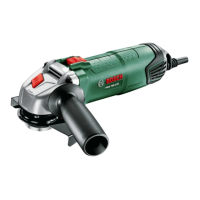
Switching On and Off
To start the unit, push the On/Off switch 4 for-
wards.
To switch the unit off, press the On/Off switch 4
to the rear.
Setting the Belt Speed (PVS 300 AE)
Using the thumb wheel 3 the required sanding-
belt speed can be selected, even during opera-
tion.
The optimum belt speed and grit of the sanding
belt is dependent on the material and is to be de-
termined by a practical test.
The dust that is produced while working can
be detrimental to health, inflammable or ex-
plosive. Suitable safety measures are re-
quired.
Examples: Some dusts are regarded as carci-
nogenic. Use suitable dust/chip extraction
and wear a dust respirator.
Dust from light alloys can burn or explode. Al-
ways keep the work place clean, as blends of ma-
terials are particularly dangerous.
The machine can be plugged directly into the re-
ceptacle of a Bosch all-purpose vacuum cleaner
with remote control starting. The vacuum cleaner
starts automatically when the machine is
switched on.
The vacuum cleaner must be suitable for the ma-
terial to be worked.
When vacuuming dry dust that is especially detri-
mental to health or carcinogenic, use a special
vacuum cleaner.
For dust extraction using an external vacuum
cleaner, a suction adapter must be used in this
case (see accessories). Insert the suction
adapter and suction hose fixture firmly.
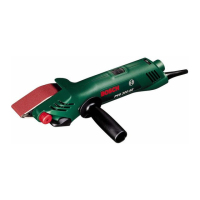
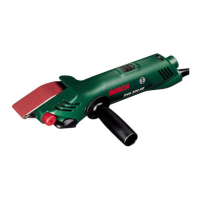
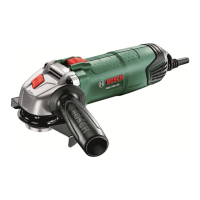
The auxiliary handle 10 makes possible comfort-
able handling and optimum guiding of the ma-
chine.
The auxiliary handle is screwed into the threaded
hole 9 on the housing.
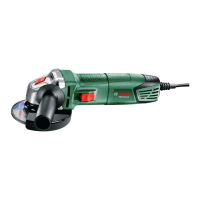
Removing the Sanding Belt
Swing down the SDS quick tensioning lever 7.
This removes the tension from the sanding belt
and it can be pulled off to the side.
Fitting a New Sanding Belt
Before fitting the new sanding belt 5, clean the
backing surface 11, idler roller 12 and tension
roller 13.
Place on the sanding belt with the required grit.
Swing back the quick tensioning lever to its initial
position and allow to latch. This tensions the
sanding belt.
Sanding belts that are worn on one side can be
turned by 180° since the special adhesive allows
sanding in both directions.
Initial Operation
Application Grit
Coarse Fine
Roughening paint 180 240 1–2
Removing paint,
enamel 60 120 5–6
Softwood 60 240 5–6
Hardwood 60 180 5–6
Particle board 60 180 5 –6
Rust removal 60 80 5 –6
Non-ferrous metal 80 180 4–5
Plastic 80 240 2–3
Acrylic glass 80 240 1–2
1
Dust/Chip Extraction
Auxiliary Handle (Accessory)
Changing the Sanding Belt
(see figure )
A
10 • 2 609 931 414 • 02.01
 Loading...