Prepare for operation
7
Worcester 2000 – 6 721 814 552 (2019/09)
3.2 Topping up the system pressure
Your installer should have informed you where to find the filling system
and instructed you in its use.
NOTICE:
System fill method
▶ You must disconnect the external filling loop after re-pressurisation,
to comply with the Water Authority regulations.
External filling loop
Once the external filling loop and pressure gauge has been located,
follow the instructions for re-pressurising the system.
Refer to figure 3.
▶ Unscrew the blanking cap [1].
▶ Attach the hose [2] to the valve.
– Usually one end of the hose is already connected to one of the
system fill isolation valves.
▶ Ensure both ends [3] of the hose are screwed on hand tight.
▶ Monitor the pressure gauge.
– The system fill isolation valves [4] are in a closed position (the
handle/screwdriver slot is across the valve).
▶ Turn the handle/screwdriver slot through 90° to open valves and
slowly fill the system.
– The system fill isolation valves [5] are opened (the handle/
screwdriver slot is in-line with the valve).
– The needle on the pressure gauge will start to rise.
▶ Set the pressure between 1 and 1.5 bar pressure.
▶ Turn the handles/screwdriver slots back, through 90°, to close the
valves.
– The system fill isolation valves [6] are in a closed position (the
handle/screwdriver slot is across the valve).
▶ Top up the system pressure, if as a result of the air bleeding the
pressure drops off.
Once the pressure has settled between 1 and 1.5 bar.
▶ Ensure the valves are closed.
▶ Remove the hose [2] and replace the blanking cap [1].
Fig. 3 External filling loop
If the pressure gauge reads more than 1.5 bar as a result of over filling:
▶ Bleed one radiator until the pressure gauge returns to between 1 and
1.5 bar.
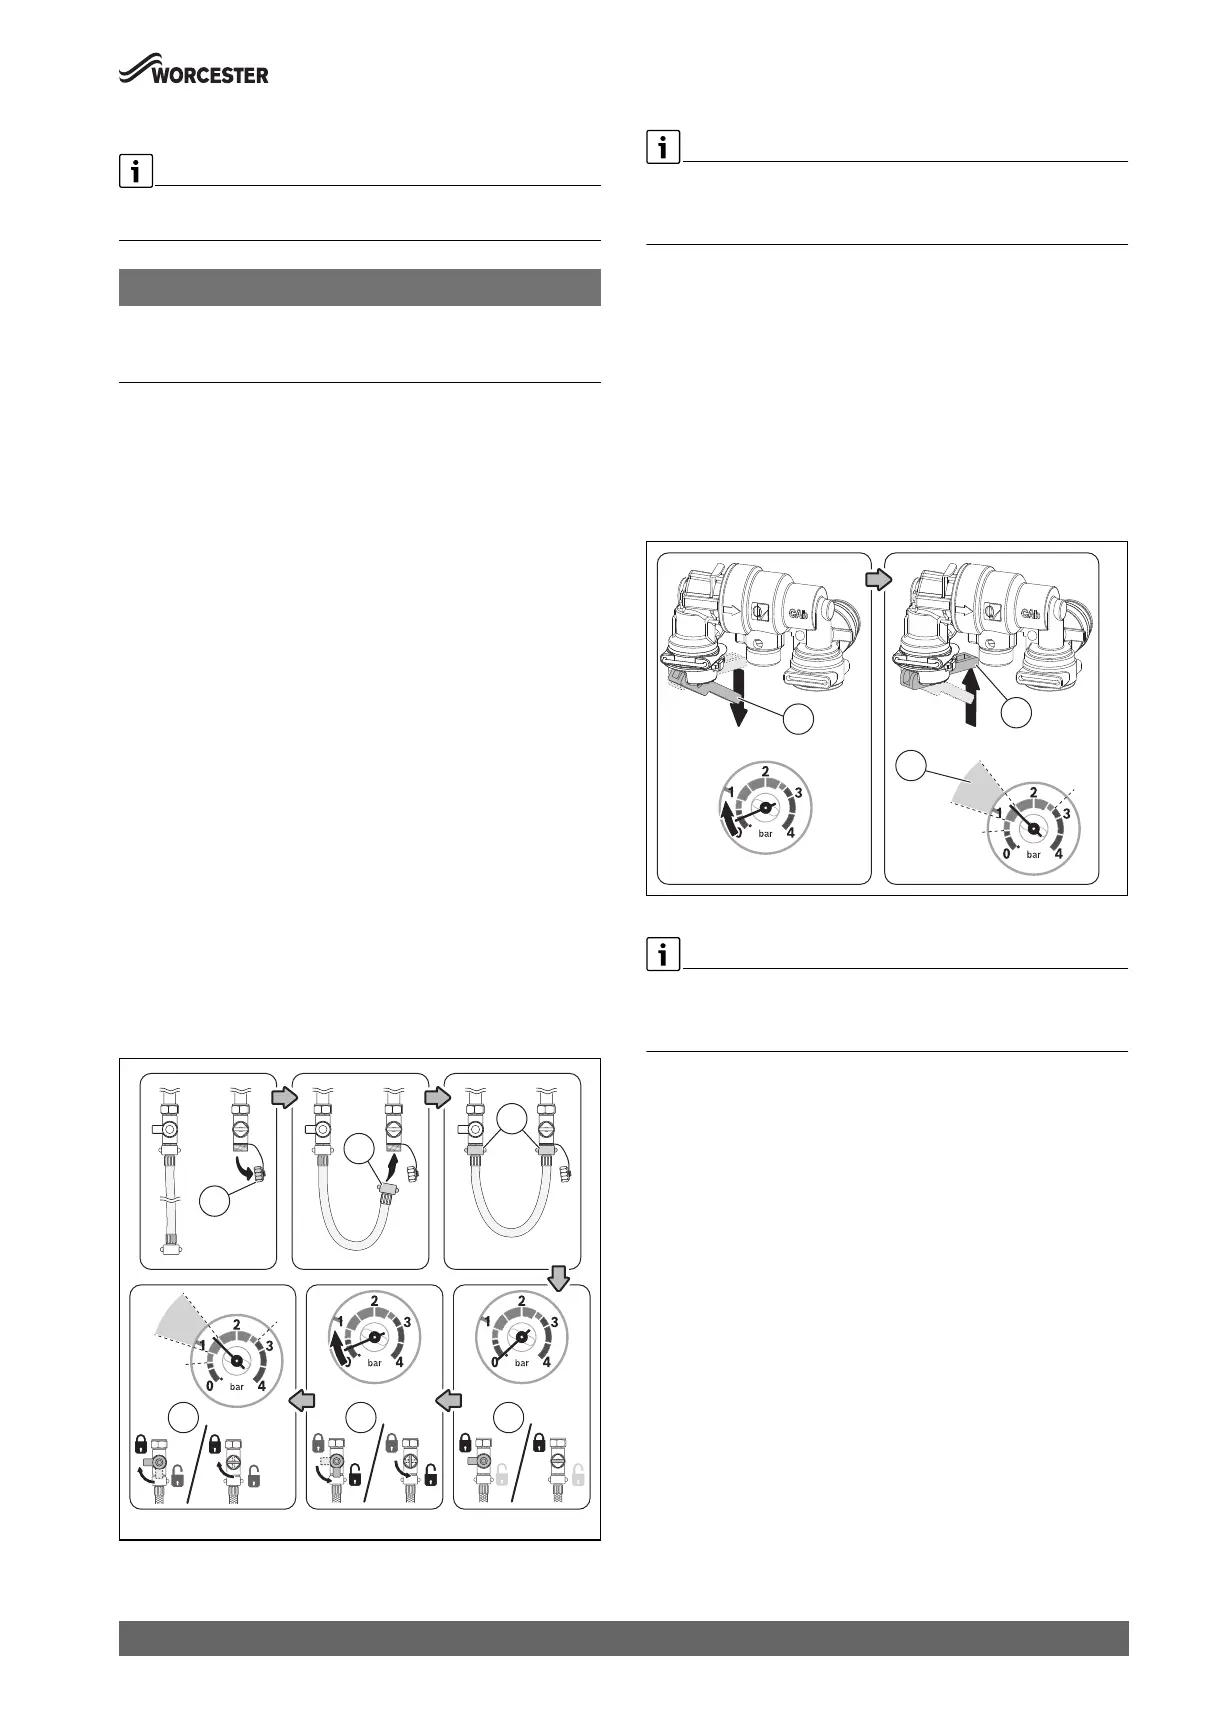
Keyless filling link
Locate the filling link (underneath the appliance on the right hand side)
and follow the instructions for re-pressurising the system.
▶ Re-pressurise the system.
– Pull the lever [1] down to start the filling process.
– The needle on the pressure gauge will start to rise.
▶ When the pressure, shown on the pressure gauge, reaches between
the 1 and 1.5 bar [2],
– Release the lever [1] to stop the filling process.
▶ Top up the system pressure, if as a result of the air bleeding the
pressure drops off.
Fig. 4
If the pressure gauge reads more than 1.5 bar as a result of over filling:
▶ Bleed one radiator until the pressure gauge returns to between 1 and
1.5 bar.
0010015034-001
1
2
3
4
5
6
Min
1 bar
1.5 bar
Max
0010015050-001
1
1
Min
1 bar
1.5 bar
Max
2
 Loading...