6
Setting Up Your Acoustic Wave
®
II CD Changer
Français Español English
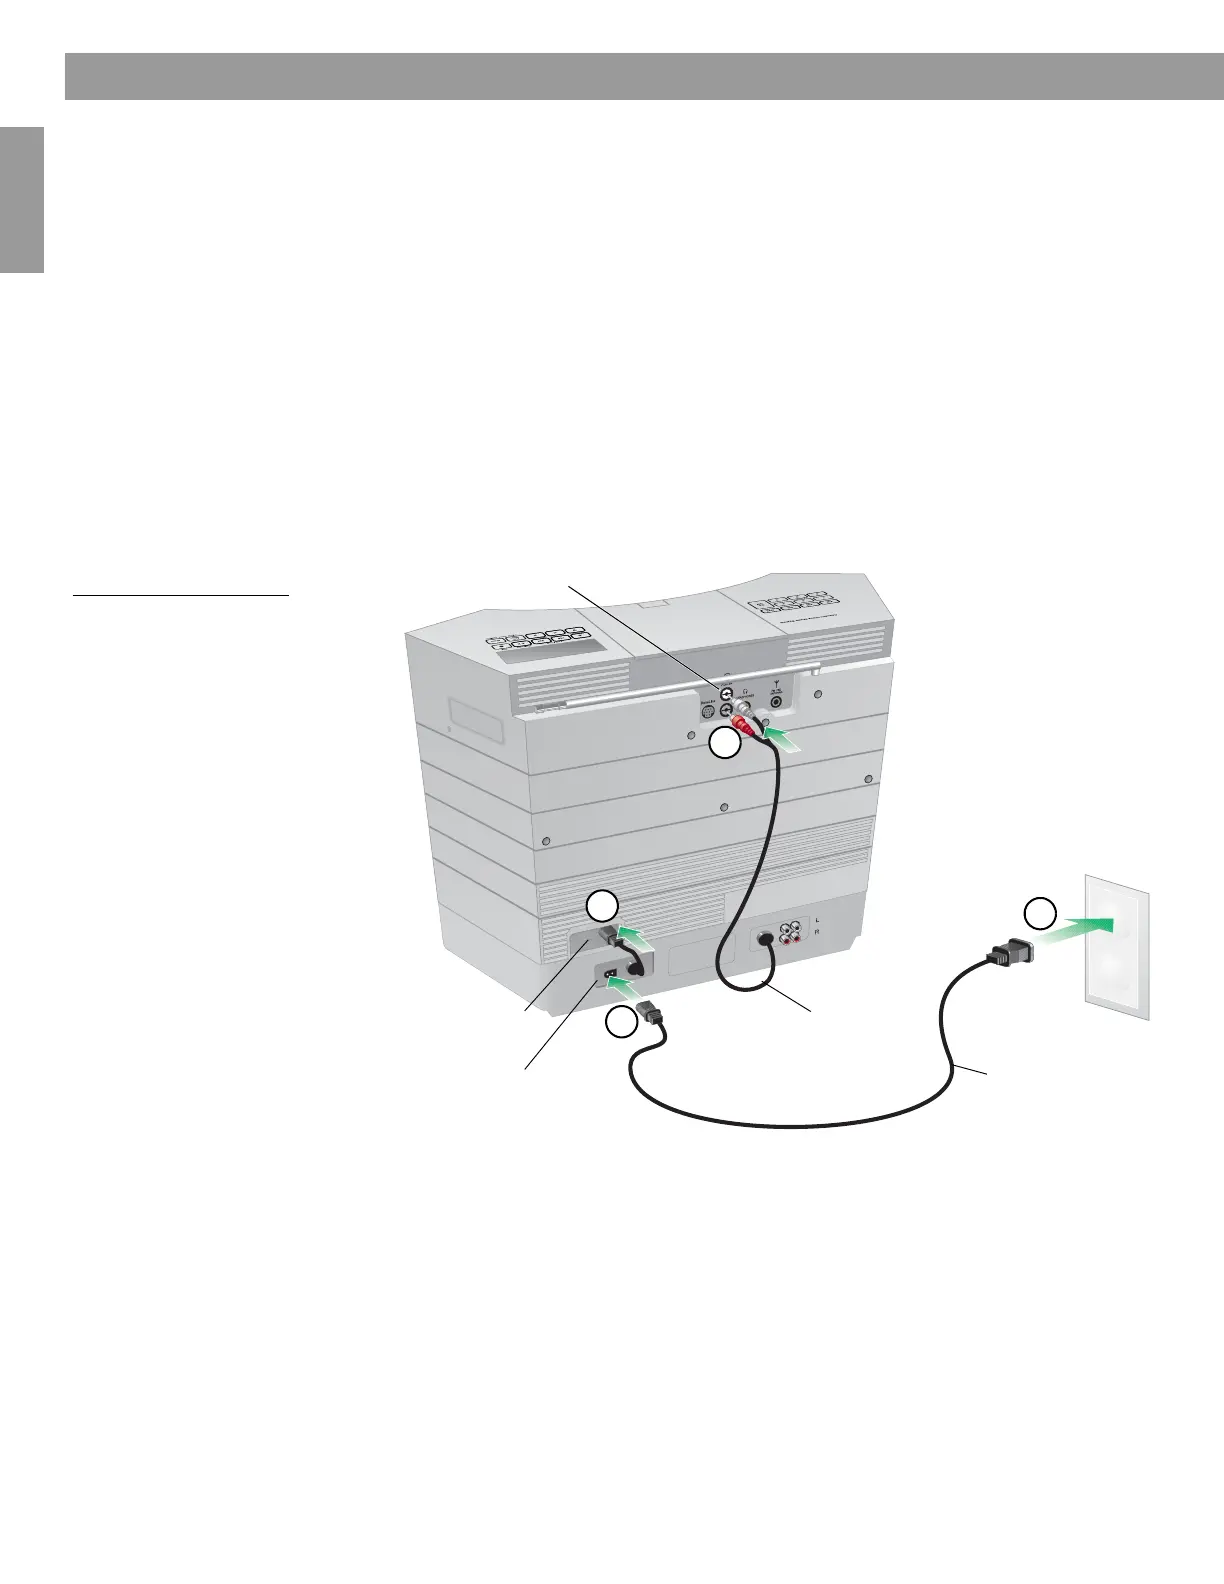
Making the connections
Before you start this setup procedure, disconnect the AC power cord on your
Acoustic Wave
®
music system II and set it aside. You will need to use it again in
Step 3.
On the back of the CD changer there are two cables that connect to your Acoustic Wave
®
music system II.
1. Insert the two connectors of the AUX input cable into AUX IN jacks on the back of the
music system (Figure 3). Be sure to match the colors of the connectors and jacks: red to
red, and white to white.
2. Plug the attached CD changer power cord into the AC power jack on the back of the
music system.
3. Plug the small end of the power cord into the power jack on the back of the CD changer.
4. Plug the other end of the power cord into an AC (mains) wall outlet.
After applying power, “PLEASE WAIT” appears on the display for about 30
seconds while the system prepares itself for operation. DO NOT insert any
discs until this message disappears.
Figure 3
Connecting cables and
power cords
Acoustic Wave
®
music system II
AC power cable
AUX input
cable
CD changer power jack
Acoustic Wave
®
music
system II power jack
AUX IN jacks
2
3
4
1
TM
 Loading...