4
TEST PROCEDURES
1. Phase Check
1.1 Referring to Figure 1, ensure proper wiring
of the loudspeaker.
2. Rub and Tick Test
2.1 Apply a 35Vrms, 80Hz signal to the input
of the loudspeaker.
Note: No extraneous noises such as rubbing,
scraping or ticking should be heard. To distin-
guish between normal suspension noise, rubs
and ticks, displace the cone of the driver with
your finger. If the sound can be made to go
away or get worse, it’s a rub or tick and the
driver should be replaced. If the noise stays
the same, it’s normal suspension noise and
will not be heard with regular program mate-
rial.
3. Air Leak Test
3.1 Apply a (6Vrms for 4 Ohm version)
(35Vrms for transformer version), 80Hz signal
to the input of the loudspeaker.
3.2 Check for air leaks around the cabinet,
driver, and transformer plate. Replace any
gasket that is found to be defective.
4. Sweep Test
4.1 Apply a (6Vrms for 4 Ohm version)
(35Vrms for transformer version), 50Hz signal
to the input of the loudspeaker.
4.2 Sweep the signal generator from 50Hz to
5kHz. Listen for buzzes, rattles or extraneous
noises from the driver or internal parts. A
whooshing noise from the port around 80Hz is
acceptable. Replace any driver that buzzes.
Redress any wire that buzzes.
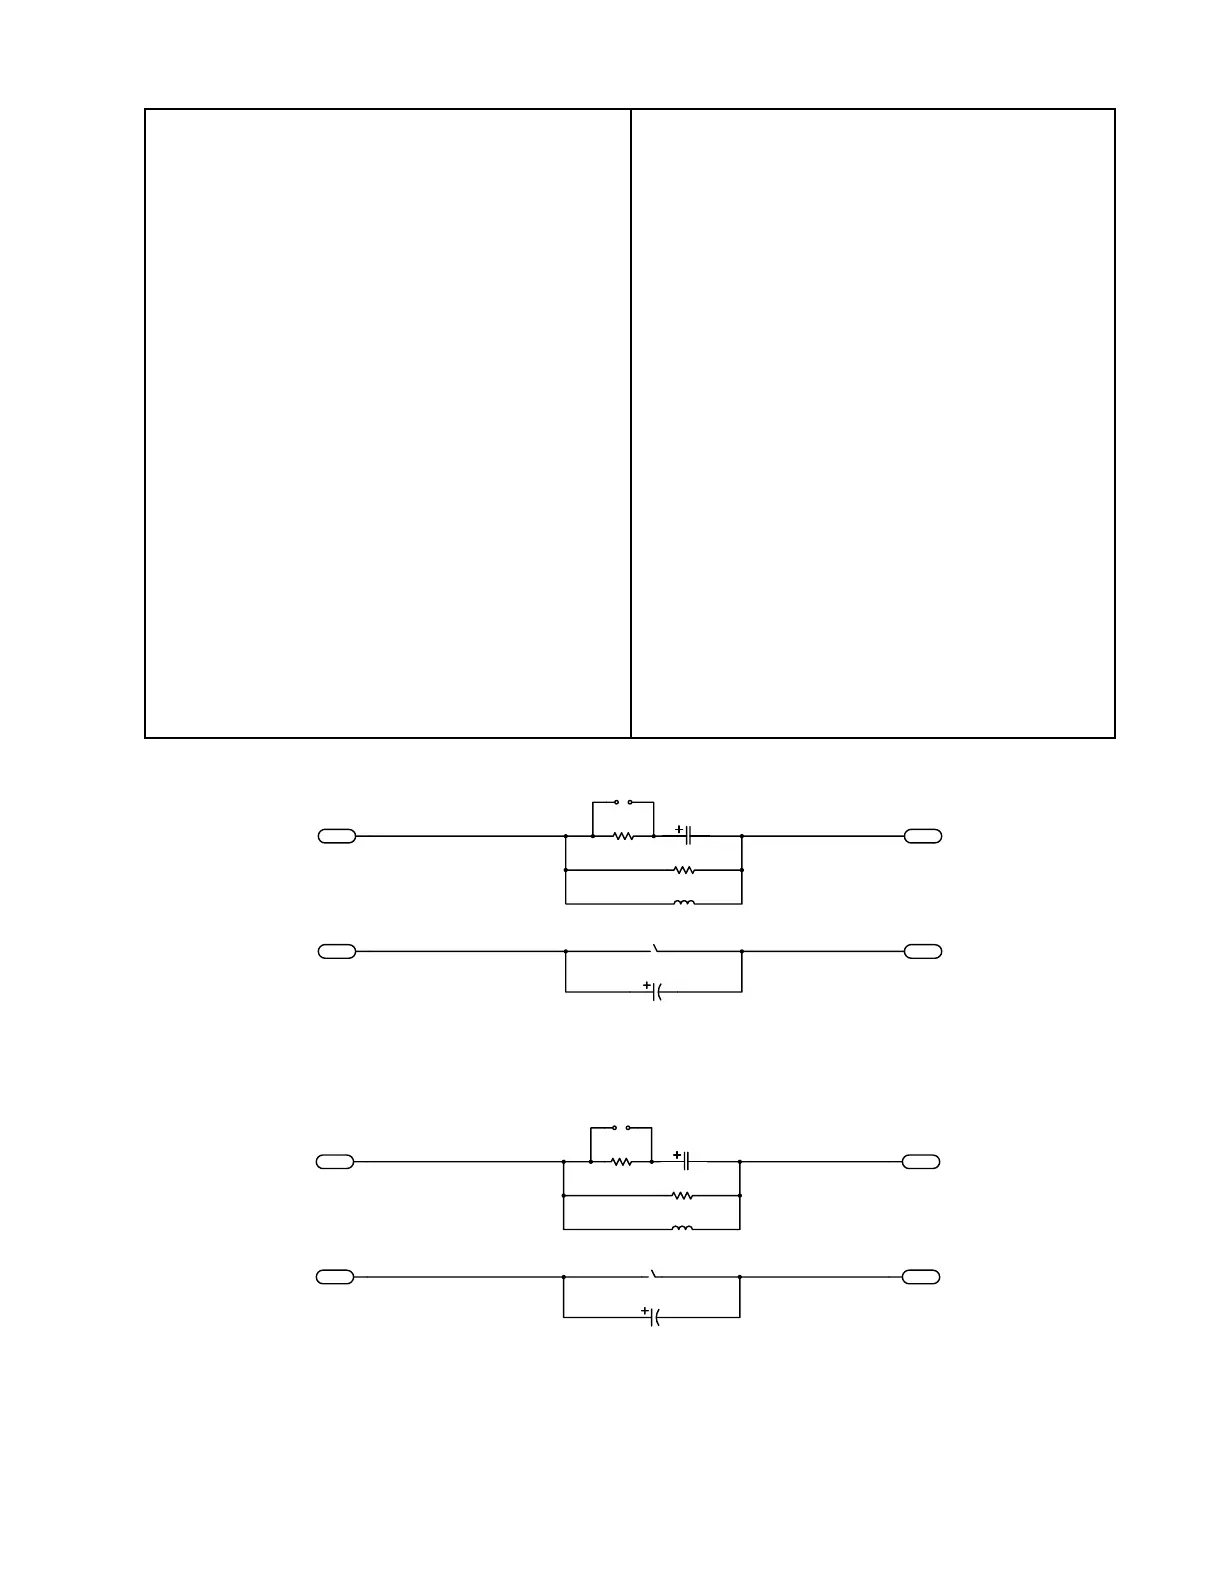
NOT USED
OUT-
OUT+IN+
IN-
C1
NOT USED
E4
R1
6.2 Ohm
E3
C2
10uF, BP, 50V
JP1
NOT USED
E1
E2
R2
2.4 Ohm
PTC1
L1
1.5mH
NO CONNECTION
Figure 3. 70/100V Passive Version Equalizer Schematic Diagram
OUT-
OUT+IN+
IN-
C1
47uF, BP, 50V
E4
R1
6.2 Ohm
E3
C2
10uF, BP, 50V
JP1
NOT USED
E1
E2
R2
2.4 Ohm
PTC1
L1
1.5mH
Figure 2. 4 Ohm Passive Version Equalizer Schematic Diagram