106
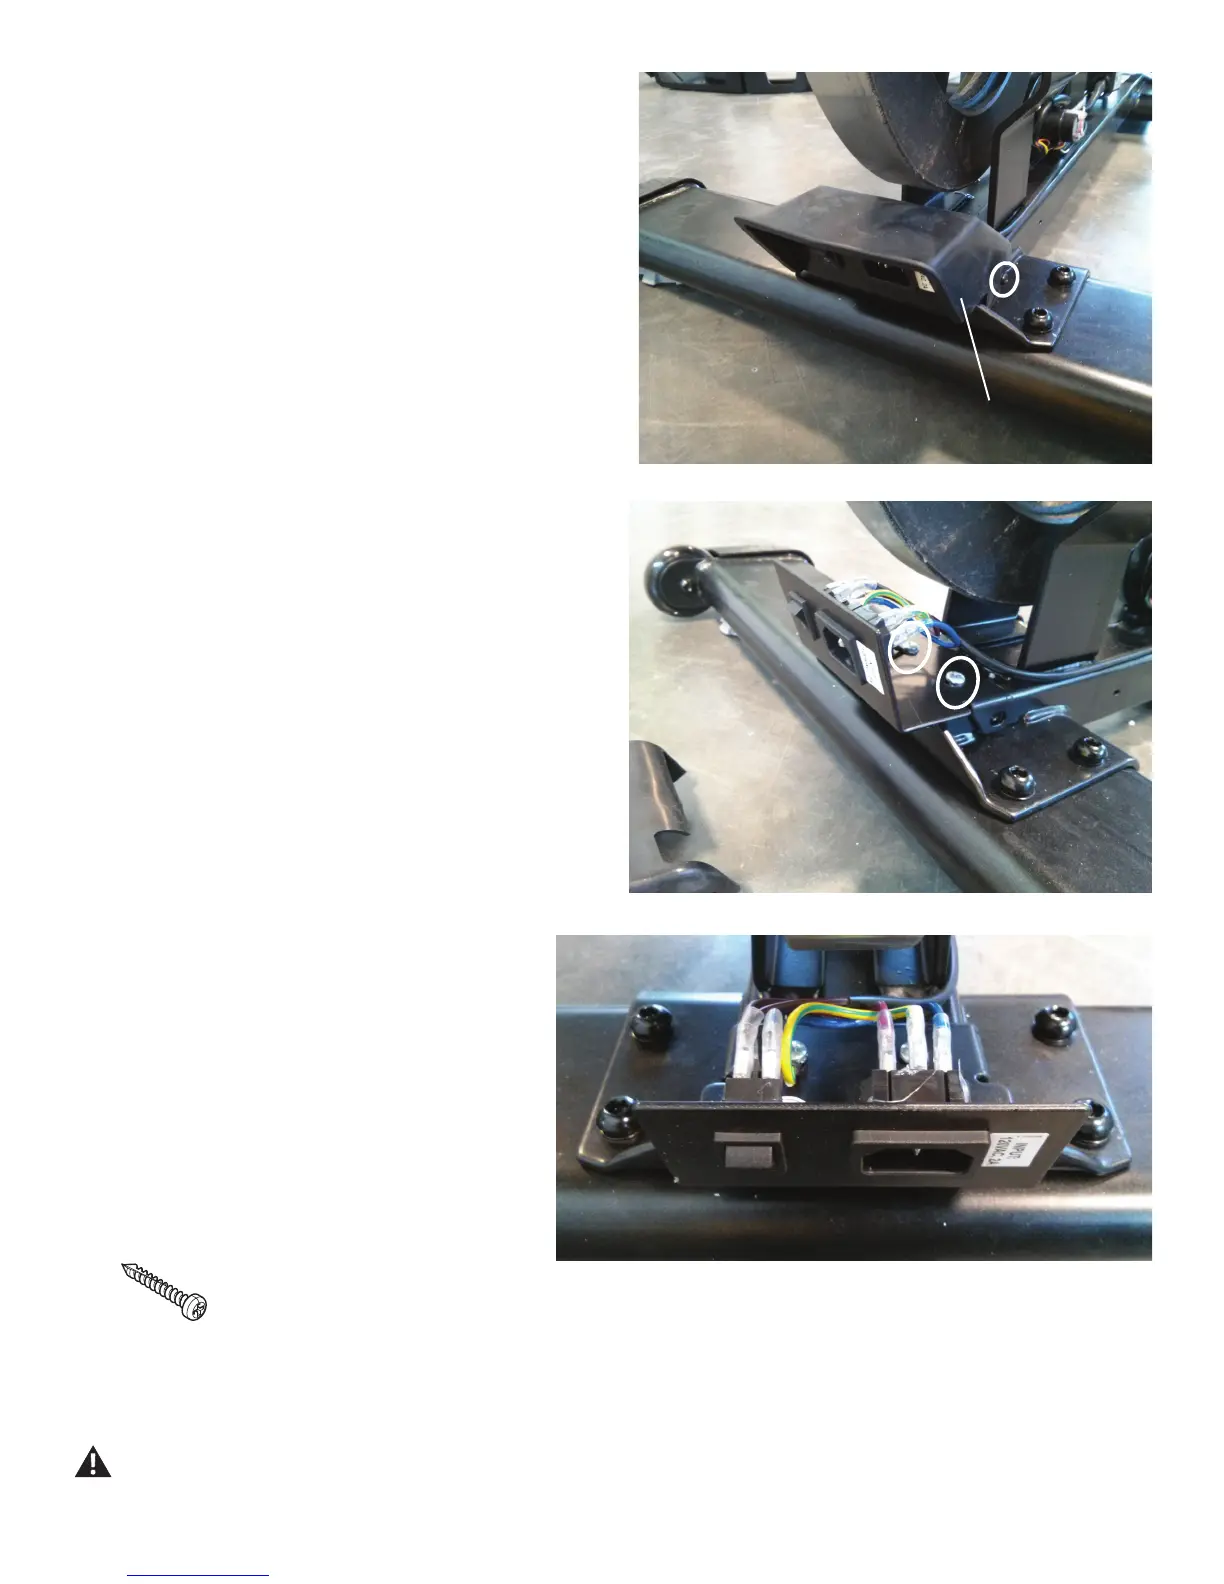
19.Usinga#2Phillipsscrewdriver,removethetwoscrews(oneindicat-
ed)fromeachsideofthePowerSwitchCover.RemovetheCover.
20. Note the location of each cable and how they connect to the old
Power Switch Assembly.
21. Carefully disconnect a cable and connect it to the new Power Switch
Assembly. Repeat until all cables are connected to the new Power Switch
Assembly.
22.Usinga#2Phillipsscrewdriver,removethetwoindicatedscrewsfrom
the old Power Switch Assembly. Remove it.
23. Installation is the reverse procedure. Put the Left Shroud in
positionrsttoalignthescrewsfortheRightShroud.Installthe
topscrewsrst.BesurethetabsintheMotorizedLiftCoversnap
into the Side Shrouds.
NOTICE: This step may require two people. Be sure not to
crimp any cables.
Note: Self-tapping screws attach the Shrouds to the Frame.
24.Inspectyourmachinetoensurethatallhardwareistightand
components are properly assembled.
Do not use until the machine has been fully assembled and
inspected for correct performance in accordance with the
Owner’s Manual.
Power Switch Cover