Do you have a question about the Brandt BOH1325BB and is the answer not in the manual?
The Brandt BOH1325X - BOH1325BB is an electric built-in oven designed for household cooking. It has a volume of 78 liters and an energy efficiency class A, with energy consumption ratings of 0.93 kWh/cycle for conventional use and 0.83 kWh/cycle for fan-forced use. The oven weighs 36.4 kg.
Before using the appliance, carefully read all instructions and keep them for future reference. This manual covers multiple models, so some features described may not be present in your specific appliance. Pay close attention to figures when reading.
This appliance can be used by children aged 8 and above, and by persons with reduced physical, sensory, or mental capabilities, or lack of experience and knowledge, if they are supervised or instructed on safe use and understand the hazards. Children should not play with the appliance, and cleaning and user maintenance should not be performed by children without supervision.
WARNING: The appliance and its accessible parts become hot during use. Avoid touching heating elements. Keep children under 8 years of age away unless continuously supervised. WARNING: Danger of fire. Do not store items on cooking surfaces. WARNING: If the surface is cracked, switch off the appliance to avoid electric shock. Do not operate the appliance with an external timer or separate remote-control system. During use, the appliance will get hot. Avoid touching heating elements inside the oven. Handles may get hot after a short period of use. Do not use harsh abrasive cleaners or scourers to clean the oven door glass and other surfaces, as they can scratch surfaces, leading to shattering or damage. Do not use steam cleaners. WARNING: To avoid electric shock, ensure the appliance is switched off before replacing the lamp. CAUTION: Accessible parts may be hot when cooking or grilling. Keep young children away from the appliance when it is in use. The appliance complies with local and international standards. Maintenance and repair work should only be carried out by authorized service technicians. Improper installation or repair work can be dangerous. Do not alter or modify the specifications of the appliance. Inappropriate hob guards can cause accidents. Before connecting, ensure local distribution conditions (nature of gas and gas pressure or electricity voltage and frequency) and appliance specifications are compatible. The specifications are on the label. CAUTION: This appliance is designed only for cooking food and is intended for indoor domestic household use only. It should not be used for any other purpose or in any other application, such as non-domestic use, in a commercial environment, or for heating a room. Do not use oven door handles to lift or move the appliance. All possible measures have been taken to ensure safety. If the glass breaks, take care to avoid scratching during cleaning. Avoid hitting or knocking the glass with accessories. Ensure the supply cord is not trapped or damaged during installation. If damaged, it must be replaced by the manufacturer, its service agent, or similarly qualified persons. Do not let children climb on the oven door or sit on it while it is open. Keep children and animals away from the appliance.
Water must be poured into the water reservoir before oven operation. Do not add water to the reservoir when the oven is hot. When the oven door is opened, steam may escape from inside. Be careful when opening the oven door, as this may cause a risk of burning. As a result of steam cooking, moisture may remain in the oven. To prevent corrosion, ensure the oven interior dries after cooking. Use drinking water in the oven for steam cooking. Do not use flammable alcohol or solids. Use stainless dishes for steam cooking. At the end of each steam cooking, if water remains in the tank, it should be cleaned and this remaining water should not be used in the next cooking.
Do not operate the appliance before it is fully installed. The appliance must be installed by an authorized technician. The manufacturer is not responsible for damage caused by defective placement or unauthorized installation. When unpacking, ensure the appliance is not damaged during transportation. In case of damage, do not use the appliance and contact a qualified service agent. Packaging materials (nylon, staples, Styrofoam) should be kept away from children and disposed of immediately. Protect the appliance from the atmosphere; do not expose it to sun, rain, snow, dust, or excessive humidity. Any materials (e.g., cabinets) around the appliance must withstand a minimum temperature of 100°C. The appliance must not be installed behind a decorative door to avoid overheating.
When first using your oven, you may notice a slight smell. This is normal and caused by insulation materials on the heater elements. Before using, leave it empty and set it at maximum temperature for 45 minutes. Ensure the environment is well ventilated. Take care when opening the oven door during or after cooking. Hot steam may cause burns. Do not put flammable or combustible materials in or near the appliance when it is operating. Always use oven gloves to remove and replace food. Under no circumstances should the oven be lined with aluminum foil, as overheating may occur. Do not place dishes or baking trays directly onto the oven base while cooking. The base becomes very hot and may be damaged. Do not leave the oven unattended while cooking with solid or liquid oils. They may catch fire under extreme heating conditions. Never pour water onto flames caused by oil; instead, switch off the oven and cover the pan with its lid or a fire blanket. If the product will not be used for a long period, turn the main control switch off. Ensure appliance control knobs are in the "0" (stop) position when not in use. When pulling out trays, take care not to spill or drop hot food. Do not place anything on the oven door when it is open. This could unbalance the oven or damage the door. Do not hang towels, dishcloths, or clothes on the appliance or its handles.
Ensure the appliance is turned off at the mains before cleaning or maintenance. Do not remove control knobs to clean the control panel. To maintain efficiency and safety, use original spare parts and call authorized service agents if needed. Do not scrape lime residues from the oven floor, as this may damage it. To dissolve lime, pour 200-250 ml of white vinegar (acid ratio not more than 6%) onto the oven floor after every 2 or 3 uses and wait 30 minutes. Then clean with a damp wet cloth.
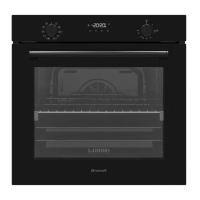
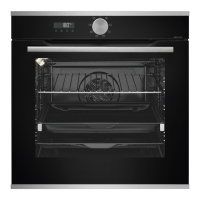
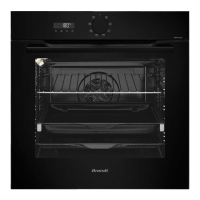
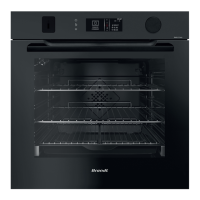
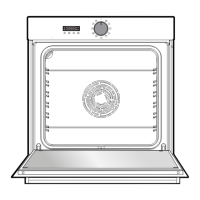
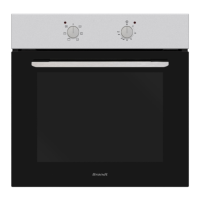
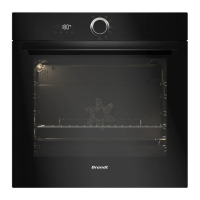
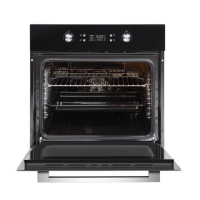
The oven features a Control Panel, Oven Door Handle, and Oven Door. The control panel includes an Oven Function Control Knob, Timer, and Oven Thermostat Knob.
Provides recommended rack positions, temperatures, and cooking times for various dishes like Puff Pastry, Cake, Cookie, Stew, Chicken, Grilled meatballs, Chop, and Beefsteak, across different functions (Static, Fan, Turbo, Grilling). Important: Times are laboratory conditions and may vary. Always preheat for frozen/fresh pizza, placing the baking tray on the 1st rack during preheating. Do not add water to the water tank when the oven is hot. Temperatures and times are tested values and may vary based on food quality, quantity, temperature, and mains voltage.
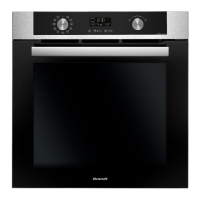
Allows setting cooking time, minute minder, and timer display. Features include Auto Cooking, Thermostat Symbol, Cooking Time, Key Lock, Minute Minder, Mode Function, Decrease Timer, and Increase Timer. Time Adjustment: Set time by pressing "+" and "-" keys. The dot in the middle of the screen will flash. Adjust time using "+" and "-" keys. Audible Warning Time Adjustment: Set warning time between 0:00 and 23:59 hours. The audible warning is for warning purposes only and will not activate the oven. Semi-automatic Time Adjustment (cooking period): Sets a fixed period of time (0-10 hours) for cooking. Prepare food and put it in the oven. Select cooking function and temperature. Press "+" until "dur" and "O" symbols appear. Set desired time using "+" and "-" keys. Sound Adjustment: Adjust audible warning sound by pressing and holding the "-" button for 3 seconds. "ton1" will appear, indicating the current sound type. Press "-" to cycle through sound types ("ton1", "ton2", "ton3", "OFF"). "OFF" turns off all sound. Brightness Adjustment: Adjust display brightness by pressing and holding the "+" button for 3 seconds. "br1" will appear. Press "+" to cycle through brightness levels. Thermostat Symbol: Automatically activates during oven thermostat running.
WARNING: Switch off the appliance and allow it to cool before cleaning. General Instructions: Check cleaning materials are appropriate and recommended by the manufacturer. Use cream cleaners or liquid cleaners; do not use caustic (corrosive) creams, abrasive cleaning powders, rough wire wool, or hard tools as they may damage cooker surfaces. Do not use cleaners that scratch the glass, enamelled, or painted parts. Should any liquids overflow, clean them immediately to avoid damage. Do not use steam cleaners. Cleaning the Inside of the Oven: Enamelled ovens are best cleaned while the oven is warm. Wipe oven with a soft cloth soaked in soapy water after each use. Then, wipe over again with a wet cloth and dry. You may need to use a liquid cleaning material occasionally. Cleaning the Glass Parts: Clean glass parts on a regular basis. Use a glass cleaner to clean inside and outside. Rinse and dry with a dry cloth. Cleaning the Stainless Steel Parts (if available): Clean stainless steel parts on a regular basis. Wipe with a soft cloth, soaked in soapy water. Then, dry with a dry cloth. Do not clean stainless steel parts while they are still hot. Do not leave vinegar, coffee, milk, salt, water, lemon, or tomato juice on stainless steel for a long time. Cleaning Painted Surfaces (if available): Spoons of tomato, tomato paste, ketchup, lemon, oil derivatives, milk, sugary foods, sugary drinks, and coffee should be cleaned with a cloth dipped in warm water immediately. If these stains are not cleaned and allowed to dry, they should NOT be rubbed with hard objects (pointed objects, steel and plastic scouring wires, surface-damaging dish sponge) or cleaning agents containing high levels of alcohol, stain removers, degreasers, surface abrasive chemicals. Otherwise, corrosion may occur on the painted surfaces, and stains may occur. The manufacturer will not be held responsible for any damage caused by the use of inappropriate cleaning products or methods. Removal of the Inner Glass: Remove the oven door glass. Push the glass in direction B and release from location bracket A. Pull the glass out in direction A. Push the glass towards and under the location bracket Y, in direction B. Place the glass under the location bracket X in direction C. If the oven door is a triple glass oven door, the third glass layer can be removed the same way as the second glass layer. Removal of the Oven Door: Before cleaning the oven door glass, remove the oven door. Open the oven door. Open the locking catch A (with a screwdriver) up to the end position. Close the door until it is almost in the fully closed position, and remove the door by pulling it towards you. Removal of the Wire Shelf: To remove the wire rack, pull the wire rack as shown in the figure. After releasing it from the clips A, lift it up.
WARNING: Maintenance should be carried out by an authorized service person or qualified technician only. Changing the Oven Lamp: WARNING: Switch off the appliance and allow it to cool before cleaning. Remove the glass lens, then remove the bulb. Insert the new bulb (resistant to 300°C, 230V, 15-25 Watt, Type E14). Replace the glass lens. The product contains a light source of energy efficiency class G. Light source cannot be replaced by end user; after-sales service is needed. The included light source is not intended for other applications. The lamp is designed specifically for household cooking appliances and is not suitable for household room illumination.
If problems persist after basic troubleshooting, contact an authorized service person or qualified technician.
Use original packaging and carry using its original case. Follow transport signs. Tape all independent parts to prevent damage. If original packaging is unavailable, prepare a carriage box to protect external surfaces.