25
The cleaning cartridge contains a highly fl ammable liquid so keep
it away from sources of ignition. Do not smoke near the station. Do
not expose to direct sunlight for long periods of time.
Do not refi ll the cartridge and use only original Braun refi ll
cartridges.
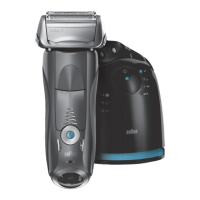
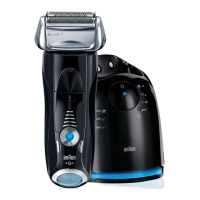
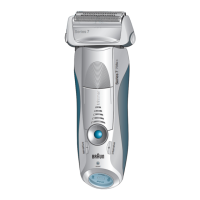
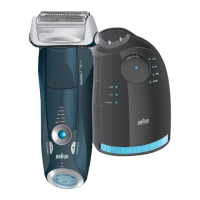
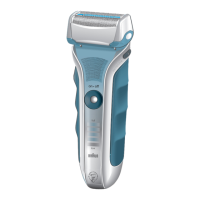
Description
Clean&Renew station
1 Cleaning fl uid display
2 Lift button for cartridge exchange
3 Station-to-shaver contacts
4 Start button
5 Cleaning program indicators
6 Station power socket
7 Cleaning cartridge
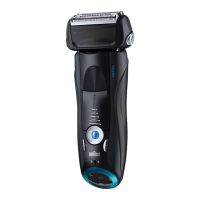
Shaver
8 Foil & Cutter cassette
9 Cassette release button
10 Shaver head lock switch
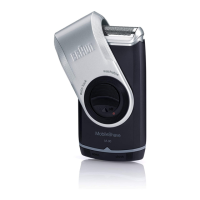
11 Pop-out long hair trimmer
12 On/off switch
13 – setting button (sensitive)
14 + setting button (intensive)
15 Reset button
16 Shaver display
16a Charging lights (green)
16b Low -charge light (red)
16c Replacement symbol
17 Shaver-to-station contacts
18 Shaver power socket
19 Travel case
20 Special cord set (design can diff er)
Before shaving
Prior to fi rst use you must connect the shaver to an electrical outlet using the special
cord set (20) or alternatively proceed as below:
Installing the Clean&Renew station
• Press the lift button (2) to open the housing.
• Hold the cleaning cartridge (7) down on a fl at, stable surface (e.g. table).
• Carefully remove the lid from the cartridge.
• Slide the cartridge into the base of the station as far as it will go.
• Slowly close the housing by pushing it down until it locks.
• Using the special cord set (20), connect the station power socket (6) to an electrical
outlet.
The cleaning fl uid display (1) will show how much fl uid is in the cartridge:
up to 30 cleaning cycles available
up to 7 cleaning cycles remaining
new cartridge required
91508132_7760cc_JP.indd 2591508132_7760cc_JP.indd 25 24.07.17 15:2824.07.17 15:28
CSS APPROVED Effective Date 27Jul2017 GMT - Printed 04Sep2017 Page 25 of 34