A
Amanda PerryAug 6, 2025
What to do if my Braun Iron doesn't switch on?
- MMary HuffAug 6, 2025
If your Braun Iron doesn't switch on, make sure it is correctly connected to a mains socket and then press the On/Off button.
What to do if my Braun Iron doesn't switch on?
If your Braun Iron doesn't switch on, make sure it is correctly connected to a mains socket and then press the On/Off button.
How to unscrew the closure of my Braun CareStyle IS5145 WH?
If the closure of your Braun Iron is difficult to unscrew, it may be due to lime scale buildup. Turn the cap forcefully. To avoid this problem, rinse the system frequently.
Why does brown fluid leak from the soleplate of my Braun CareStyle IS5145 WH?
The brown fluid leaking from the soleplate of your Braun Iron is likely due to chemical water softeners or additives that have been poured into the water tank boiler. To resolve this, never pour such products into the water tank. Clean the soleplate with a damp cloth and rinse the boiler.
What to do if there are water drops from the holes in the bottom of the soleplate of my Braun CareStyle IS5145 WH?
If you notice water drops from the holes in the soleplate of your Braun Iron, it's likely due to water that has condensed inside the tubes. This often happens when steam is used for the first time or after a long period of inactivity. Press the steam button several times away from the ironing board to eliminate the cold water from the steam circuit.
Why does steam come out under the base unit of my Braun CareStyle IS5145 WH?
If steam is coming out from under the base unit of your Braun Iron, the «max» pressure safety system has opened. Turn the appliance off immediately and contact an authorised Braun Customer Service.
What to do if my Braun CareStyle IS5145 WH emits an intermittent noise associated with vibrations?
This intermittent noise associated with vibrations from your Braun Iron is usually normal. It happens when water is being pumped into the boiler. If the noise persists, check if the water tank is empty and, if so, refill it and press the reset button.
What to do if I notice smoke/smell the first time I turn on my Braun Iron?
When you first turn on your Braun Iron, it's normal to notice some smoke or smell. This occurs because some parts have been treated with a sealer or lubricant that evaporates during the initial heating. This should stop after using the iron a few times. If the smoke/smell persists after turning off the appliance, contact an authorised Braun Customer Service.
Read instructions carefully and completely before using the appliance.
Highlights hot surfaces, appliance usage by children, cord safety, and proper handling.
Lists and numbers components of the base unit and the iron.
Specifies intended use, preparation before first use, and water tank filling.
Explains the LED indication when the water tank is empty and how to refill.
Details starting the iron, steam ironing, double trigger, dry ironing, and vertical steam.
Highlights the unique round shape of the soleplate for better gliding on difficult areas.
Details iCare and Eco modes and their suitability for different fabrics.
Provides tips for best results and how to use the precision shot function.
Explains sleep mode, after ironing steps, and the lock system for storage.
Step-by-step guide on how to descale the appliance to maintain performance.
Instructions on cleaning the soleplate, handle, and glossy surfaces using recommended methods.
Addresses common problems like appliance not switching on, steam leaks, and indicator lights.
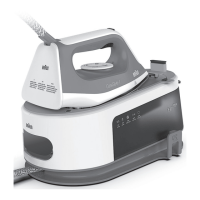
The Braun CareStyle 5 and CareStyle 5 Pro are advanced electric ironing stations designed to meet high standards of quality, functionality, and design, offering both steam and dry ironing capabilities for various garments.
The core function of the Braun CareStyle 5 series is to provide efficient and effective ironing. It operates as a pressure-based steam iron, combining high temperatures with powerful steam to remove wrinkles from fabrics. The appliance is suitable for ironing garments according to their care labels and can also be used for refreshing clothes.
The base unit of the ironing station includes an On/Off button with an accompanying LED indicator, a Calc clean system LED, and a Reset button. For energy efficiency, an ECO button and its LED are provided. A Water tank empty LED alerts the user when refilling is needed. The base unit also features an iron rest, a removable water tank with a transparent cover, a closure for the boiler, a power cord, and a lock system for secure transportation and storage.
The iron itself is connected to the base unit via a double cord and is equipped with a Steam button for continuous steam, and a Precision shot button (available on selected models like the IS5155 Pro) for targeted steam. A Temperature control LED on the iron indicates its heating status, and a heel rest provides a stable resting position during ironing pauses.
The appliance is designed for household use only and for processing normal household quantities of garments. It is important to note that the appliance should not be used for ironing or dampening garments while they are being worn.
Before First Use: Upon unboxing, all packaging materials, including plastic bags and polystyrene foam, should be removed and kept away from children. Any existing labels on the unit, except for the rating plate, should also be removed. Before the first steam ironing, it is recommended to iron over a rag for a few minutes to clear any manufacturing residues that might otherwise stain garments.
Filling the Water Tank (A): Ensure the appliance is switched off and unplugged. The removable water tank (9) is then taken out and filled with tap water, making sure not to exceed the "max" level. For areas with extremely hard water, a 50% tap water and 50% distilled water mixture is recommended. Distilled water should never be used exclusively, and no additives (like starch) or condensation water from a tumble dryer should be added. After filling, the water tank is inserted back into the base unit, and the appliance is placed on a stable, level surface. If filtering devices or in-house permanent descalers are used, it's crucial to ensure the water obtained has a neutral pH.
Water Tank Empty LED: When the water tank is empty, the LED (7) illuminates continuously, and the temperature control LED (17) on the iron flashes. To continue steam ironing, the water tank must be refilled (A), and the reset button (4) pressed.
Starting Operation (B): Before ironing, always consult the garment care label instructions. Fabrics marked with the "do not iron" symbol should be avoided. The iron is placed on its iron rest (8) or heel rest (18), the cord is fully unwound, and the appliance is plugged in. Pressing the On/Off button (1) initiates heating. Both the temperature control LED (17) on the iron and the On/Off LED (2) will flash during heating and remain continuously on once the desired temperature is reached.
Steam Ironing: Steam is activated by pressing the steam button (15) or the precision shot button (16).
Double Trigger: For a continuous burst of steam, press the steam button (15) or the precision shot button (16) twice in quick succession (within 1 second). This will release steam for a few seconds. To stop the continuous steam, press either button once again.
Dry Ironing: To iron without steam, simply do not press the steam button (15) or the precision shot button (16). After 10 minutes of dry ironing, the system automatically switches to boiler sleep mode to conserve energy.
Vertical Steam: The iron can also be used for vertical steaming of hanging clothes (B). Hold the iron in a vertical position, tilted slightly forwards, and repeatedly press the steam button (15) or precision shot button (16) while moving the iron from top to bottom. It's important to remember that steam is very hot, and garments should never be ironed or dampened while being worn.
3D Soleplate: The unique round shape of the 3D soleplate is designed to provide excellent gliding results, even over difficult areas like buttons and pockets.
Settings:
Precision Shot (C): Press the precision shot button (16) completely down to release steam only from the tip area of the soleplate. Releasing the button stops the function. If the button is not pressed completely, some steam may also escape from the rear steam holes.
Boiler Sleep Mode (D): This mode activates if there has been no steam emission for 10 minutes, reducing the boiler temperature to save power. The iron's temperature remains unchanged. To restart steam ironing, press either the steam button (15) or the reset button (4).
After Ironing/Storage: Turn off the appliance using the On/Off button (1), unplug it, and allow it to cool down completely before storing. The water tank should be emptied, and the iron locked.
Lock System (E): The appliance features a lock system for easy transportation and storage. The iron can be lifted and carried by its handle when locked. Before transport, ensure the iron is properly locked and the water tank is empty. To lock, place the soleplate into the recess on the iron mat and push the slider (13) towards the iron until a "click" is heard. To unlock, push down the button on the slider.
Descaling (F): To maintain optimal performance, the system requires descaling after every 15 liters of water consumption (approximately 8 complete refills). The LED (3) will flash to indicate that descaling is needed. It is crucial never to open or touch the closure (11) when the appliance is hot or plugged in. Do not use any chemicals, additives, or descaler to rinse the boiler.
Descaling Procedure:
Care and Cleaning (G): Before cleaning, always ensure the appliance is switched off, unplugged, and completely cooled down.
Safety Precautions:
| Type | Steam Iron |
|---|---|
| Power | 2400 W |
| Water Tank Capacity | 1.4 L |
| Heating Time | 2 min |
| Soleplate Material | Ceramic |
| Cord Length | 2.5 m |
| Vertical Steam | Yes |
| Auto Shut Off | Yes |
| Descaling System | Yes |
| Self-cleaning function | Yes |
| Anti-drip system | Yes |