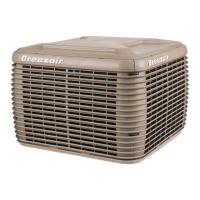
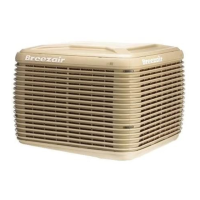
This manual describes the Breezair EXH Series Evaporative Air Coolers, which are designed to provide natural cooling. The device functions by drawing in fresh air, passing it over water-saturated cooling pads, and then circulating the cooled air into a building. This process is naturally cooler and aims to provide comfort in various environments.
Function Description
The Breezair evaporative air cooler operates on the principle of evaporation to cool the air. A fan motor draws ambient air into the unit, where it passes through water-saturated cooling pads. As water evaporates from these pads, it absorbs heat from the air, lowering the air's temperature. The cooled, fresh air is then distributed throughout the building. The system includes a water pump to circulate water over the pads and a float valve to maintain the correct water level in the pan. A drain valve is also incorporated to manage water quality and prevent stagnation.
The cooler is equipped with an electronic module that controls the fan motor, water pump, and other optional features. This module is factory sealed and not field serviceable, emphasizing the need for authorized technicians for any repairs. The fan motor is a direct drive, electronically commutated motor that automatically adjusts to provide optimum performance without the need for manual belt or pulley adjustments. It also features inbuilt overheating protection that automatically resets.
The device is designed for permanent water supply connection, with the float valve automatically controlling the water level. A manual water shut-off valve is recommended near the point of entry into the cooler. The system includes a "WaterManager®" feature that automatically monitors and adjusts the quality of the water in the cooler by draining existing water and replacing it with fresh water when needed. This feature helps maintain optimal cooling performance and extends the life of the cooling pads.
Usage Features
The Breezair EXH Series offers flexible control options through either a SENSORTOUCH® Remote Control or a SENSORTOUCH® Wall Mounted Thermostat Control. Both controls allow users to manage the cooler's operation, including setting the thermostat range, fan speed, and operating modes.
Remote Control Features:
- Setting the Clock: The clock on the remote control can be set when the unit is off, allowing for 12 or 24-hour display.
- Turning On/Off: The POWER button switches the cooler on and off, retaining previous settings in memory.
- Operating Modes:
- MANUAL MODE: Users can manually select either COOL or VENT mode and adjust the fan speed using arrow buttons. COOL mode provides fresh, cooled air, while VENT mode circulates fresh air without cooling.
- AUTO MODE: In this mode, the cooler's thermostat automatically controls operation based on a pre-selected comfort level (1-10). The cooler adjusts fan speed, switches between COOL and VENT, and turns itself off as needed, influenced by room conditions like direct sunlight or electrical appliances.
- AUTO TIMER MODE: This mode allows the cooler to operate only during a programmed time period. Users can set ON and OFF times, as well as a comfort level and economy setting.
- ECONOMY MODE: This feature limits cooling/ventilation and reduces power consumption by up to 20%. It can be used in both AUTO and MANUAL modes.
- DRAIN MODE: The DRAIN button opens the drain valve, emptying the water tank for cleaning and drying. The system also automatically drains the tank after 3 days or 3 hours of inactivity (depending on DIP switch settings) to ensure cleanliness.
- PRE-COOL MODE: This function saturates the cooling pads before the fan starts, ensuring only cool air enters the building. It involves filling the pan, running the pump for 30 seconds to saturate pads, and then starting the fan after 2 minutes.
- WaterManager® Settings: The remote control allows users to specify high or low salinity settings for the WaterManager® feature, optimizing water quality based on local conditions. The current setting can be viewed by holding down the ECON and MODE buttons.
- Power Failure Recovery: The cooler automatically restarts within 10 minutes after power is restored if the remote control remained "ON" during the outage.
- Batteries: The remote control uses 3 AAA alkaline batteries, which typically last 18 months. A "BATTERY LOW" indicator appears when batteries are low.
- DIP Switches: Two rows of DIP switches are located under the battery cover, defining various operational parameters like clock format, pre-cool function, drain delay, and WaterManager® activation. Users are warned not to alter switches 1-8 on the top row and 7-8 on the bottom row, as this will disable the cooler.
Wall Control Features:
- Turning On/Off: The 0 button turns the air cooler on and off.
- Operating Modes:
- Automatic Mode: The cooler operates based on the temperature sensed at the wall control, adjusting fan speed and switching between COOL/VENT as needed. Users can override automatic cooling levels.
- Manual Mode: Users can manually select COOL or VENT and adjust fan speed.
- Timed Automatic Start: Allows users to set a delayed start time (up to 24 hours) for the cooler to turn on automatically in either Automatic or Manual mode.
- Timed Automatic Stop: Allows users to set a delayed stop time (up to 24 hours) for the cooler to turn off automatically.
- Drain Valve Control: Manual drain activation is possible when the wall control is OFF by holding the and buttons for 1 second.
- Salinity Control Method: Users can select between "Salinity Sensor" (standard) or "Timed Drain" methods for water replacement.
- Water Drain Delay Time: Users can adjust the delay time (from 4 hours to 4 days) before the drain valve automatically opens if the cooler is not operated.
- Comfort Adjustment: Users can adjust the cooling level or fan speed to suit their needs, especially if the air feels too cold or not cold enough.
Maintenance Features
Regular maintenance is crucial for the optimal performance and longevity of the Breezair evaporative air cooler. All maintenance and repair work must be performed by a licensed and qualified electrician and/or HVAC technician using factory-authorized spare parts.
General Safety Precautions for Maintenance:
- ALWAYS disconnect the cooler from the power supply before starting any maintenance.
- NEVER use a naked flame near the cooler materials.
- Protect the cooler from all sources of ignition.
- NEVER use a water hose to squirt the interior of the cooler to avoid damaging electrical components.
Pre-Assembly Inspection:
- Verify that all components listed in the manual are present, including the cabinet, spare corner clips, operating/installation manuals, warranty card, foot mount screws, roof jack adaptors, direct drive motor assembly, electronic module, pump, mains power enclosure, water probe, and float valve.
- Check the contents of the SENSORTOUCH® Remote Control and Wall Control packout kits, which include nuts, brass adaptors, AAA batteries, antennas, solenoids, cable ties, rubber washers, screws, wall plugs, and solenoid covers.
End of Season Service:
- Turn off the power supply and water supply to the cooler.
- Remove the pad frames (as shown in Fig. B of the manual).
- Thoroughly clean the tank and pump filter.
- Gently wash the cooling pads to remove dust. If pads are in poor condition, replace them.
- Ensure a drain-down facility is provided at the lowest point of the water supply pipe if freezing conditions can occur.
- Re-fit the pad frames.
Pre-Season Service:
- Turn off the main power supply to the air cooler.
- Remove the pad frames.
- Ensure the power switch in the cooler is off.
- Gently wash the pads to remove any dust buildup from the winter period. Replace pads if in poor condition.
- Turn on the power switch inside the cooler, then the water, and then the main power.
- Re-fit the pad frames and run the cooler.
Pad Maintenance:
- The pads supplied are selected for high cooling performance. When replacing pads, only use manufacturer-recommended alternatives to avoid performance issues, damage, or safety risks like water carry-over into electrical components.
- To remove a pad frame, insert a flat screwdriver into the slot, lever until disengagement, pull the frame outwards to disengage internal side clips, pivot the frame outwards, and lift up. Care should be taken not to damage the pad.
Water System Maintenance:
- Check and clean the lid water spreaders (Fig. C).
- Thoroughly clean the tank and pump filter.
- Check the water distribution system for obstructions in hoses.
- The WaterManager® feature automatically drains and refills the tank to maintain water quality, reducing manual intervention.
- If the cooler is not operated for 72 hours, the drain valve automatically opens to empty all water. This delay time can be adjusted via the wall control.
Troubleshooting:
The manual provides a comprehensive troubleshooting guide for common issues such as inadequate cooling, noisy cooler operation, pump failure, fan failure, continuous overflow, water being blown into the building, and unpleasant odors. Each problem is linked to probable causes and suggested remedies, including:
- Adjusting float level.
- Cleaning or replacing pads.
- Checking water distribution system and pump.
- Ensuring adequate air discharge and exhaust.
- Cleaning the fan.
- Checking circuit breakers and fuses.
- Replacing faulty components like pumps, motors, or controllers.
- Rectifying fault conditions indicated by the tri-color LED on the electronic module.
- Cleaning the pan and changing pads if algae is present.
- Running the fan on "vent" mode to dry pads after cooling cycles.
The electronic module includes diagnostic LEDs (Hall Effect, Thermal O/L, Fan Speed, Power, Tricolour diagnostic) to help identify issues. For example, a double flashing green LED indicates normal operation, while red flashes indicate specific fault codes related to communication, water detection, probe clearing, or power supply frequency.