Customer Service
(North America):
1-888-538-8683
Local
(Wyoming, USA):
307-222-6086
Email:
help@mybrewista.com
READ THIS MANUAL PRIOR TO FIRST USE AND SAVE FOR
FUTURE REFERENCE
1-year Limited Warranty
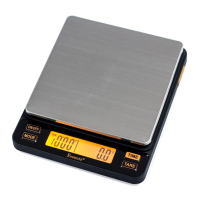
Smart Scale™ II Components
❶ Plaorm
❷ ON/OFF buon
❸ MODE buon
❹ Baery Level Indicator
❺ MODE indicator
❻ Timer
❼ LCD Readout
❽ Weight (g)
❾ TARE buon
❿ TIME buon
Thank you for purchasing the Brewista Smart Scale™ II.
With proper care and treatment, this scale will provide
years of reliable service.
Fig. A: Illustraon of the Scale’s
Components and Controls
General Maintenance and Care
• Avoid exposure to extreme heat or cold.
◦ Always allow your scale to acclimate to normal room
temperature before use.
• Keep your scale in a clean environment.
◦ Excessive dust, dirt, vibraon, air currents, as well as
close proximity to other electronic equipment may
have an adverse eect on the accuracy and reliability
of the scale.
• Handle the scale with care.
◦ Set all items to be weighed gently on the top of
the plaorm.
◦ Although this scale is designed to be quite durable,
avoid rough treatment as this may permanently
damage the internal components.
◦ Always avoid violent shaking and dropping.
◦ This is a precision instrument and should be handled
as such.
Specicaons and Funcons
• Capacity: 2000g / 70 oz.
• Accuracy: 0.1g
• Units: grams (g) or Ounces (oz)
• Key funcons: ON/OFF, MODE, TARE, TIME
• Display: LCD with backlight
• Auto-o
◦ Auto-o funcon is set to 180 seconds by default.
◦ Auto-o can be set to 60 seconds, 120 seconds,
180 seconds, or disabled manually.
• Operang modes: Four (4) Automac modes and two
(2) Manual modes
• Power: Rechargable baery
Mode Seng
❶ Turn on the scale by pressing the ON/OFF buon.
❷ Wait unl the LCD displays zero.
❸ Press the MODE buon;
• The display will read “1”, “2”, “3”, “4”, “5”, or “6”.
• Press MODE again to toggle through these
6 modes.
Unit of Measurement
Switch the unit of measurement from grams to ounces by
holding the [MODE] buon down for about four seconds.
Repeat this step to toggle back to measuring in grams.
Operaon
Please note: When removing weight from scale, do not apply
downward force to the plaorm. Doing so may result in
inaccurate readings.
Mode 1:
(Fully Manual)
◦ No Automac Funcons
◦ User TARES and sets mer by pressing the appropriate
buons.
◦ Timer is paused and restarted by pressing the TIME
buon again.
Mode 2:
(Auto-tare and Auto-mer with immediate mer start for
espresso preparaon)
❶ Place cup on scale.
◦ Time goes to 0’00” and weight goes to 0.0g.
◦ Count-up mer starts.
❷ Remove cup aer brewing.
◦ Last me and weight are displayed
◦ Aer a ve (5) second delay, me returns to
0’00” and weight returns to 0.0g.
Mode 3:
(Auto-tare and manual mer start for espresso preparaon)
❶ Place cup on scale.
◦ Time goes to 0’00” and weight goes to 0.0g.
❷ Push buon on espresso machine to start the
shot and press orange TIME buon on scale
simultaneously.
◦ Count-up mer starts.
❸ Remove cup aer brewing.
◦ Weight reading remains on the display for ve
(5) seconds aer removing the cup.
◦ Aer a ve (5) second delay, me returns to
0’00” and weight returns to 0.0g.
Mode 4:
(Auto-tare only; mer is not acve for espresso preparaon)
❶ Place cup on scale.
◦ Weight reading goes to 0.0g (Auto-tares).
❷ Push buon on espresso machine to start the shot.
❸ Weight is displayed as added.
1
54 76 8
2 10
3 9
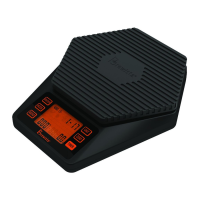
Smart Scale™ II
BSSRB2
g
Charging the Baery
❶ Open the orange USB port cover and insert the small end
of a micro USB cable into this port.
❷ Insert the large end of the USB cable into a computer,
charging port or other device for charging your scale’s
baery.
❸ The scale will automacally turn on to verify the charging
connecon.
• We recommend turning o the scale manually at
this me to reduce charging me.
• Scale is fully charged when the baery icon has
4 bars.
Our scale baery comes with protecon circuit to avoid
over-charging. We strongly recommend unplugging
the scale when it is fully charged. Over-charging will
damage the baery.
Please charge the scale as soon as possible when the last
bar in the baery sign disappears, instead of waing
unl scale shuts o due to the power depleon.