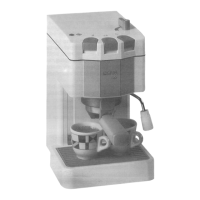
5. MAKING ESPRESSO
Preparing the appliance:
26
· Remove the water tank by pulling it outward and fill it with cold water (water tank can also be
filled by raising the cover lid);
· Insert plug into a wall outlet;
· Turn the machine ON. The power ON indicator lamp will light;
· Choose the Cremaker filter to use, according to the instructions on pages two and three (2, 3).
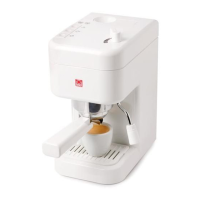
With ground coffee:
Place a measuring-spoon for each coffee to be prepared!
· Fill the chosen filter with ground coffee using the measuring spoon provided. Place one level
measure of coffee in the filter for each cup of Espresso. Do not overfill. Gently tamp down coffee
with the tamper on the left side of your machine. Insert filter-holder into brew head, by turning
it to the right as you face machine;
· Place one or two Espresso cups on the drip tray to line up with the spouts of the filter-holder.
With coffee pods:
With the coffee pod, you may prepare only one Espresso at a time!
· Place a fresh coffee pod in the Cremaker filter. Insert filter-holder into brew head, by turning it
to the right as you face machine;
· Place one Espresso cup on the drip tray to line up with the spouts of the filter-holder.
Brew coffee:
· Make sure steam
control is closed;
· When the machine is ready, the temperature OK indicator lamp will light;
· After completing all the above steps, your machine is now ready to brew coffee;
· Press brew coffee position . After a few moments, Espresso will start to flow into the cups;
· The more water you allow to flow, the softer the coffee will be .The espresso will have a light
brown foam floating on top;
· To stop the water flow, simply press the coffee botton again.
Model
ES35A is equipped with an electronic timer which allows you to choose in advance the
quantity of espresso you want to flow to the cups. It will automatically stop when the quantity
is reached.
Remove the water reservoir by pulling it outward and fill it with cold water. Turn the machine ON.
The power ON indicator lamp will light. Place an Espresso cup under the brew head (with the filter
holder inserted in the brew head) and turn ON the coffee function. You will hear the sound of the pump
and after a few seconds water will flow from the brew head.
Allow water to flow until cup is filled.
When the machine is new, it is recommended that several cups of water be allowed to flow through
to clean it.
Sometimes the self-priming pump feature may not work due to a momentary “air lock” condition. If
water does not flow from brew head, place a cup under the cappuccino nozzle. Open steam control
and turn ON the coffee function, until water flows from the cappuccino nozzle. Close steam control,
as Espresso maker is now ready.
Y
ou must never operate the machine without water in the tank!