22
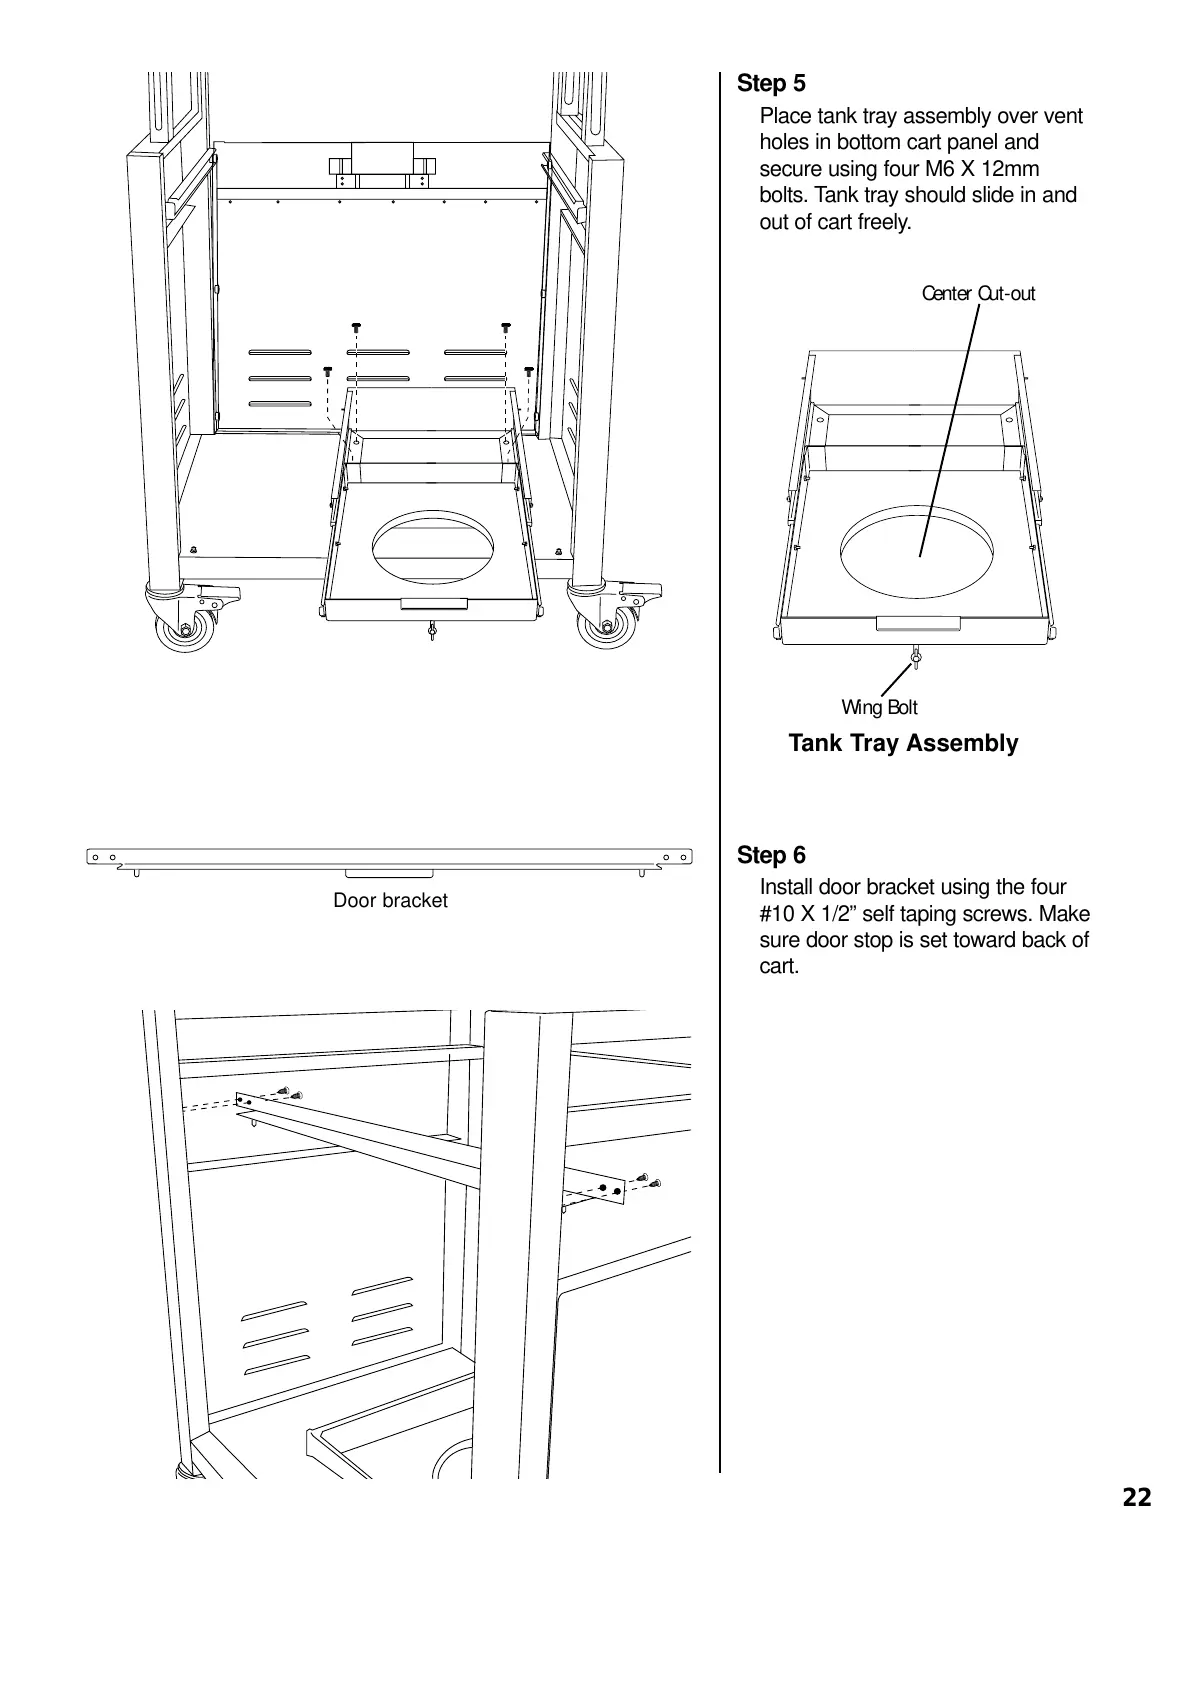
Step 5
Place tank tray assembly over vent
holes in bottom cart panel and
secure using four M6 X 12mm
bolts. Tank tray should slide in and
out of cart freely.
Step 6
Install door bracket using the four
#10 X 1/2” self taping screws. Make
sure door stop is set toward back of
cart.
Wing Bolt
Center Cut-out
Tank Tray Assembly
Door bracket