(S2)
a.
b.
Latch Bolt
Handle Strike Plate (K)
a.
c.
INSIDE BOTTOM VIEW
Screw Cover
Cutout
Screw Post
Screw Cover (I)
Washer (H)
Lower Handle
Machine Screw (S4)
Bottom of Handle
Assembly (F)
5/16" Hole
(HOLE C)
Washer Flat Tab
a.
b.
Inside Lever
Spindle
(S5)
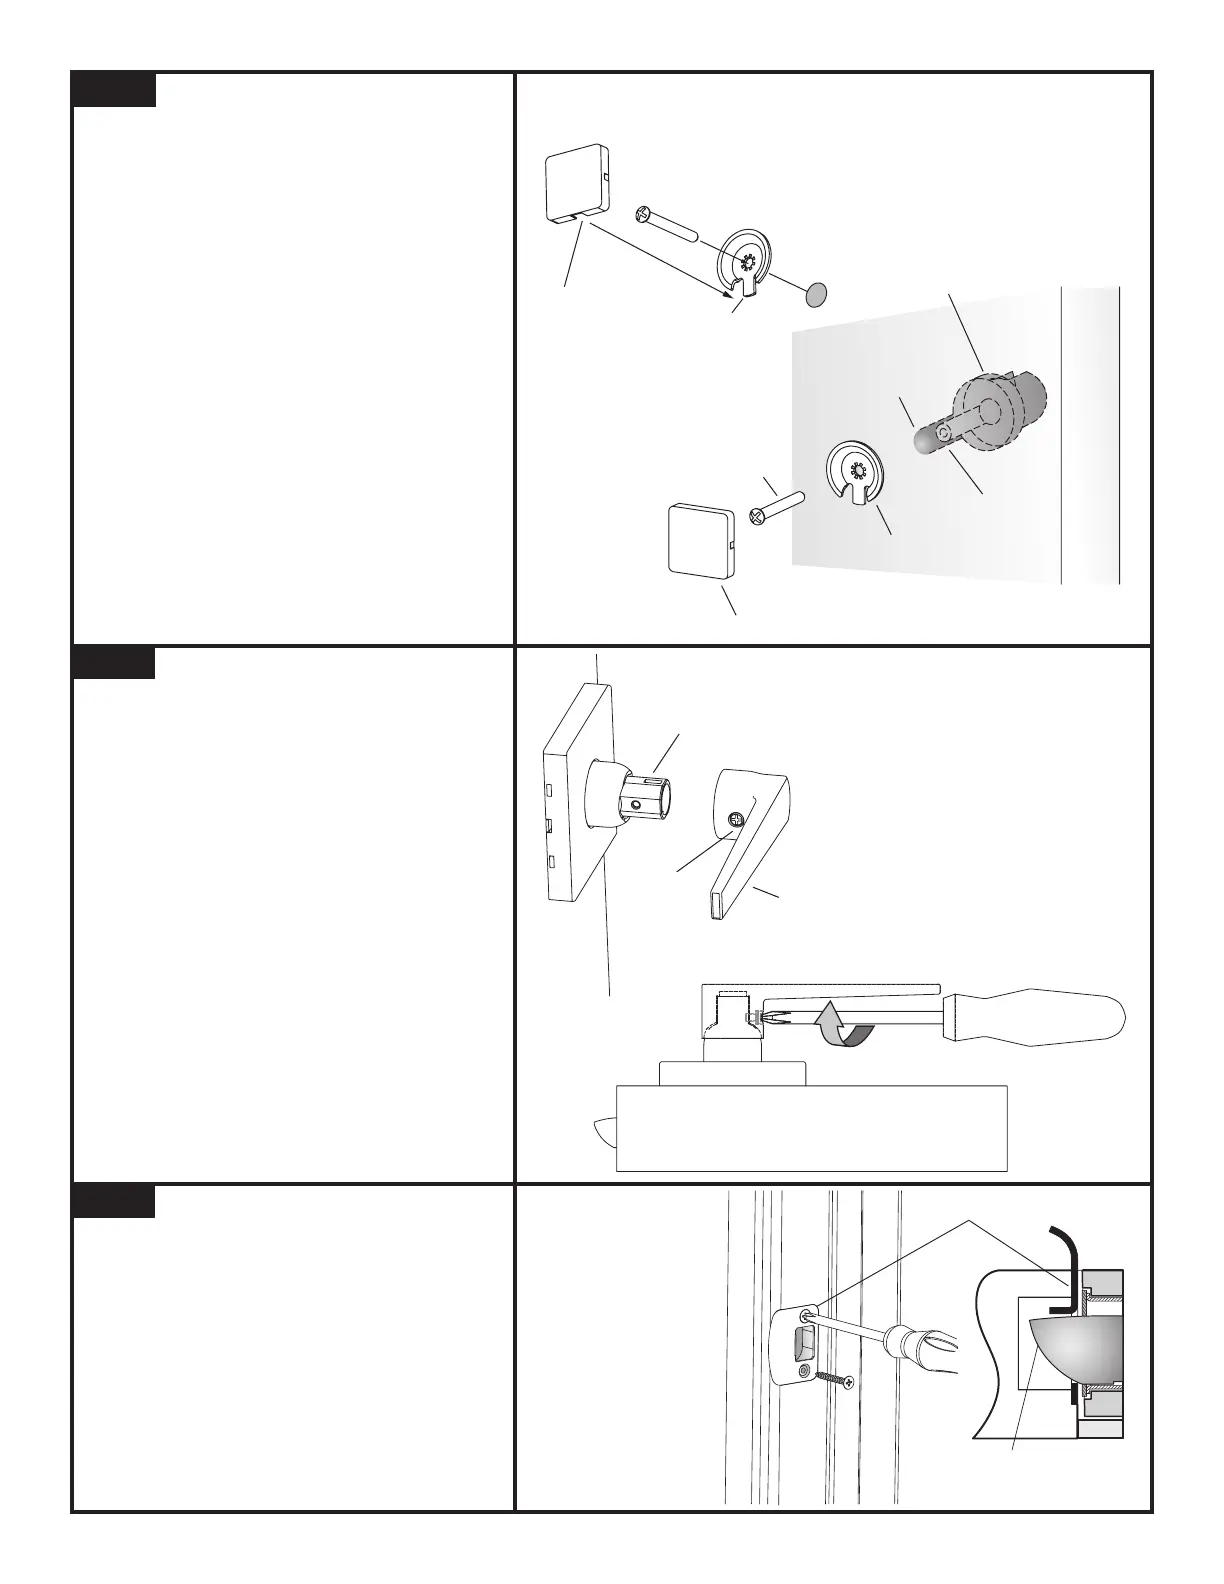
a. Insert the (S4) Lower Handle Machine Screw
through the hole in the "cup" side of the
Washer (H).
b. Place the Washer (H) against the door and
insert the (S4) screw through the washer and
into the 5/16" hole (HOLE C), engaging the
threaded screw post of Handle Assembly (F).
For best appearance, it is recommended to
position the at tab of the Washer (H) facing
down. Tighten the (S4) screw rmly with a
Phillips Head screwdriver.
c. Snap Screw Cover (I) onto Washer (H).
Install (S4) Lower Handle
Machine Screw
STEP 8
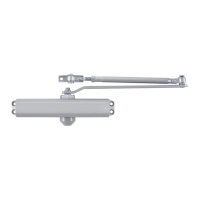
a. Push the Inside Lever (D) onto the Spindle of the
Main Lock Body (C) until it stops. Make sure the
tip of the lever is pointed away from the door
edge.
b. Tighten the (S5) Lever Retention Screw located
on the inside of the lever with a Phillips Head
screwdriver.
c. Test the security and operation of the lever by
pulling it from the end, and/or rotating it up and
down. The latch bolt should retract.
Install Inside Lever
STEP 9
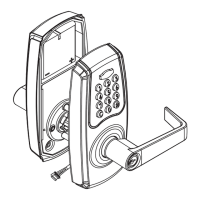
a. Secure the Handle Strike Plate (K) with two (S2)
Strike Plate Screws.
Tighten rmly.
b. It is important for Push-Pull-Rotate Locks for
the Latch Bolt to move freely in and out of the
Handle Strike Plate (K).
Install Handle Strike Plate
STEP 10