MODELS QP430SS • QP436SS • QP442SS
Page 6
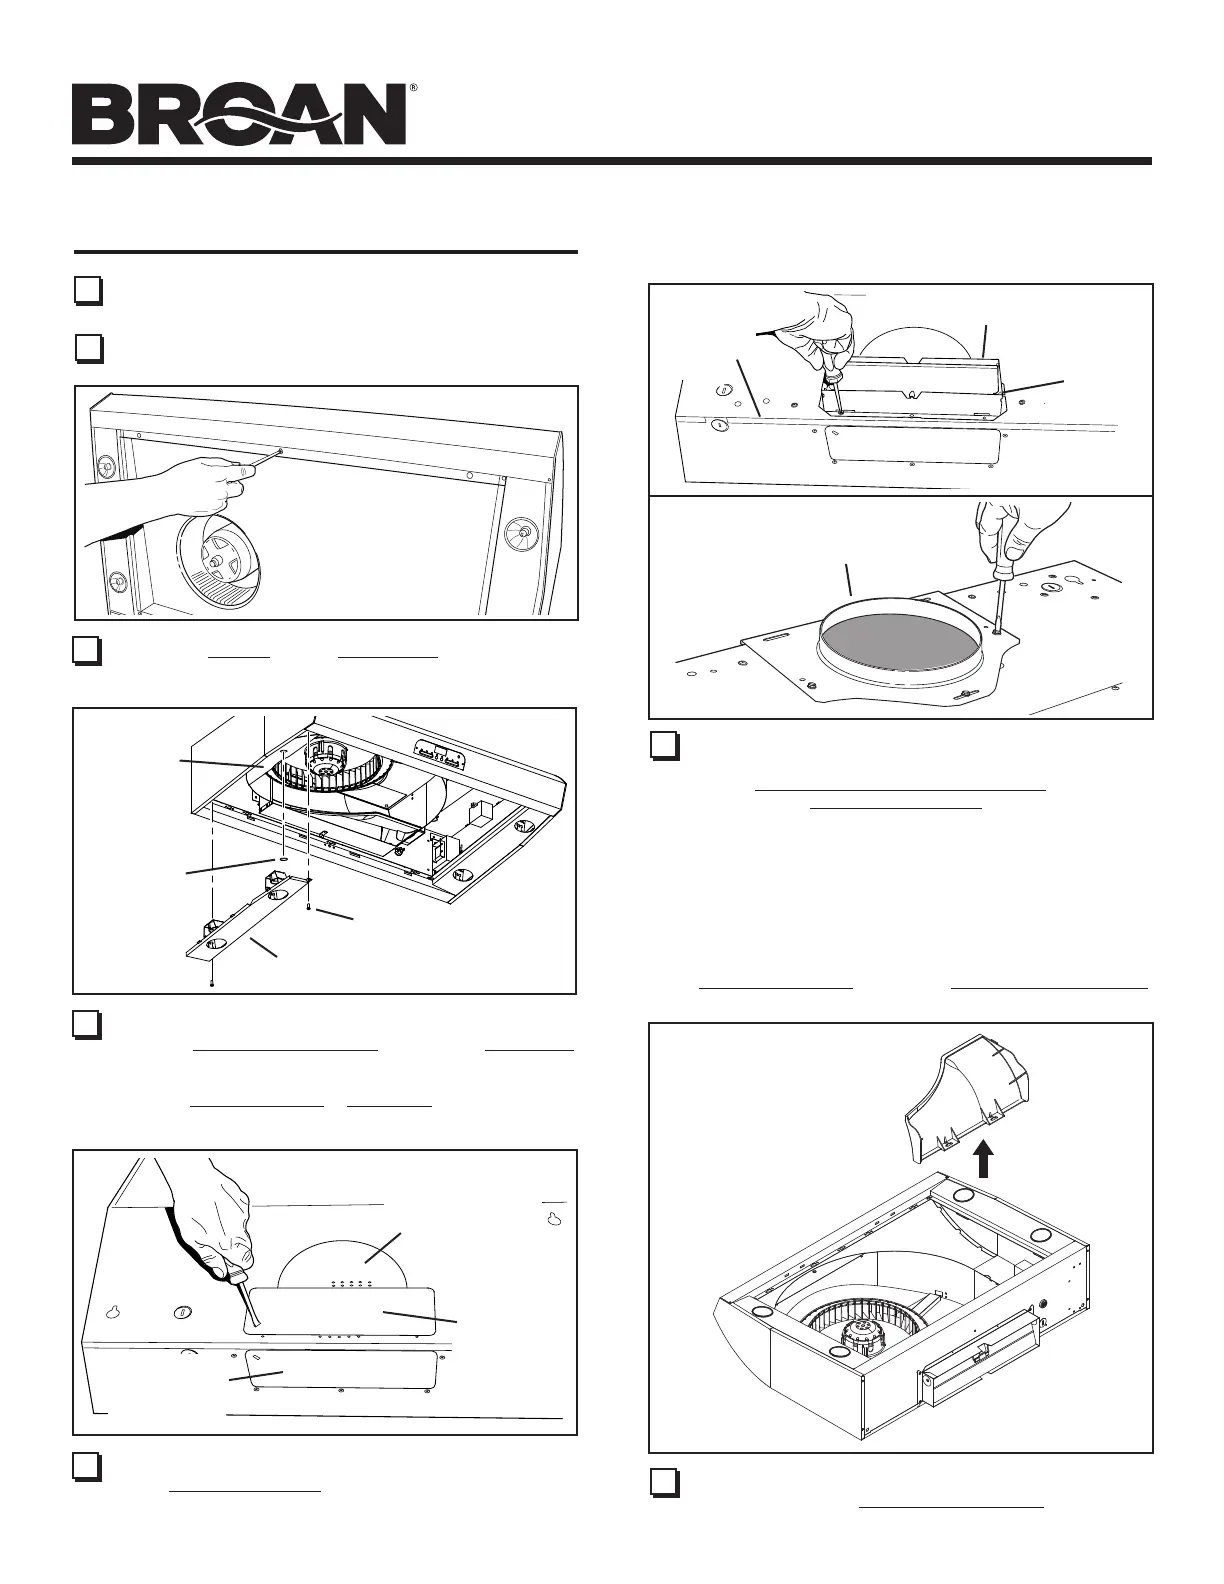
7 Remove 3¼” x 14” vertical, 3¼” x 14” horizontal, or 7-inch
round Knockout Plate(s) as appropriate for your ducting
method.
3¼” X 14”
HORIZONTAL
KNOCKOUT
PLATE
3¼” X 14”
VERTICAL
KNOCKOUT
PLATE
7” ROUND
KNOCKOUT
PLATE (also
remove 3¼” x 14”
vertical plate)
7” ROUND
DUCT
PLATE
8 VERTICAL 7” ROUND & 3¼” X 14” INSTALLATION
ONLY:
Attach 3¼” x 14” Damper/Duct Connector (if using 3¼”
x 14” duct) or 7” Round Duct Plate (if using 7-inch round
duct) over the knockout opening.
Notes:
To accomodate off-center ductwork, the 3¼” x 14” damper/
duct connector can be installed up to ½” on either side
of the hood center and the 7” round duct plate can be
installed up to ½” on either side of the hood center.
Install the 3¼” x 14” Damper/Duct Connector with the
Damper Flap Pivot nearest the Top/Back Edge of Hood.
TOP/BACK
EDGE OF
HOOD
DAMPER
FLAP
PIVOT
3¼” X 14”
DAMPER / DUCT CONNECTOR
9 HORIZONTAL 3¼” X 14” INSTALLATION ONLY:
Remove and discard Vertical Diverter Plate.
5 Remove 6 Screws holding Bottom Pan to hood. Set bot-
tom pan and screws aside.
PREPARE THE HOOD
4 Remove all protective polyfilm from the hood.
3 Remove parts bag and 3¼” x 14” damper/duct connector
from inside the hardware box included with the hood.
6 FOR 30” MODEL ONLY:
Remove Left-Hand Light Panel by removing (2) Screws
and disconnecting electrical connector.
Remove Rubber Bushing in Scroll Cap. Set parts aside.
LEFT-HAND
LIGHT PANEL
SCREWS
BUSHING
SCROLL
CAP